
Growing chives from seed indoors is easy, and gives you a head start on the growing season. The seedlings are very small when they first germinate, and extra growing time will allow for sturdier plants in spring. Learn how to grow chives from seed indoors, and fill your garden with these tasty herbs.
Chives are a garden favourite, and can be planted in both the flower garden as well as the vegetable and herb garden.
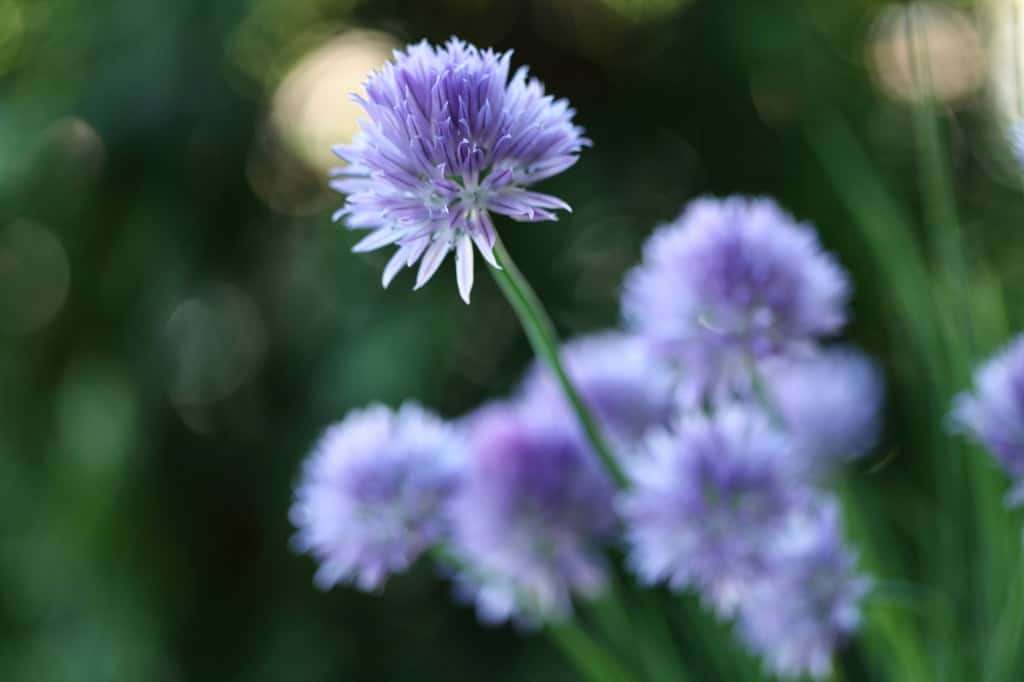
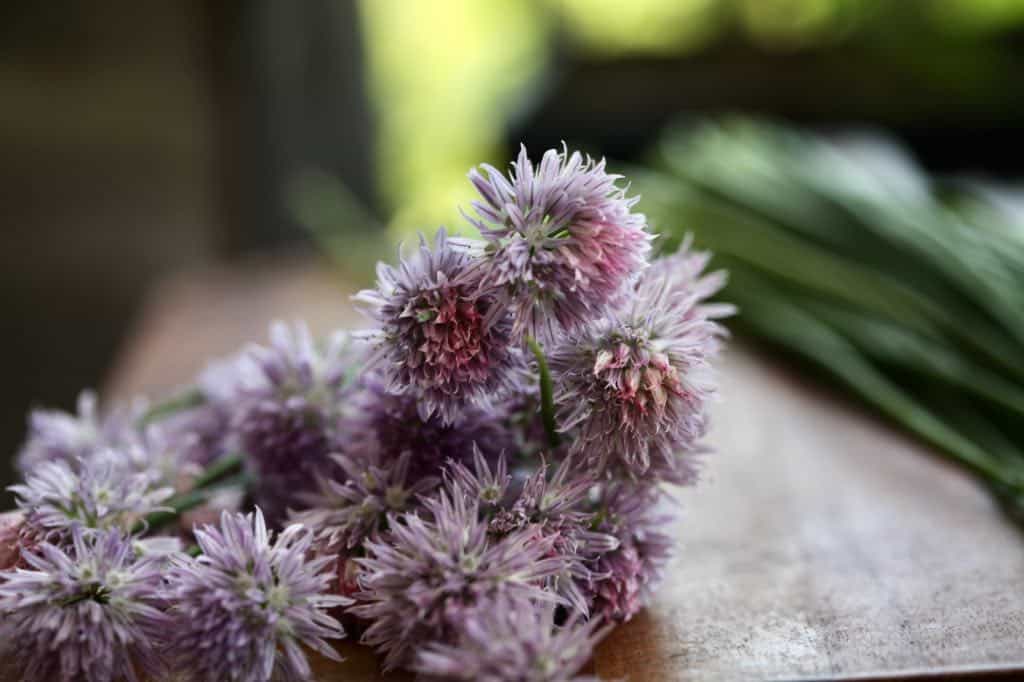
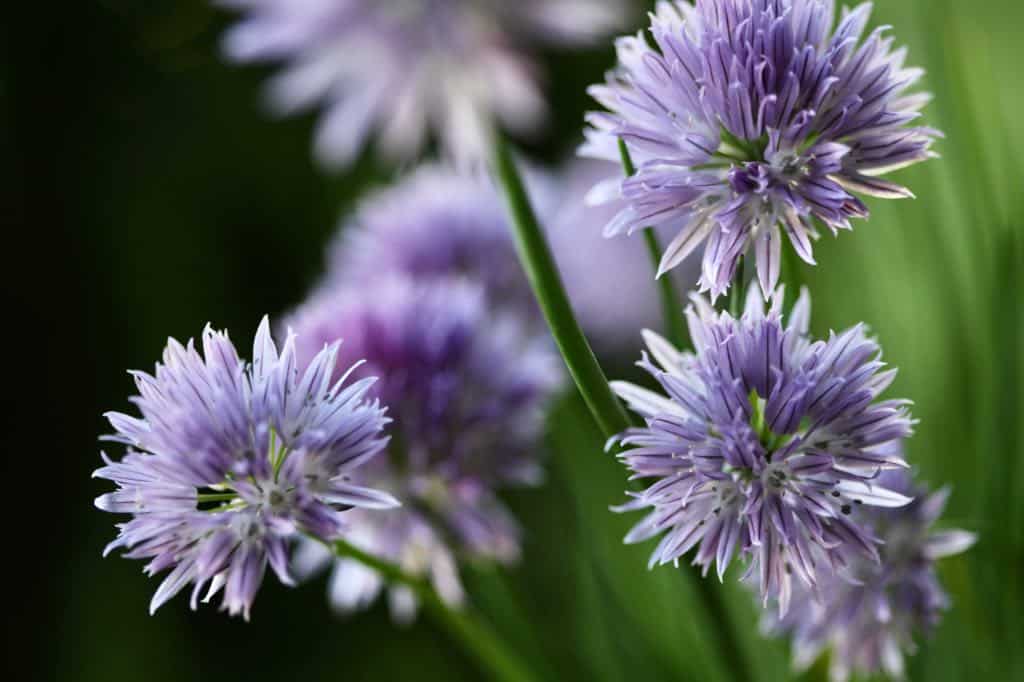
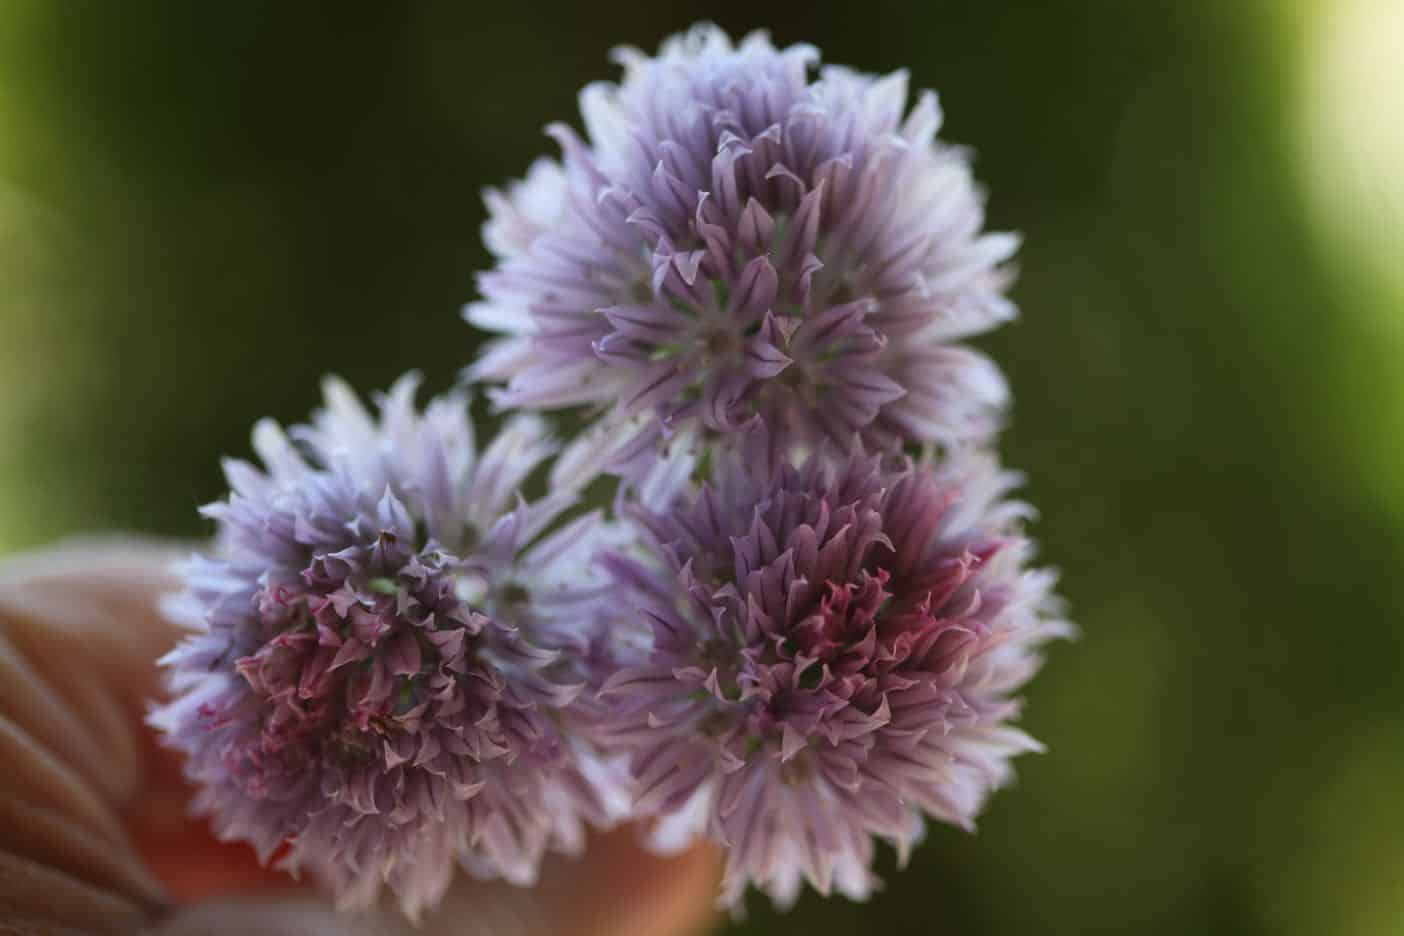
I have long grown chives in the flower garden, as I love the small, round, pompom shaped purple flowers that complement many other flowers in the garden landscape.
In the vegetable garden, chives are good companion plants for carrots, brassicas and tomatoes. The plants are known to deter aphids and other garden pests.
Chives also attract pollinators to the garden, when the flowers are in bloom. The nectar from the chive flowers is a source of food for beneficial insects.
The subtle savoury flavour of chives makes them a perfect herb to grow in the herb garden. The plants grow all season long and can be harvested as fresh herbs, and used fresh from the garden throughout the growing season.
We like to dry chives and freeze chives to preserve them to use later on in the year as well.
A perfect and low maintenance herb in the garden, starting chives from seed will allow you to increase your plantings of this wonderful herb.
What Are Chives?
Chives have long been used as a culinary herb, due to their wonderful, mild and savoury sweet taste.
Common chives have a subtle onion taste, and it's no wonder, because this herb actually belongs to the same family as the common onion.
A member of the onion family, or Family Amaryllidaceae, and the Genus allium, chives are also closely related to garlic, leeks, shallots, and Chinese chives or garlic chives ( allium tuberosum ), just to name a few.
The species name for common chives is Allium schoenoprasum.
Most often when people refer to chives, they are referring to the common chive with it's subtle onion flavor, rather than garlic chives which have a garlic-like flavor.
Garlic chives have a different appearance as well, with flat leaves and white flowers.
For the sake of this post we will be focusing on the common chive.
These plants are native plants to Asia, Europe, and North America.
The chive plant is perennial, and will return to the garden year after year. It's a cool season plant, and grows best in the cooler temperatures of spring and fall.
Both the leaves as well as the flowers of the chive plant are edible, and have many culinary uses.
Since chives are perennial, and as with most perennials, the first year plants are much smaller in size and likely will not flower.
When the plants return the following year, after a period of dormancy, they will be larger and a better size for harvesting, and also have some blooms.
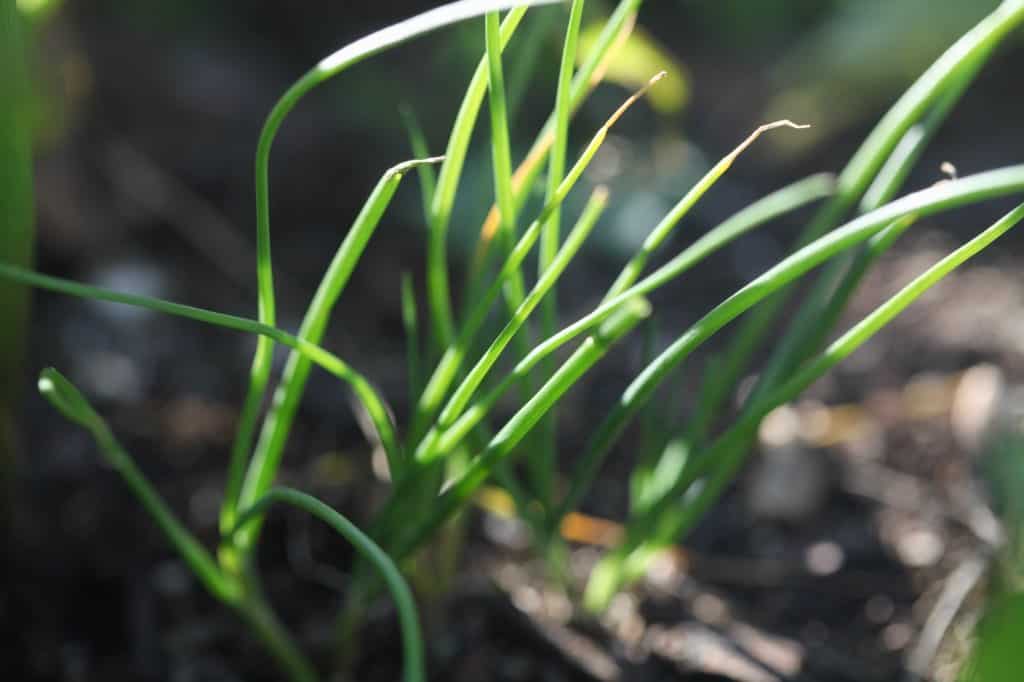
Chive Leaves
- Chive leaves have a mild onion flavor.
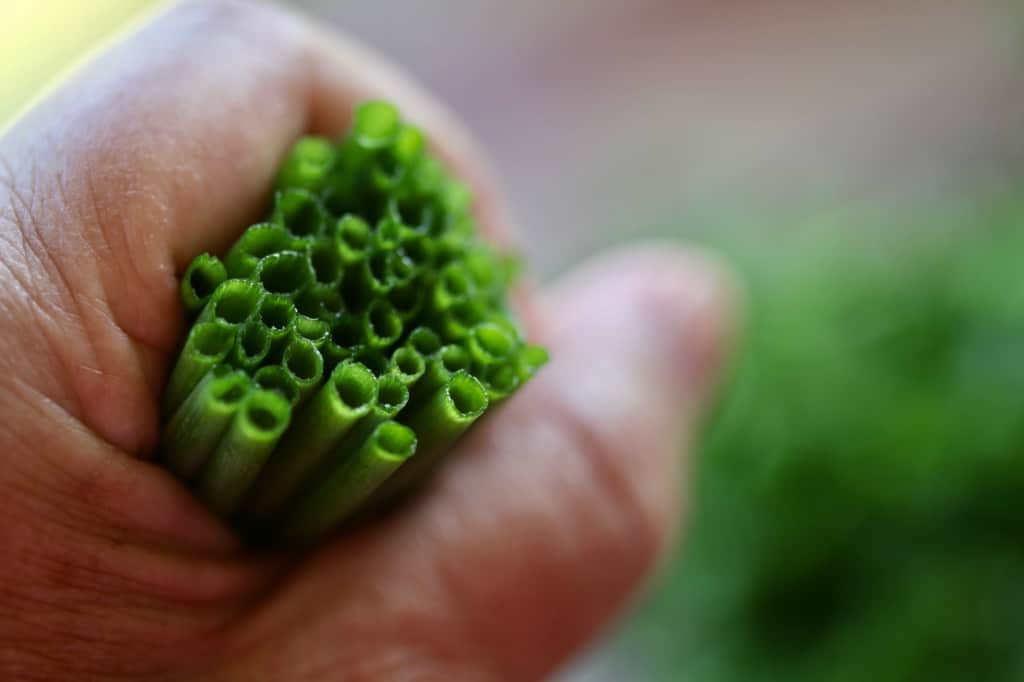
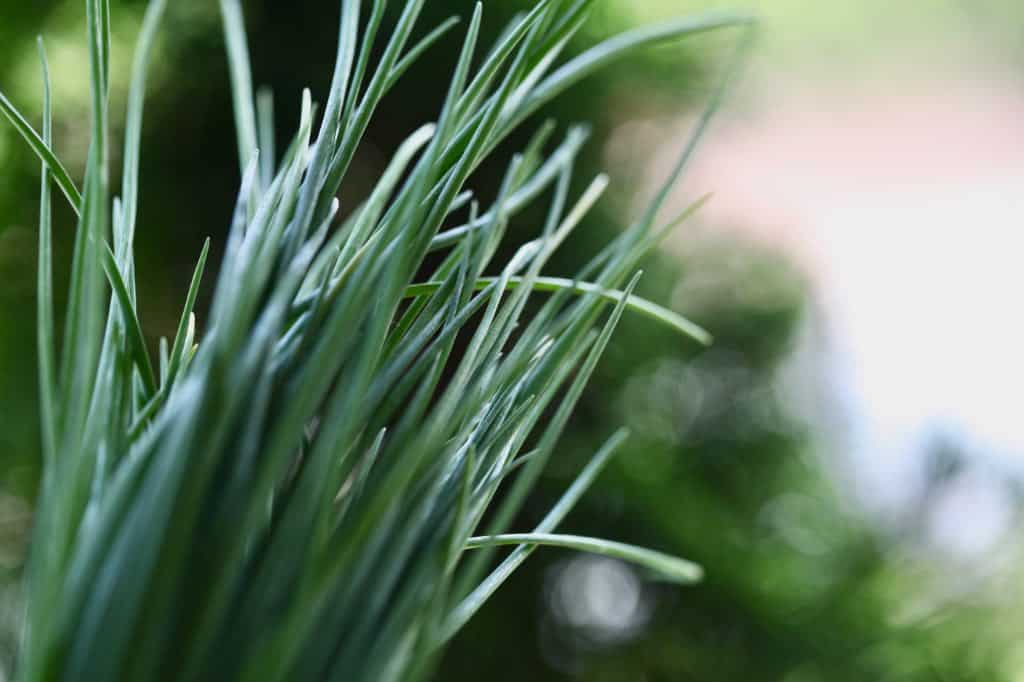
- These edible leaves are long and hollow, are a deep, bright medium green in color, and grow from the base of the plant.
- The green leaves are tubular, and grow to a point at the tip.
- New leaves are slim, and then become thicker and larger as they mature.
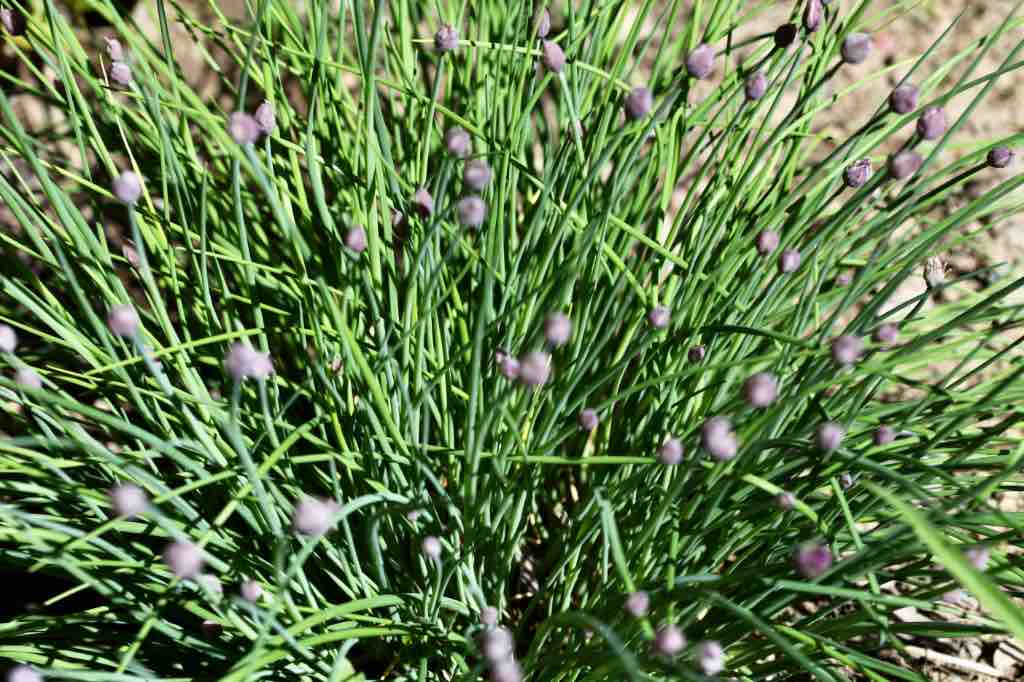
- The chive plant is a mounding plant, and grows in mounds approximately one foot across, and one foot in height.
- Look closely when harvesting the leaves, to make sure that you are not gathering up flower stems as well, as the stems are less tender and not eaten unless at an early stage.
- The stems and leaves are similar in appearance, especially when the flowers have been removed from the stems.
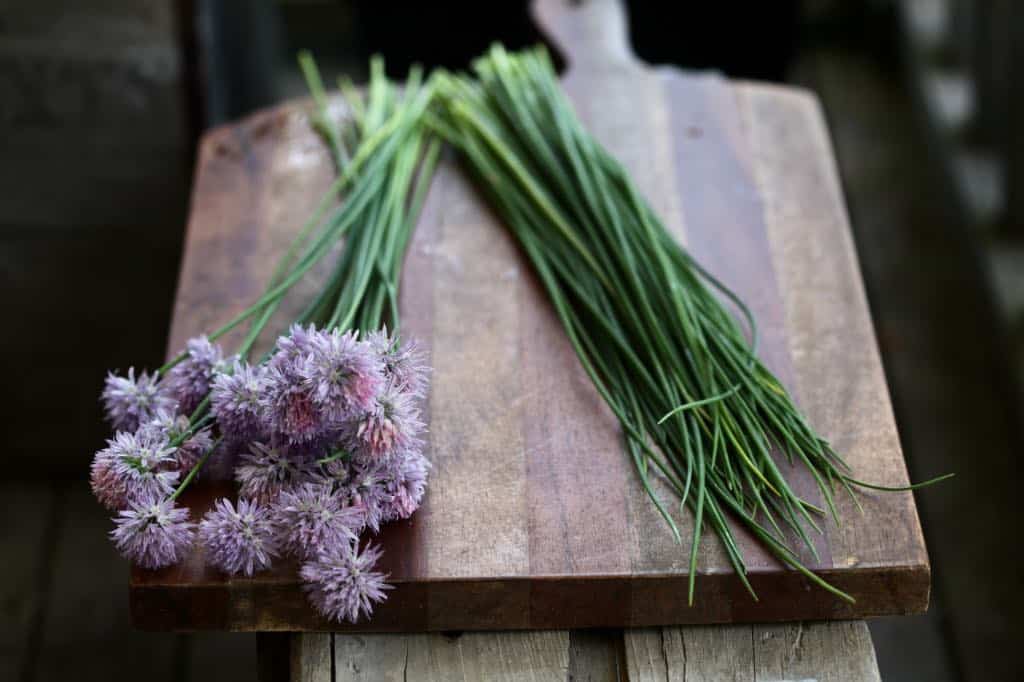
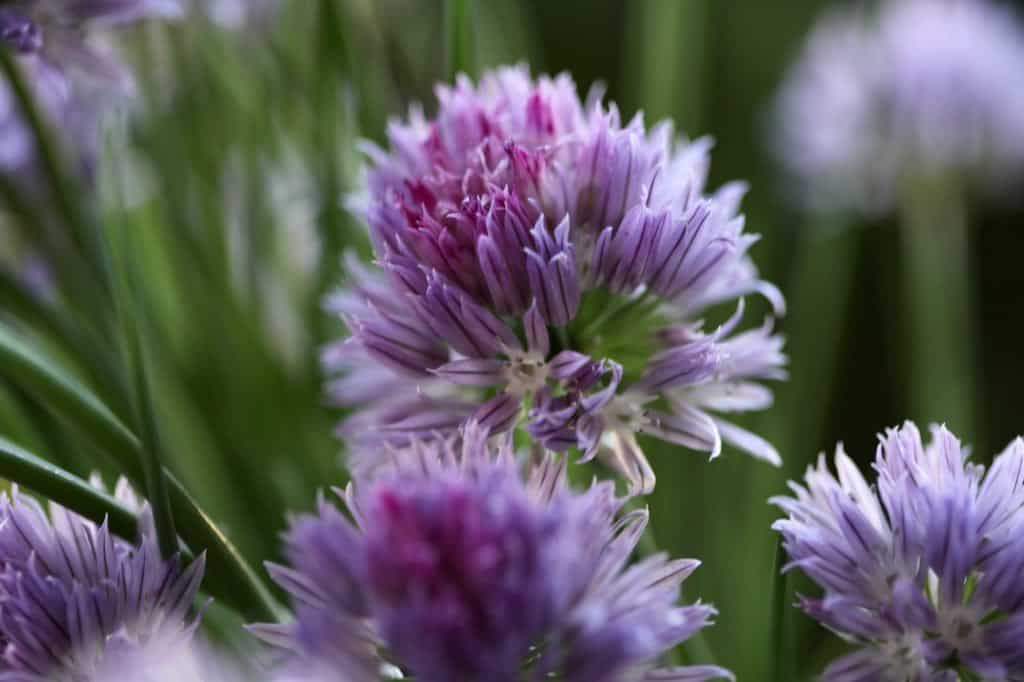
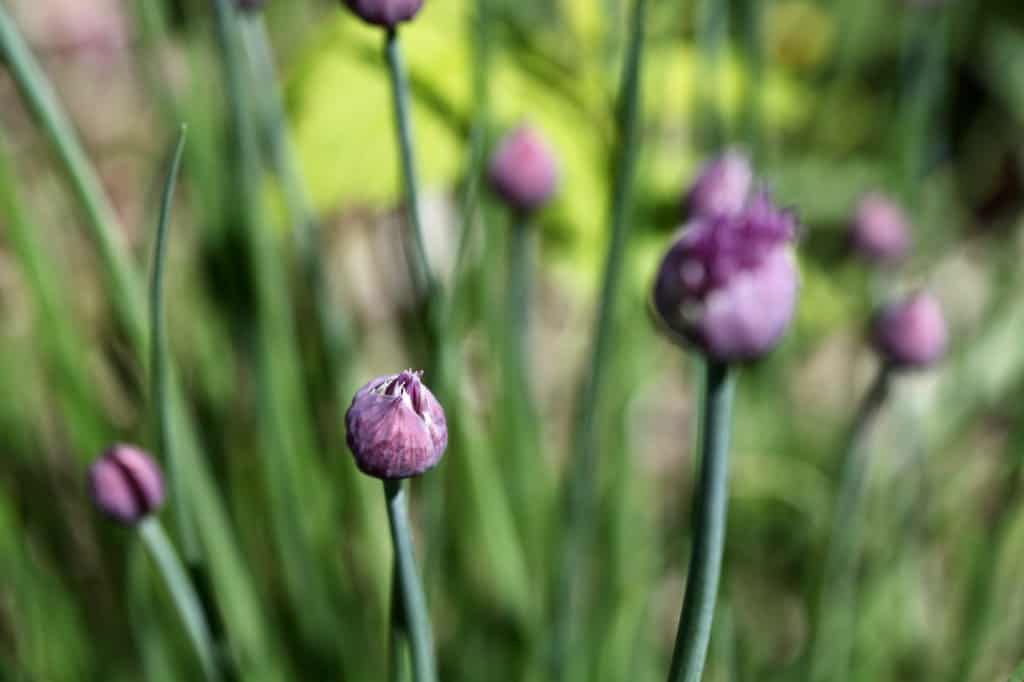
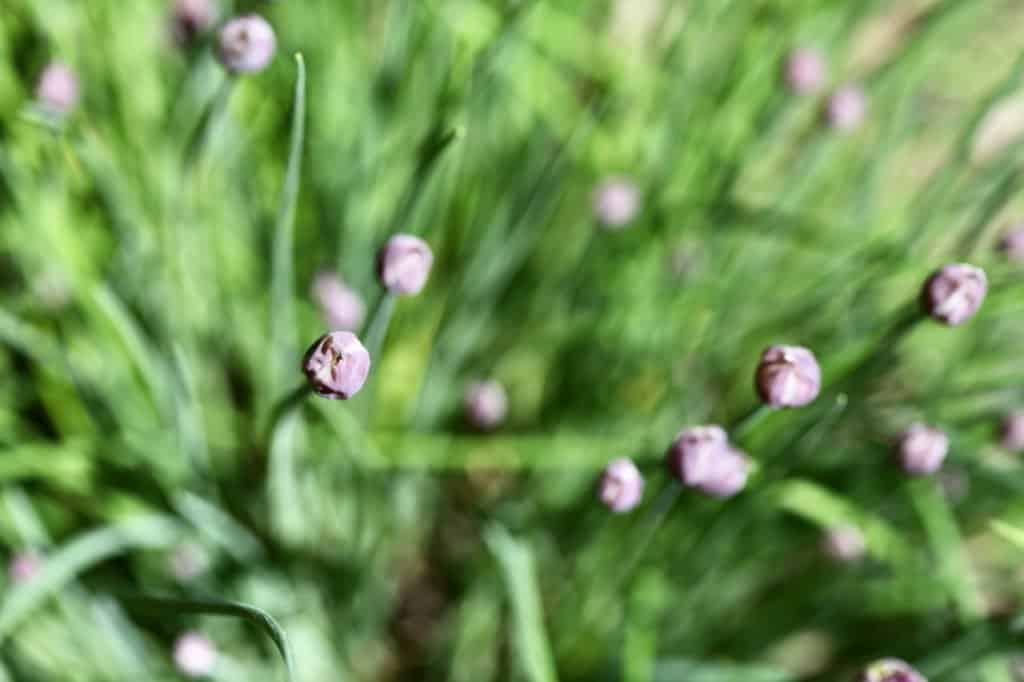
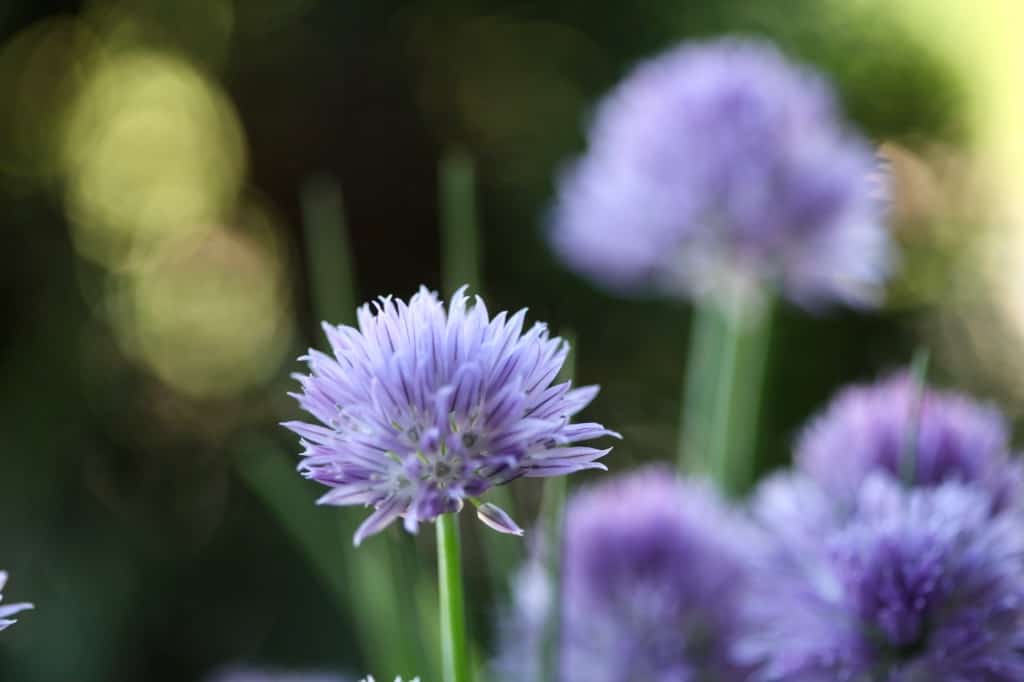
Savoury Chive Flowers
- Chive flowers are round in shape and generally small, at about ½" to 1" in diameter.
- Often found in a beautiful lavender color, the flowers can also be white or pink.
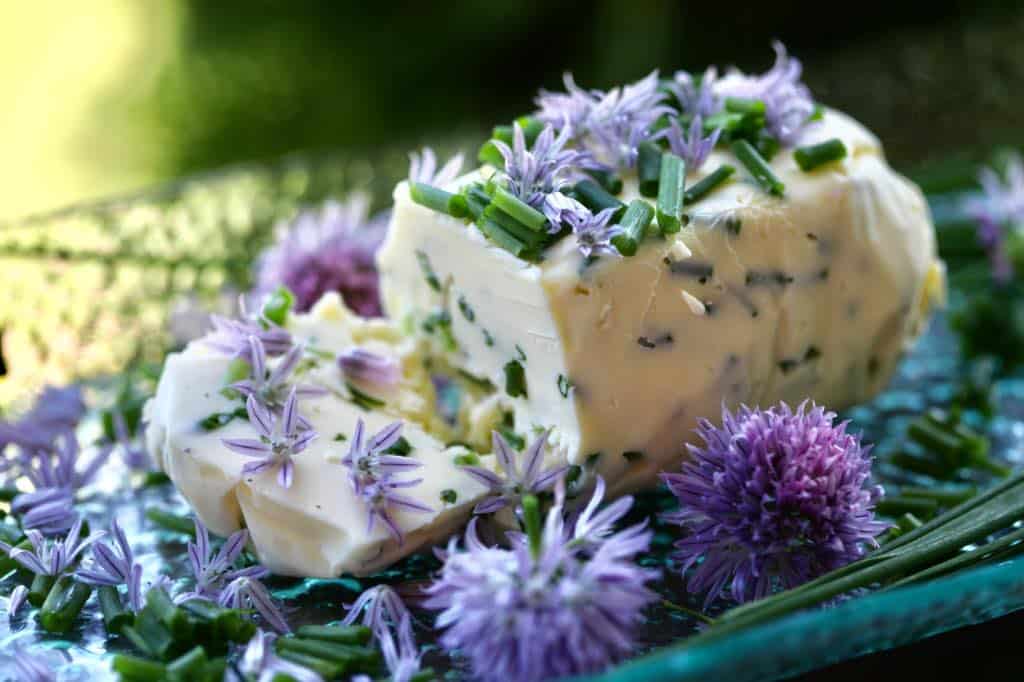
- Chive flowers are perfect for using as a garnish, and for any dishes in which the savoury taste would compliment the food.
- The petals can be pulled from the flowers to be sprinkled on salads, and used as a garnish for chive butter. They can also be added to cottage cheese, cream cheese, or any dish with a savoury flavor.
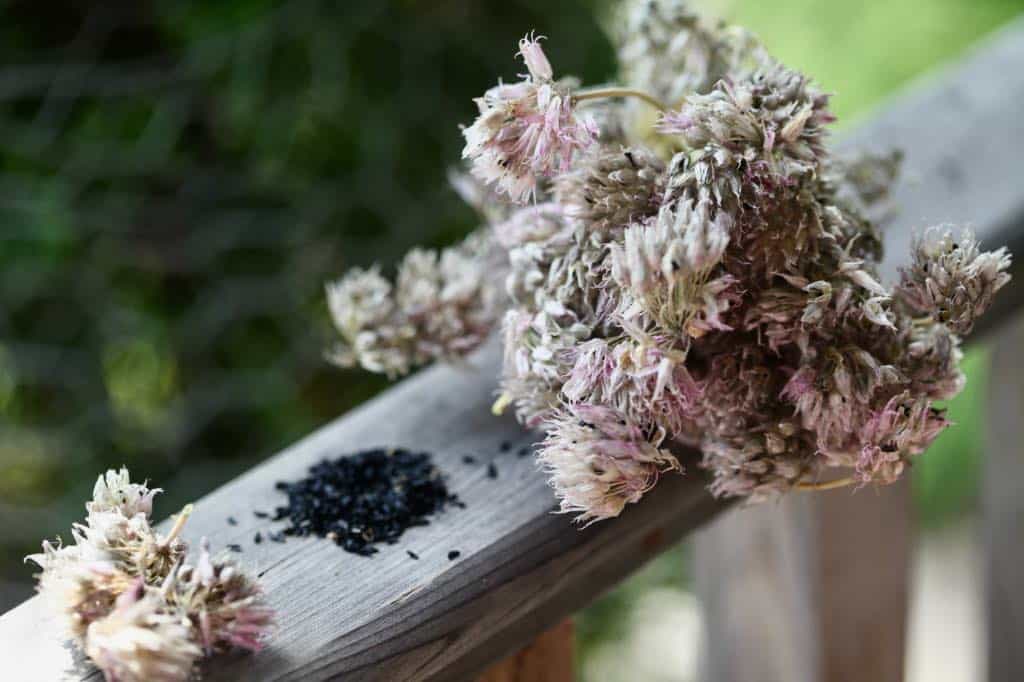
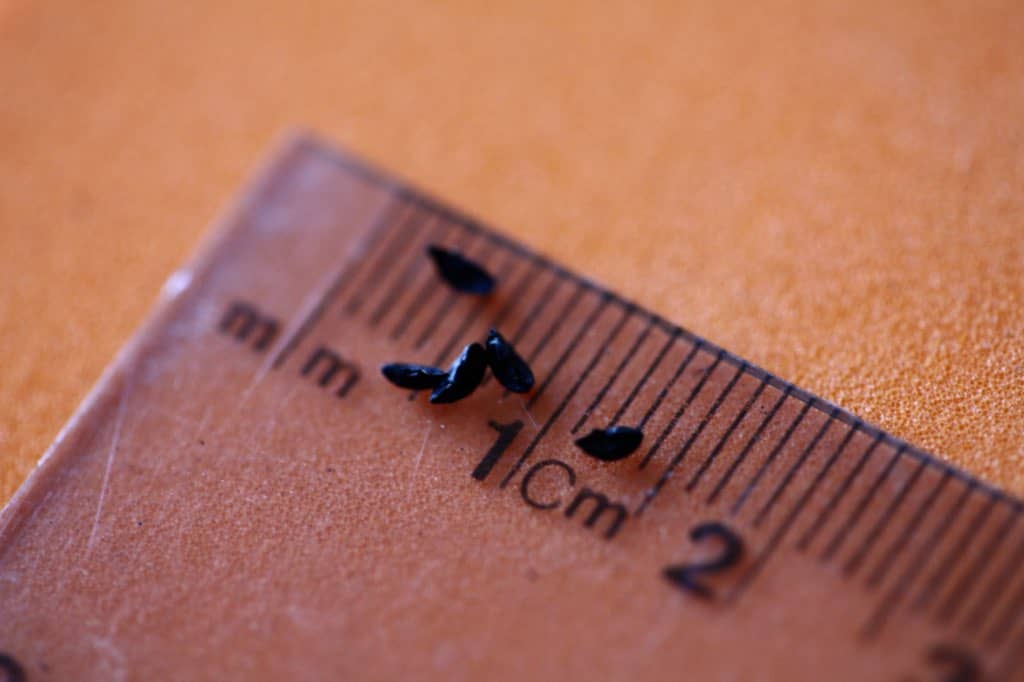
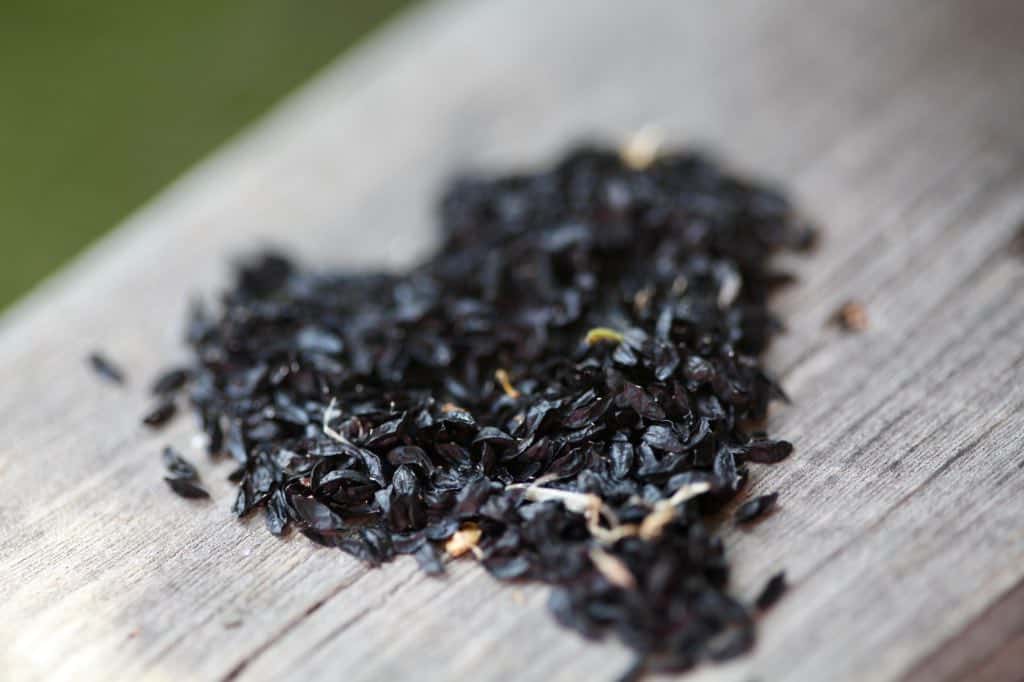
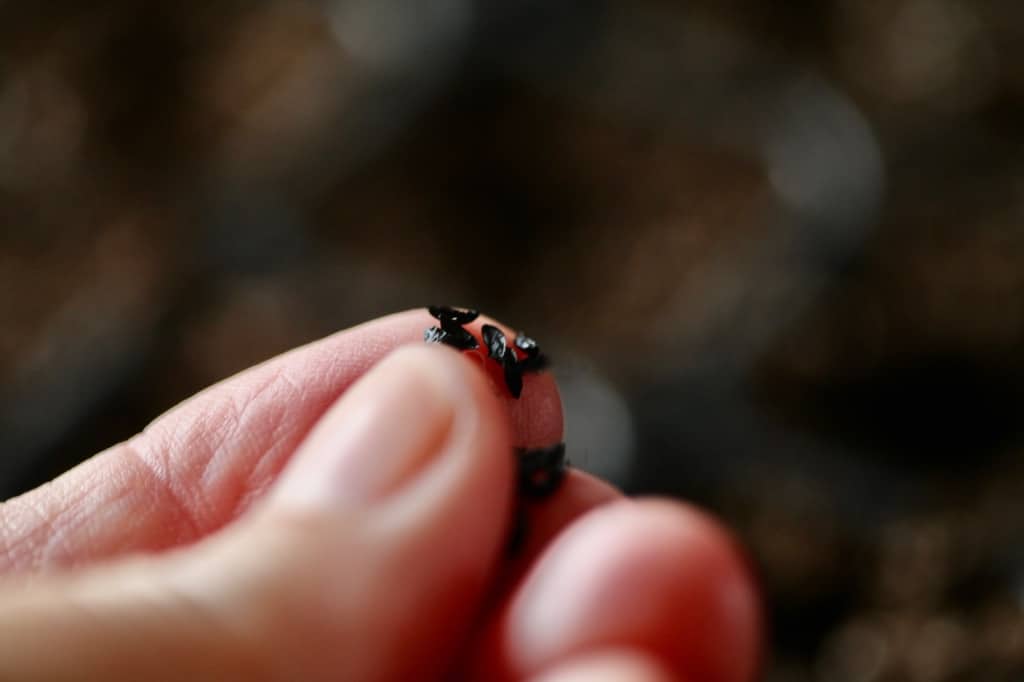
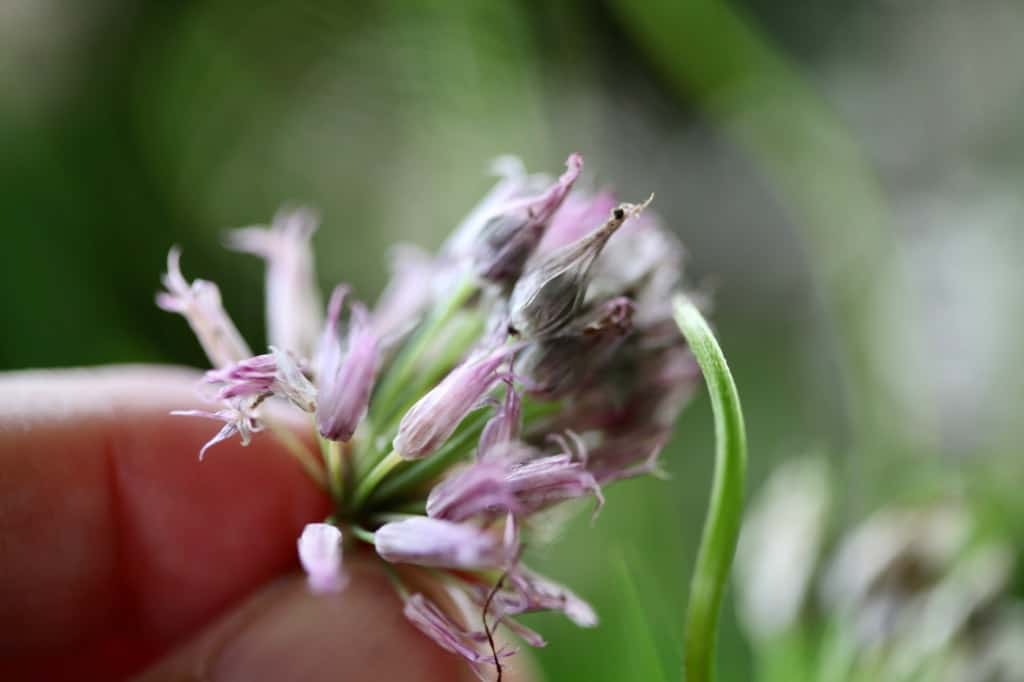
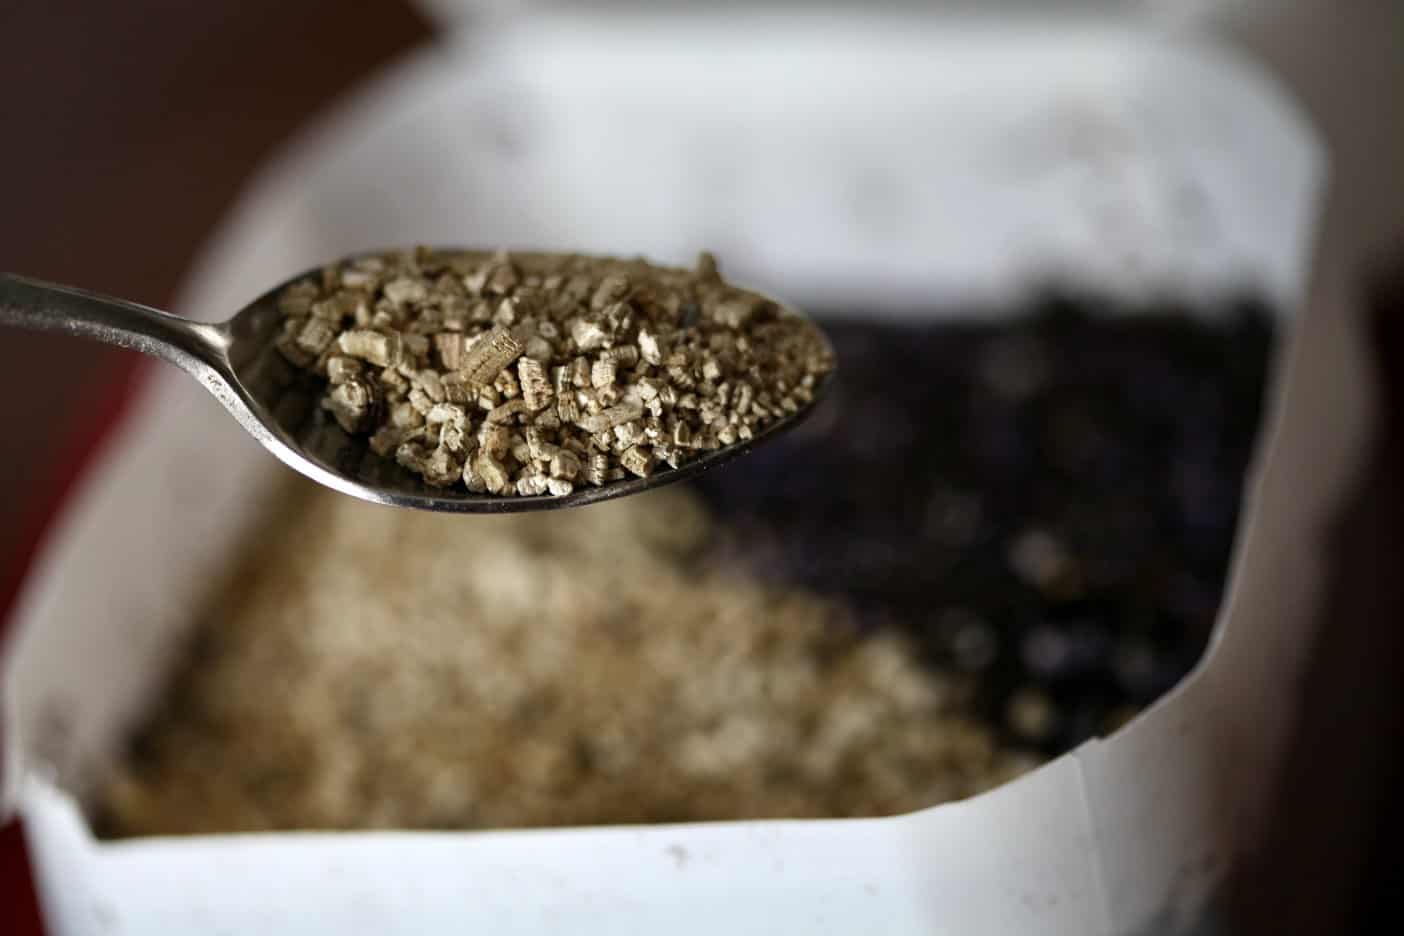
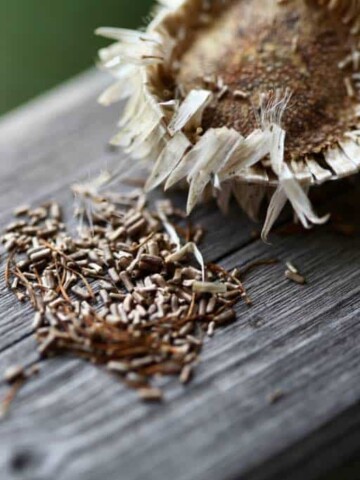
Chive Seeds
- The chive seeds are produced in the chive flowers, and are mature when the seeds become black and firm.
- The seeds will ripen after the blooms have become spent and dried.
- Seeds are oblong and pointed at each end, and they are shiny and black in color.
- The seeds are approximately 0.2 cm to 0.3 cm in length.

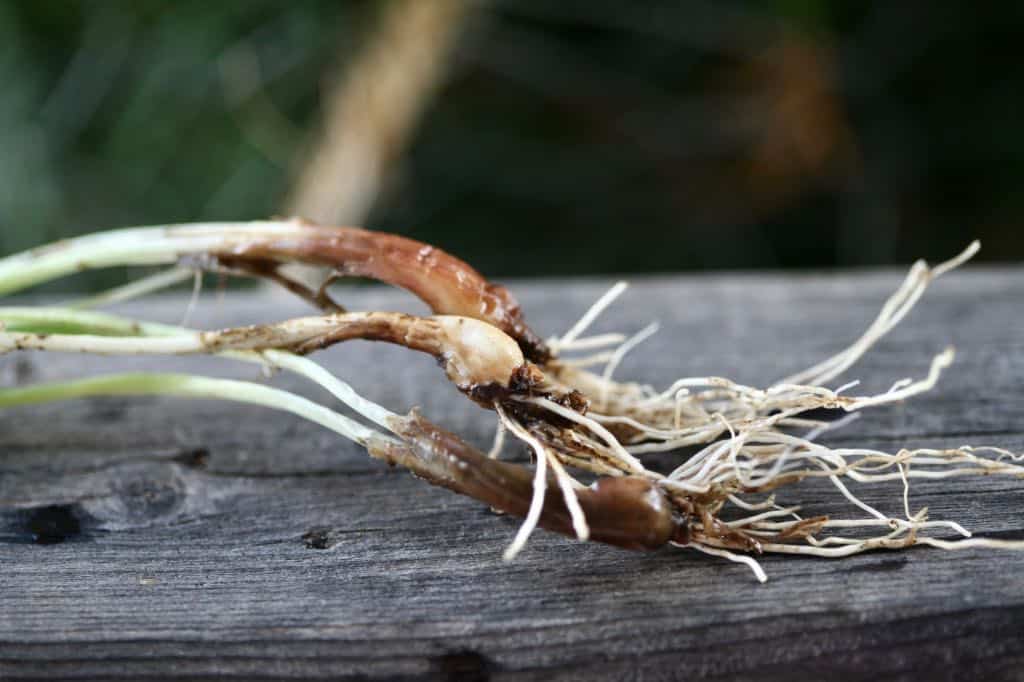
Chive Bulbs
- Chive bulbs will begin to grow as the plant matures, and will form at the base of the leaves, under the ground.
- The chive plant grows slowly under the soil, increasing in diameter to maximum size. The plant spreads via rhizomatous roots, which are connected to the small bulbs at the base of the leaves.
Are Chives Easy To Grow From Seed?
Growing chives from seed is easy, as long as you provide the right growing environment for the seeds and the young plants.
If the seeds are fresh, they will germinate fairly quickly, and you will have new chive plants in no time at all.
These baby chives will require some growing time until they can be harvested from, which is not likely to happen until the following year.
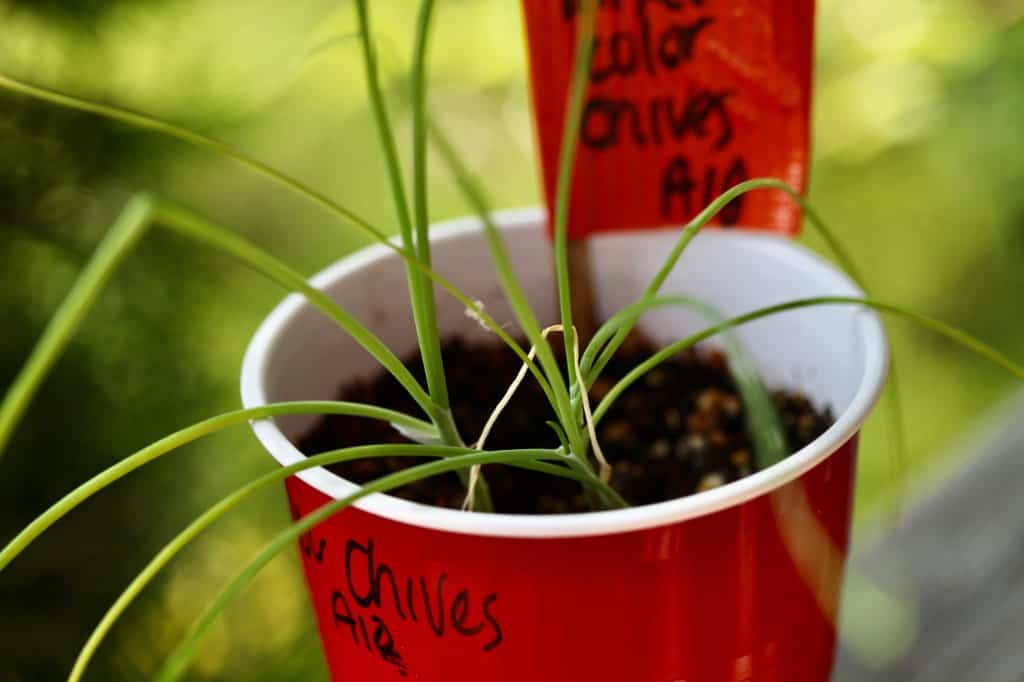
In the first year of growth the chive plants and chive leaves remain fairly small. However in the second year of growth the chives will be bigger and more harvestable, and you can use and harvest at your leisure.
Growing from seed is a wonderful way to fill your garden with lots of chive plantings.
How To Grow Chives From Seed Indoors
Growing chives from seed indoors in late winter is a great way to get chive plants started before the growing season.
Although the seeds can also be sown directly into the garden, growing from seed indoors will allow the plants to be a little bigger for planting out in spring.
This is especially helpful if you live in a cooler climate and have limited growing time.
To grow chives from seed indoors, the seeds should be planted at least six to eight weeks before your last frost date. This will allow them time for germination, as well as growth time before they are transplanted out into the garden.
So let's look at the steps in planting and starting the chive seeds indoors.
Growing Chives From Seeds Indoors
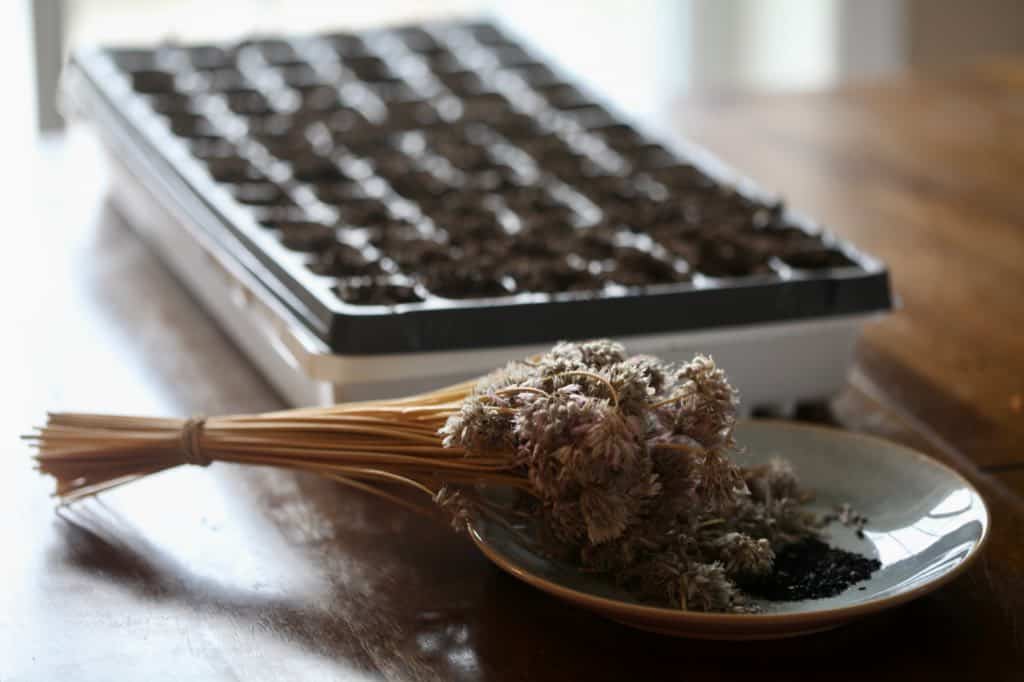
- Start by selecting your growing container for planting.
- We plant most of our seeds for growing indoors in cell trays, as the trays are easy to slip onto a shelf under the grow lights.
- Make sure that there are drainage holes in the bottom of the container. You will also need a bottom tray to catch any water drips under the planting container.
- Fill a 72 cell plug tray or chosen container with a good soilless potting mix.
- Make small holes in the soilless mix in your container, or into the center of each cell in the cell tray, approximately ¼ inch deep, into which to sow seeds.
- Plant about 10 to 15 chive seeds into each hole, and cover with more of the soilless mix, or alternatively some vermiculite, which will help to keep moisture in the soil.
- Bottom water the tray or container, making the soil moist. It's important to keep the soil moist until germination occurs, and not to let the soil dry out, as this can be harmful to the germinating seeds.
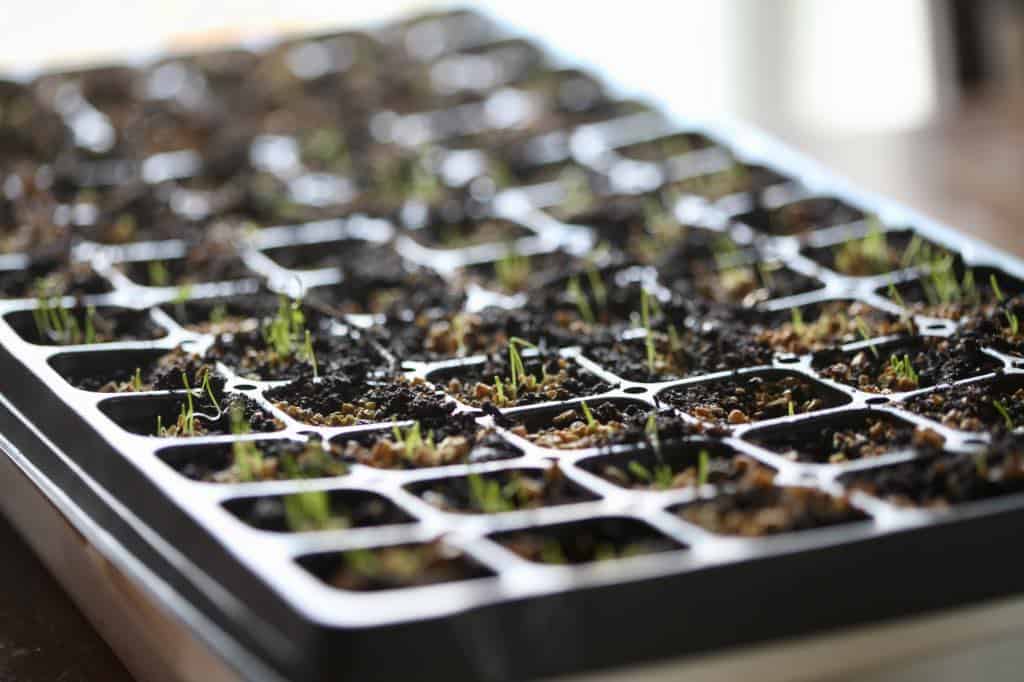
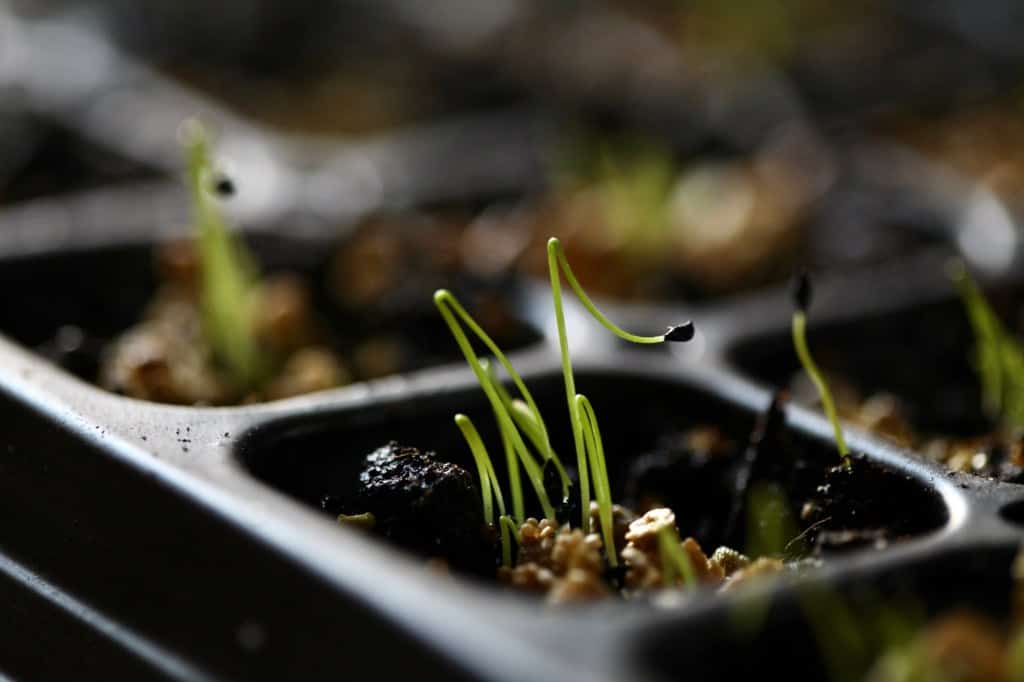
- Place the tray on a heat mat, which will warm the soil and speed up germination. Chives will germinate more readily in warm soil, and generally germinate when the soil temperature is approximately 19° celsius.
- Once 60% of the seeds have germinated, remove from the heat mat and grow under a grow light, until ready to be planted out in spring.
- Plant out after hardening off the tender seedlings, and only after the risk of frost has passed. Knowing the last frost date for your usda plant hardiness zone will help you to select a date for planting.
How Long Do Chives Take To Grow?
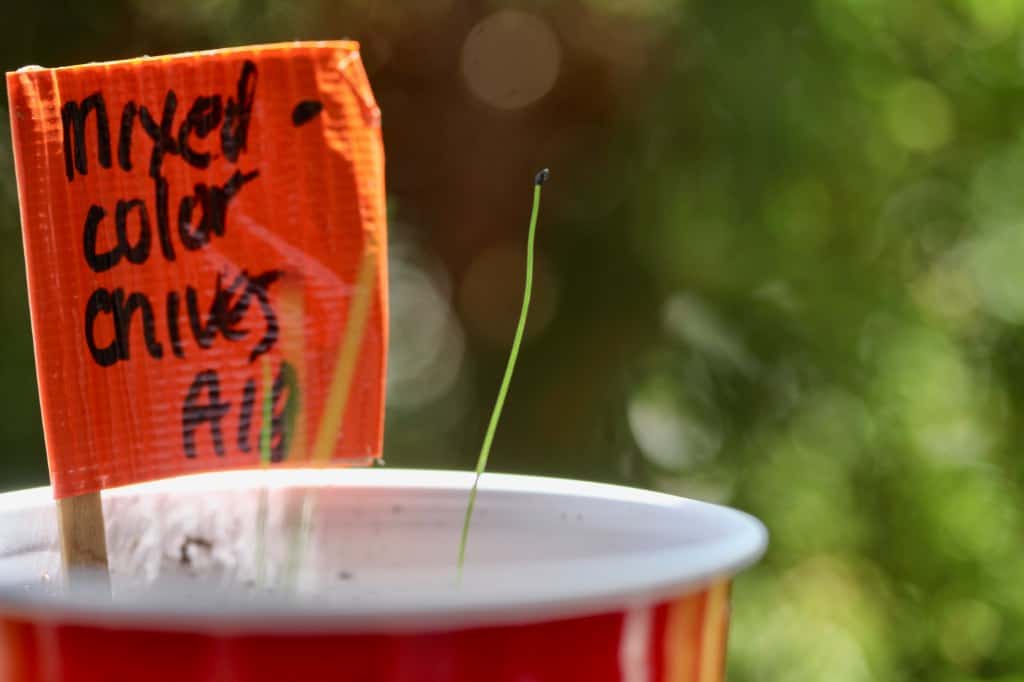
Chives do not take long to germinate, although the chive plants can remain quite small during the first growing season.
Chive Germination Time
If given the right growing conditions, chive seeds will germinate fairly quickly. Seeds will normally germinate within one to two weeks on average.
However germination time can really lag if the seeds are in cool soil, and they may not germinate as well.
My seeds germinated in 5 days, which was a pleasant surprise. The little seedlings are well on their way to being next years shining stars in the herb garden.
Time To Maturity
Some gardeners may wonder why their chive leaves are so tiny and thin the first year, not realizing that this is completely normal.
The reason for the small size of the seedlings is because they are still baby plants, and will need some time to grow and mature.
When the leaves emerge in the next growing season, they will be larger and thicker than in their first year of growth.
Second year chives are harvestable, and will provide the gardener with all the chive leaves that they are seeking.
Transplanting Chive Seedlings
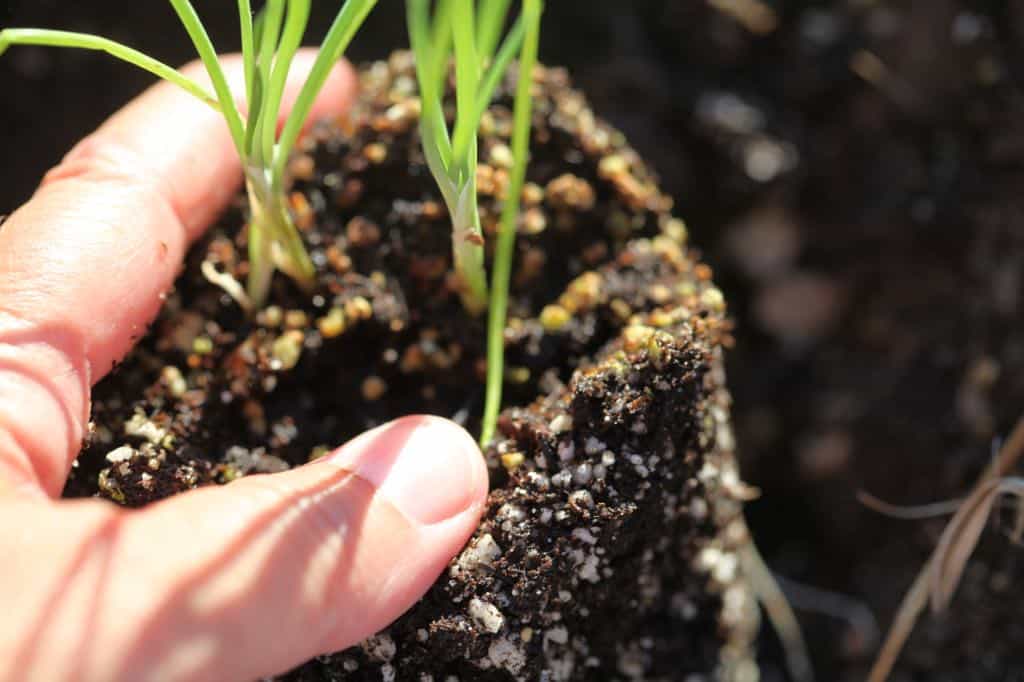
Chive seedlings can be transplanted into the garden when they are about four inches high, and when timing is right to plant them into the garden.
Although these are hardy perennial plants, they are still very tender seedlings when they are growing indoors.
They have not yet been exposed to the outdoor elements which will help to toughen them up.
Make sure to harden off the seedlings gradually, before planting them into the garden.
This will help to acclimatize the plants to the outdoor environment, preventing stress.
Once the plants are hardened off, and the last spring frost has passed, the seedlings can be transplanted into the garden.
Plant into the garden bed, at least twelve inches apart, to accommodate the width of the plants at maturity.
Water well, and keep watered while the plants are becoming established in the garden.
Now let's have a look at caring for the new chive seedlings in the garden.
Chive Care
Chives are easy and almost maintenance free plants in the garden, as long as they are planted in the right location and their growing needs are being met.

Growing Zone
- Chives are hardy from zones 3 to 9.
Moisture Requirements
- Soil moisture is important when your chive seedlings are first planted into the garden.
- Chives are drought tolerant plants when mature, however require watering and a moist soil when initially transplanted into the garden.
- Keep the soil moist until the plants have taken hold, and are established in the garden.
Soil Requirements
- Chives will grow in average soil, although do best in fertile and well drained garden soils.
- Consider adding some compost to the garden to increase the organic matter in your chive patch.
Light Requirements
- Chives grow best in a full sun location, however will also grow in a partial shade or light shade location.
- Since chives prefer the cooler temperatures, providing some afternoon shade may be best for warmer growing zones.
- Make sure to provide at least six hours of sunlight per day for best growth.
Pruning
- Once you have chives growing in the garden, you may find that they tend to reseed fairly easily. You may find some little volunteer plants from time to time.
- You can prevent reseeding by pruning spent blooms.
- Pruning spent flower heads will help to prevent reseeding and volunteer plants. It can also tidy up the look of the chive plant once it has finished blooming.
- If some seeds have dropped and begin to grow, you can easily dig up the volunteers and relocate them to another area of the garden.
- Unless of course you want them growing exactly where they are.
Conclusion
Growing chives from seed indoors is easy, as long as you provide the right growing conditions.
The tiny seedlings will establish in the garden in the first season, and return to the garden the following season in larger form.
This perennial plant will return to the garden year after year, providing lots of fresh chives with both savoury leaves and blooms to use in the kitchen.
I love to add chives to sour cream, potato salad, and other dishes where their mild onion-like flavor enhances the dish. Chive butter is also a favorite.
Chives will also reseed, so once you have this charming plant in the garden, it will continue to grace you with it's presence for many years to come.
Have you ever tried to grow chives from seed indoors? Be sure to leave a comment below to share your experience!
Other Posts You May Like:
PIN IT FOR LATER!


Leave a Reply