
Bachelor buttons are cottage garden flowers with the most adorable little pinwheels of blue. These romantic blooms are available in both annual and perennial forms. Learn how to grow bachelor buttons, and have them in your garden to enjoy all summer long.
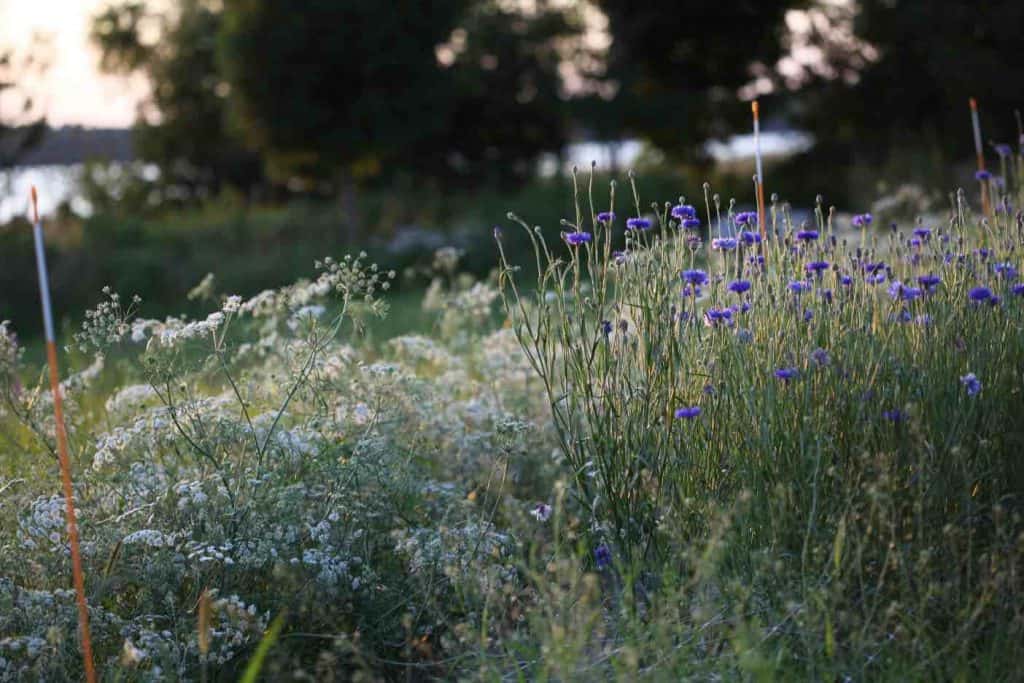
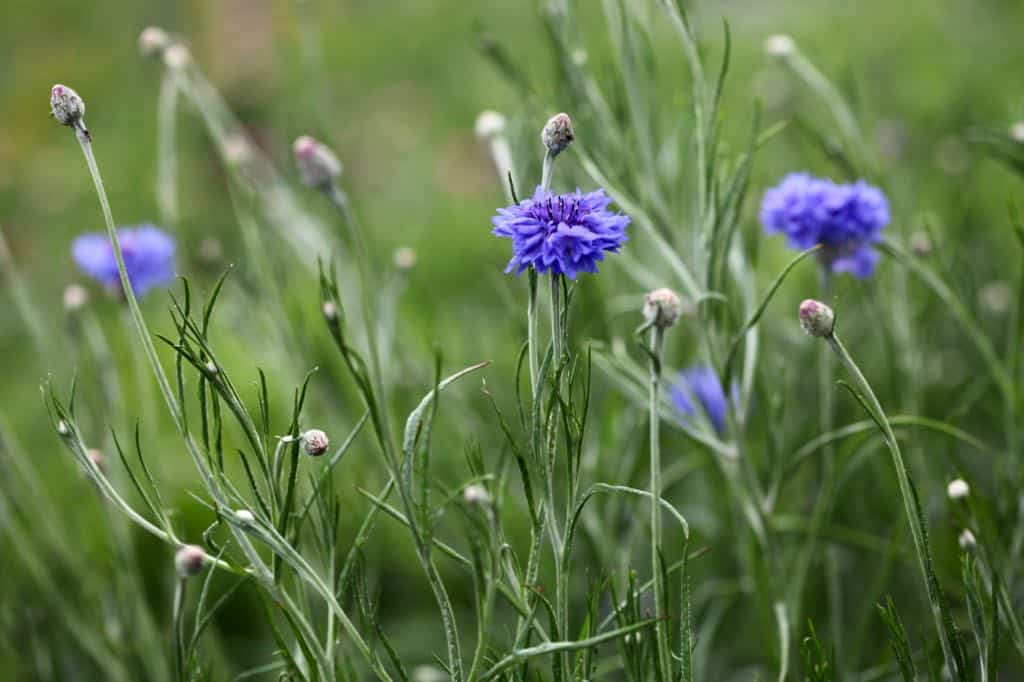
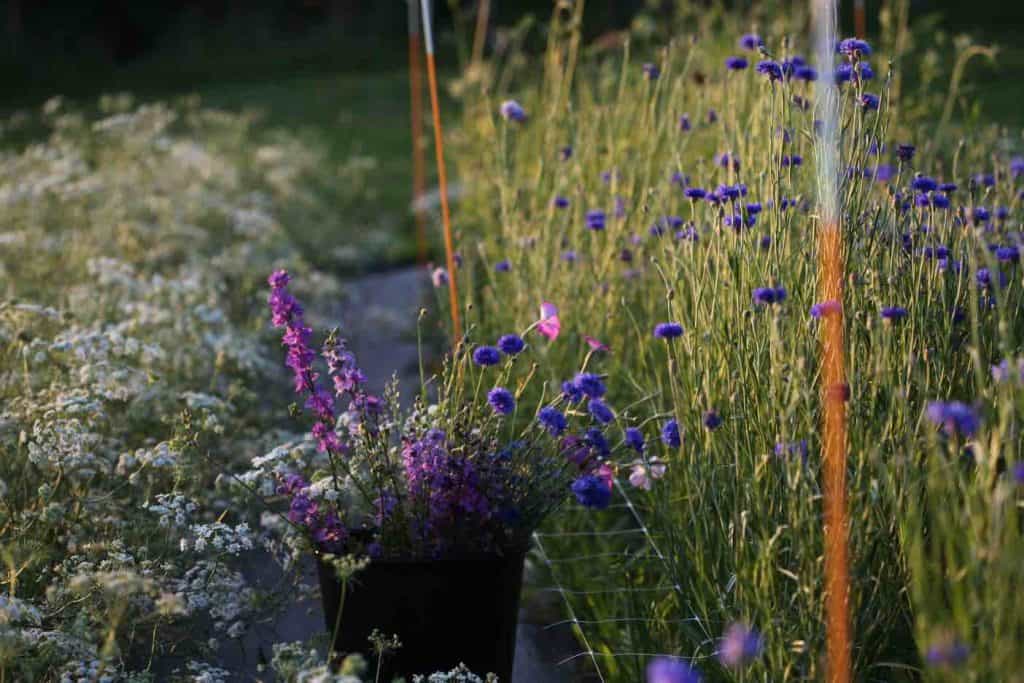
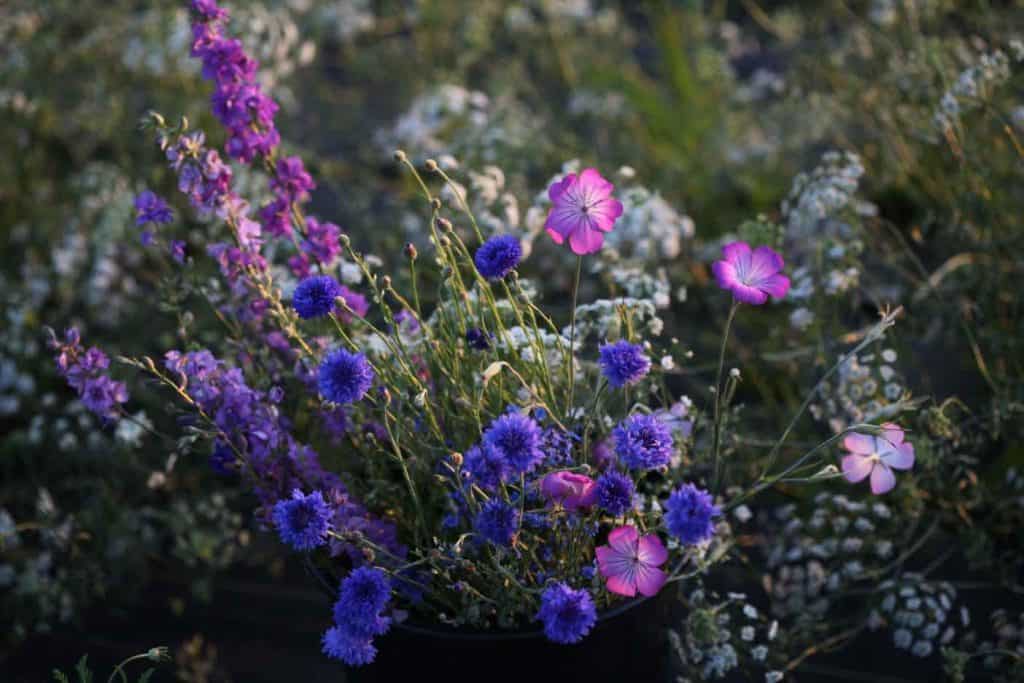
Bachelor buttons are reminiscent of an English country garden, with a profusion of blooms that are shaped like tiny pinwheels. These flowers are a must to grow in our own cut flower garden every summer.
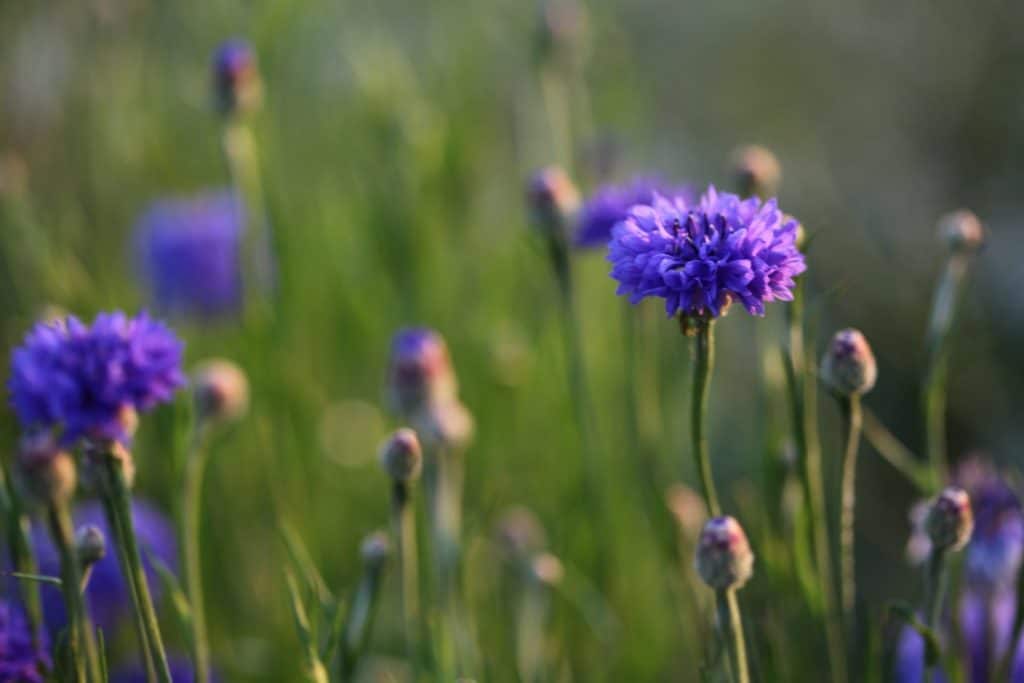
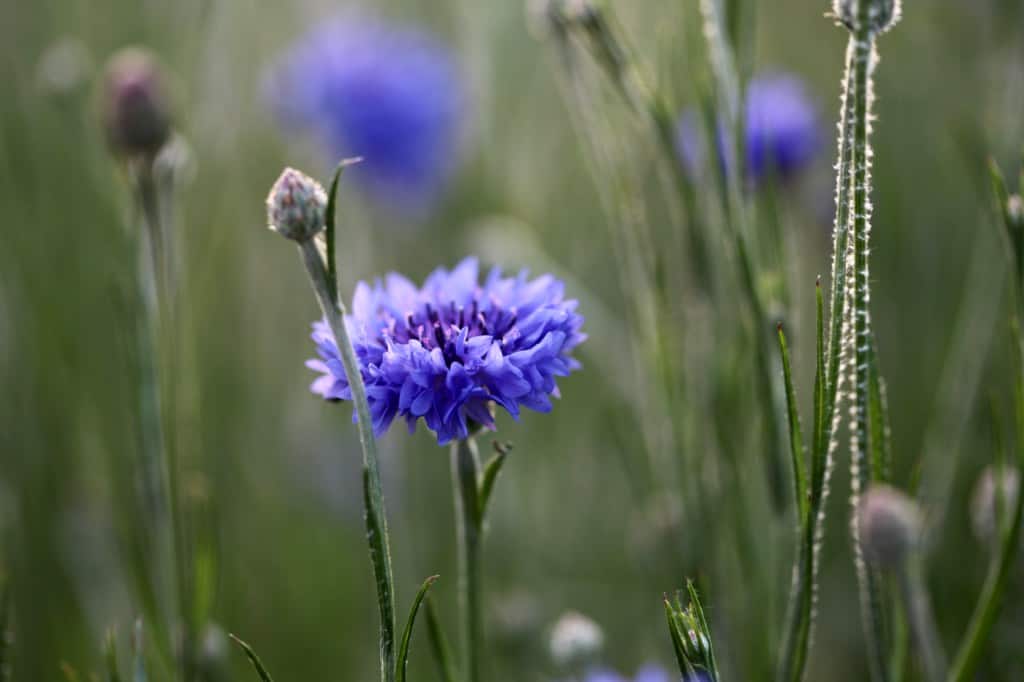
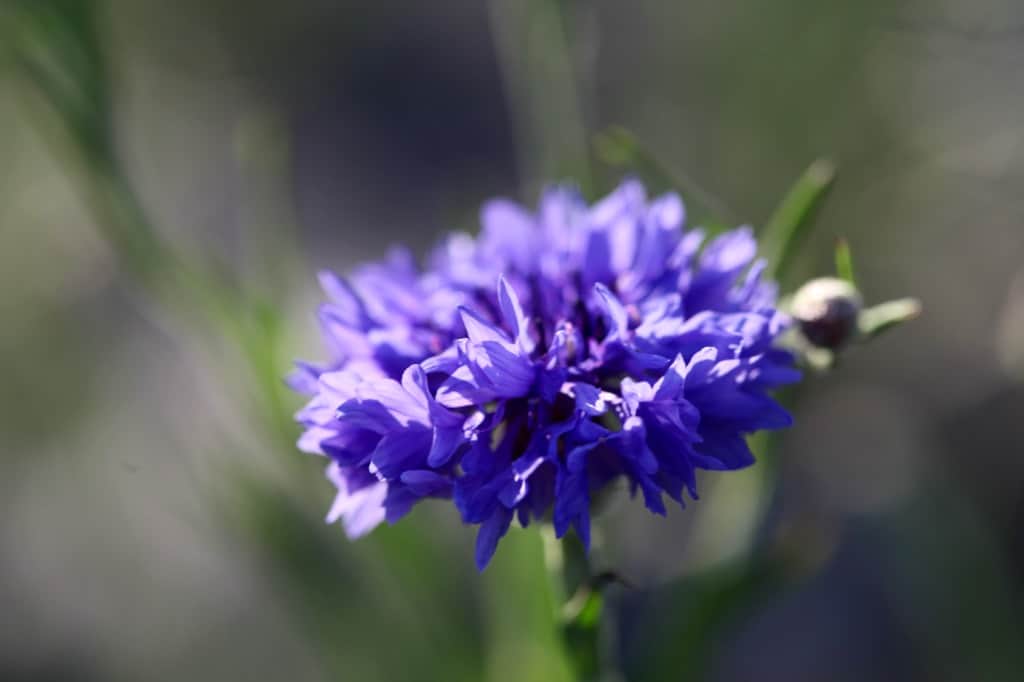
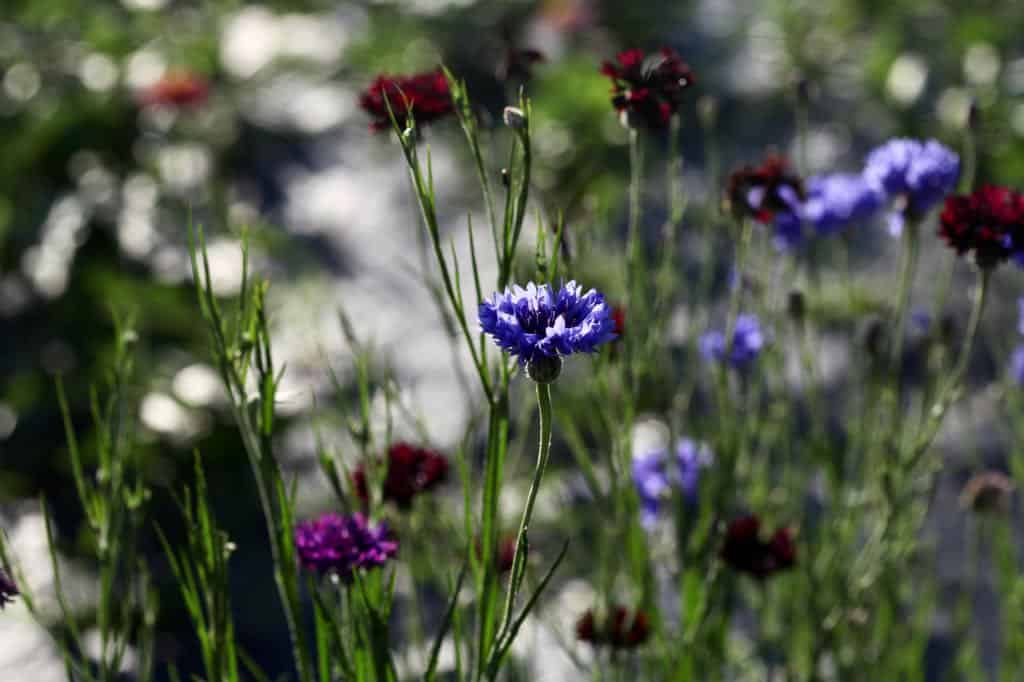
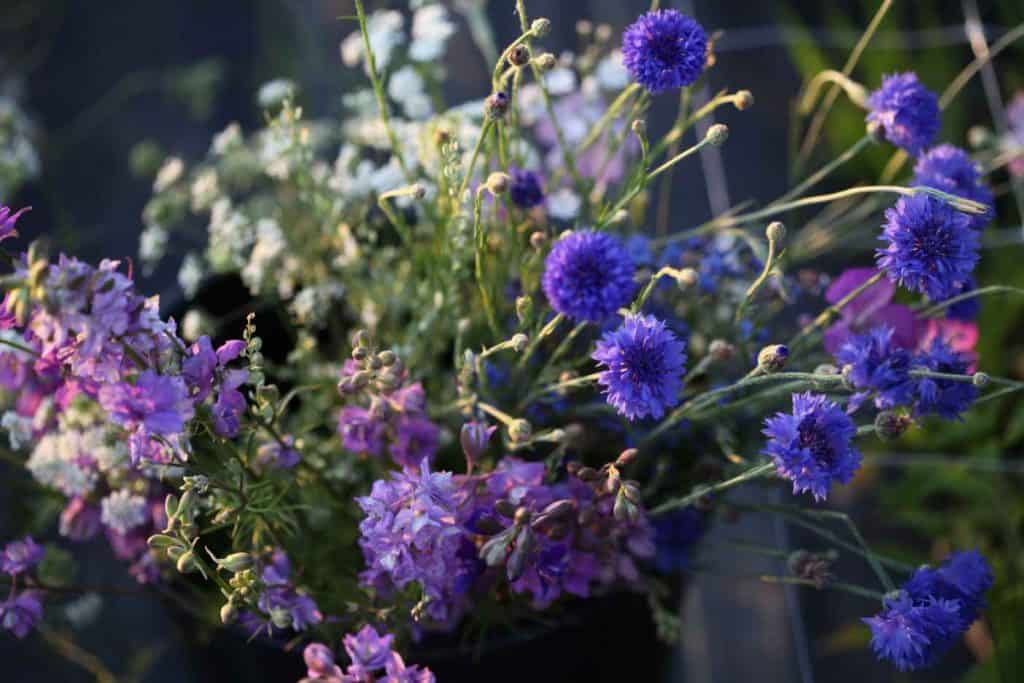
Florist Blue Boy is an intense deep blue, and it's blue flowers always add an extra special touch to the wild flower look that we love in bouquets.
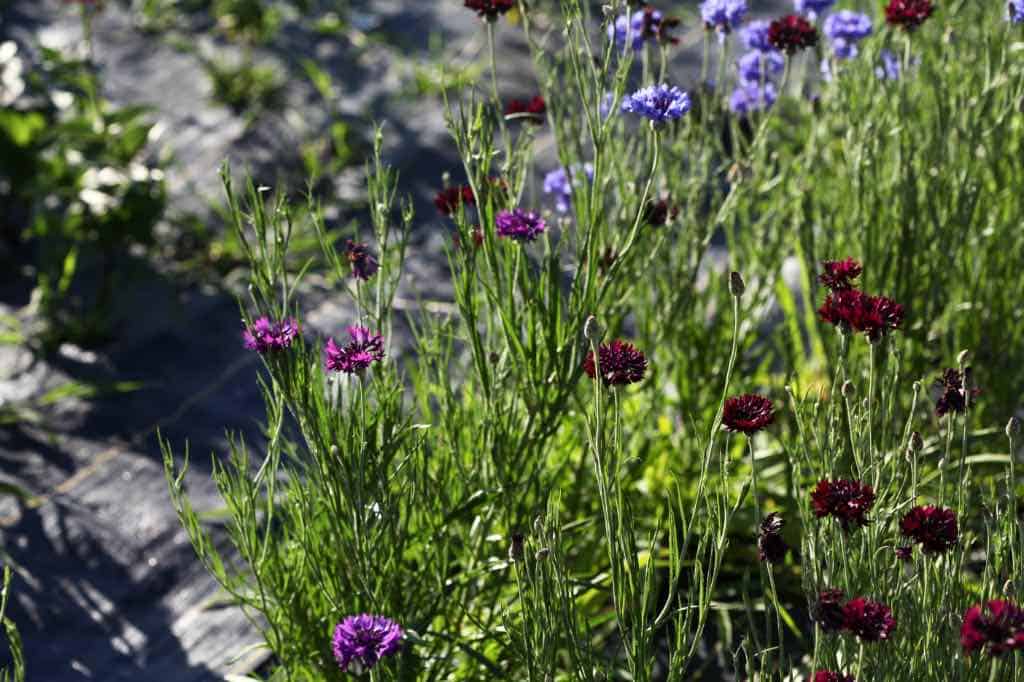
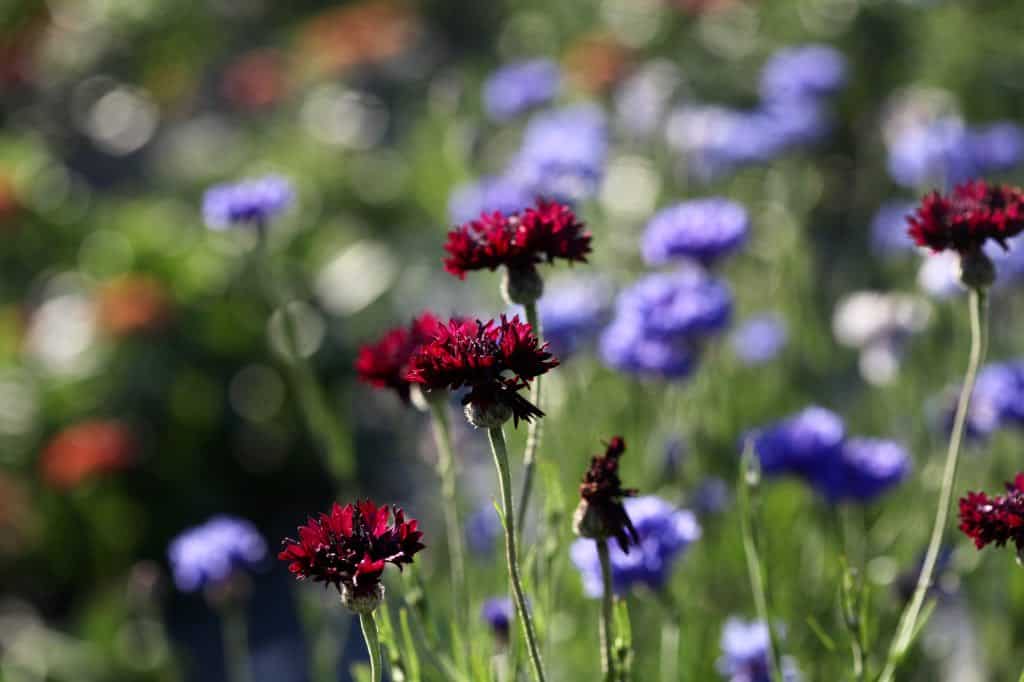
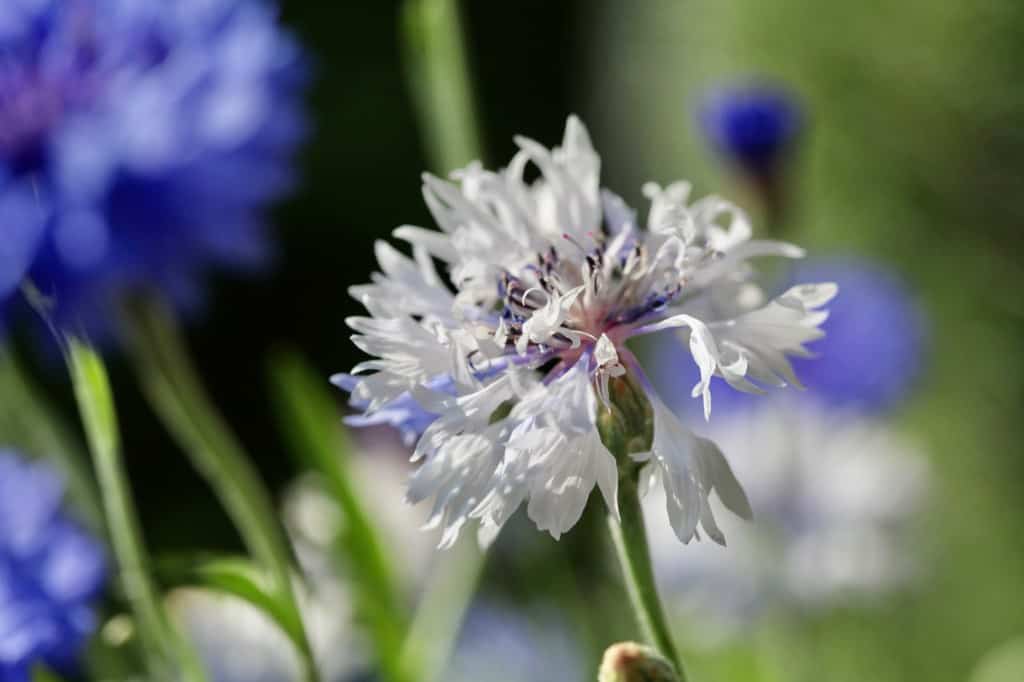
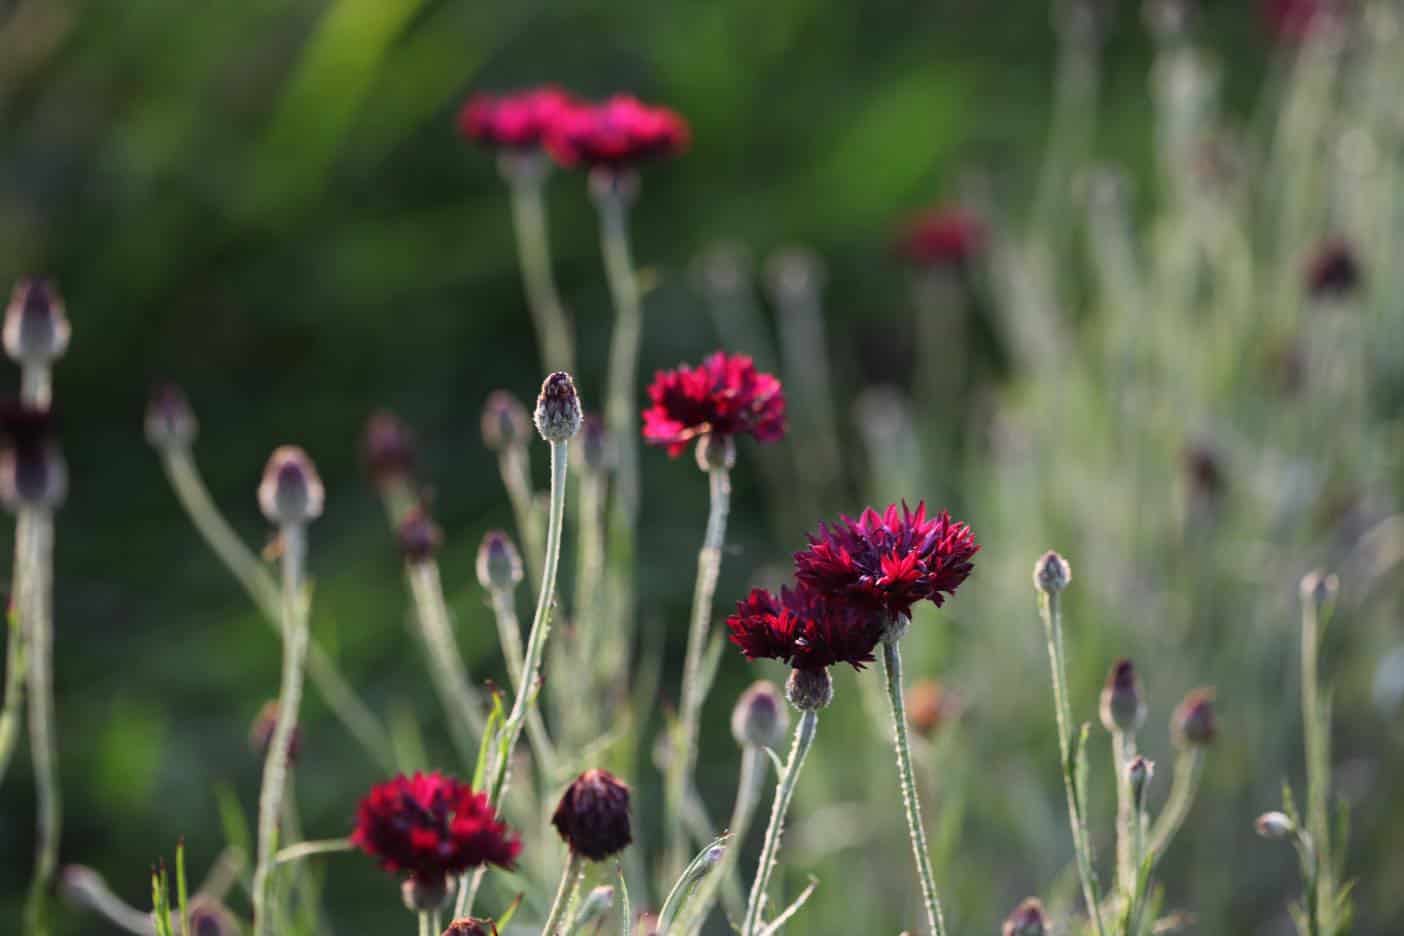
Although we plant mostly the blue variety, bachelor button flowers are also available in other beautiful colors as well.
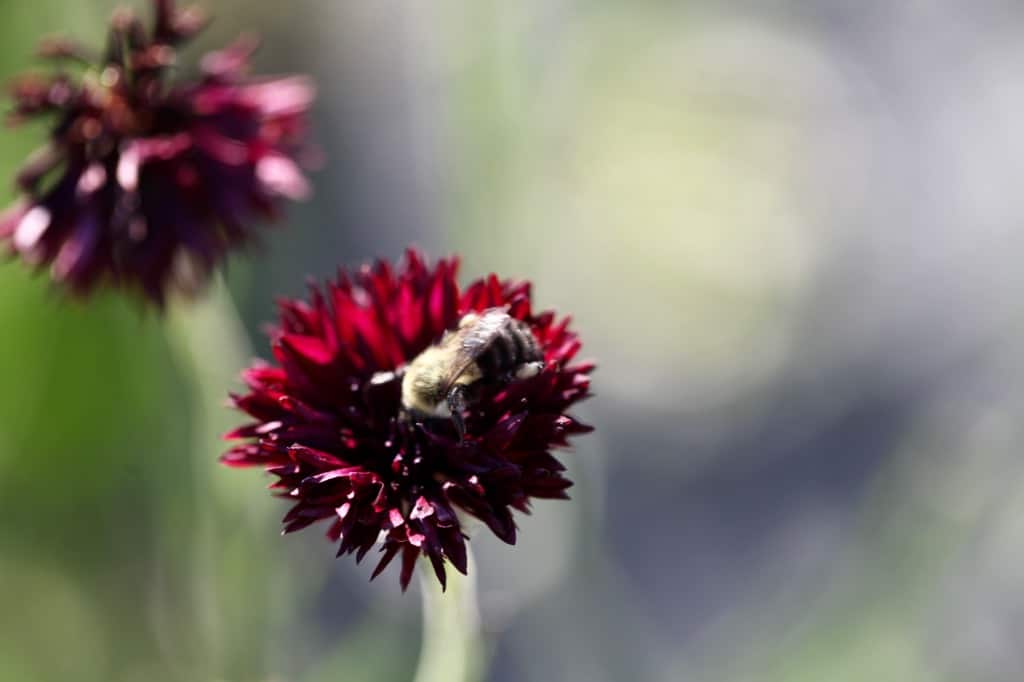
The flowers come in shades of pink and lavender, as well as in a dark and rich maroon. This year we are planting two darker colors, Boy Black and Black Button, and are looking forward to comparing these colors to the blue.
What Are Bachelor Buttons?
Bachelor buttons are flowering plants which are members of the Family Asteraceae, and Genus Centaurea.
There are both annual and perennial forms of Bachelor buttons. Each form is a different species within the Centaurea genus.
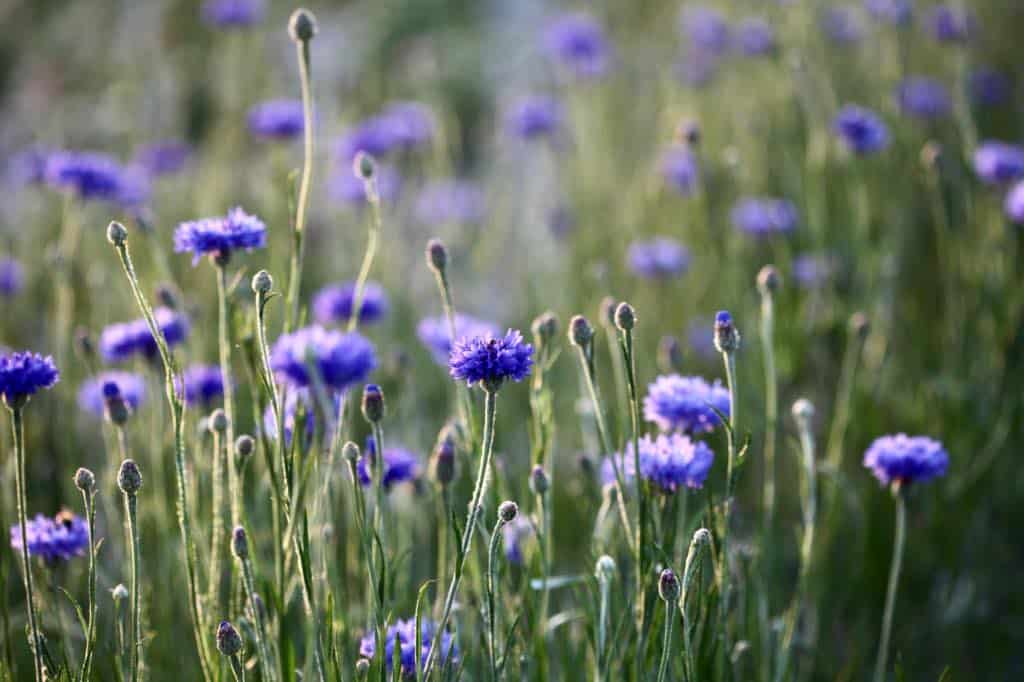
The species Centaurea Cyanus is the annual bachelor button plant. A popular cut flower due to it's ornamental nature, this annual plant has also become naturalized in some parts of North America and Australia.
Common names for Centaurea Cyanus include cornflower, bachelor's buttons, or bachelor buttons.
The species Centaurea Montana is the perennial bachelor button plant. This plant is also ornamental, and also has a tendency to escape the garden.
Common names for Centaurea Montana include mountain cornflower, mountain bluet, perennial cornflower, montane knapweed, bachelor buttons, and bachelor's button.
Both annual and perennial bachelor buttons can be used as cut flowers, although it is the annual form that is used more frequently.
Let's compare the difference between the annual and perennial forms of Bachelor Buttons.
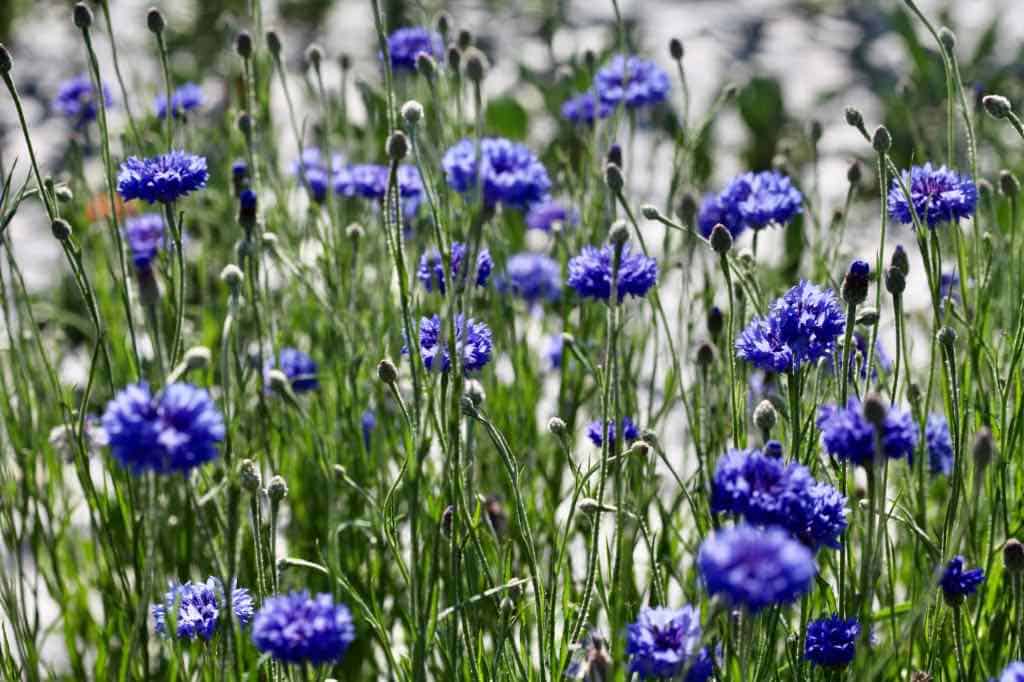
Centaurea Cyanus- Annual Bachelor Buttons
Annual Bachelor Buttons are the species known as Centaurea Cyanus. These plants are considered annuals in most growing locations, however can be perennials in much warmer locations, such as growing zones 8 through 10.
C. Cyanus is a hardy annual in colder climates, and readily reseeds itself if left to go to seed.
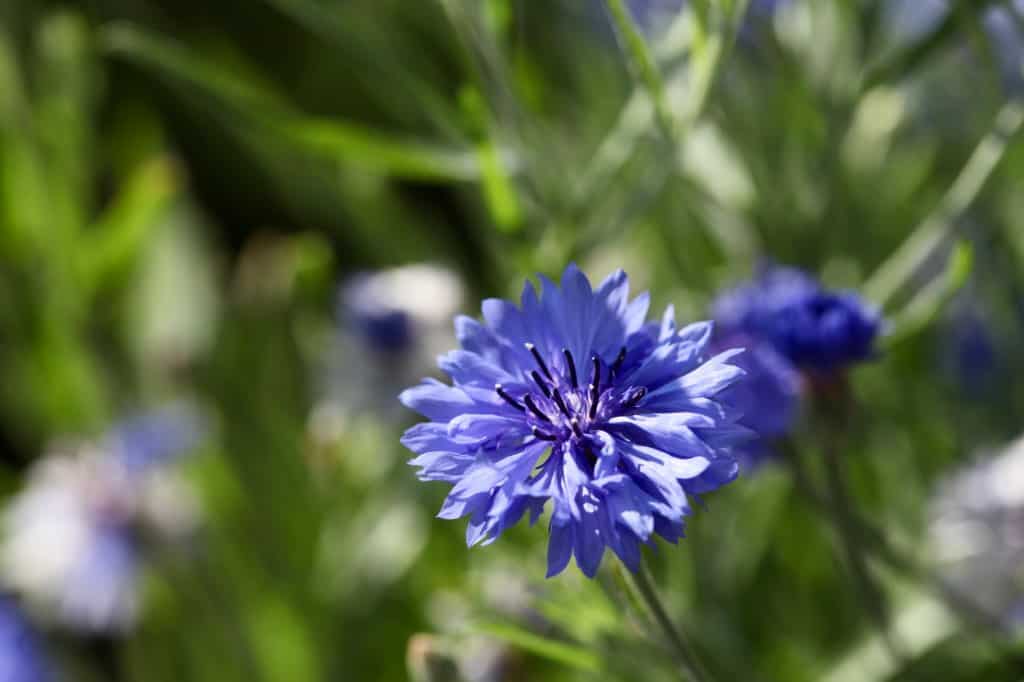
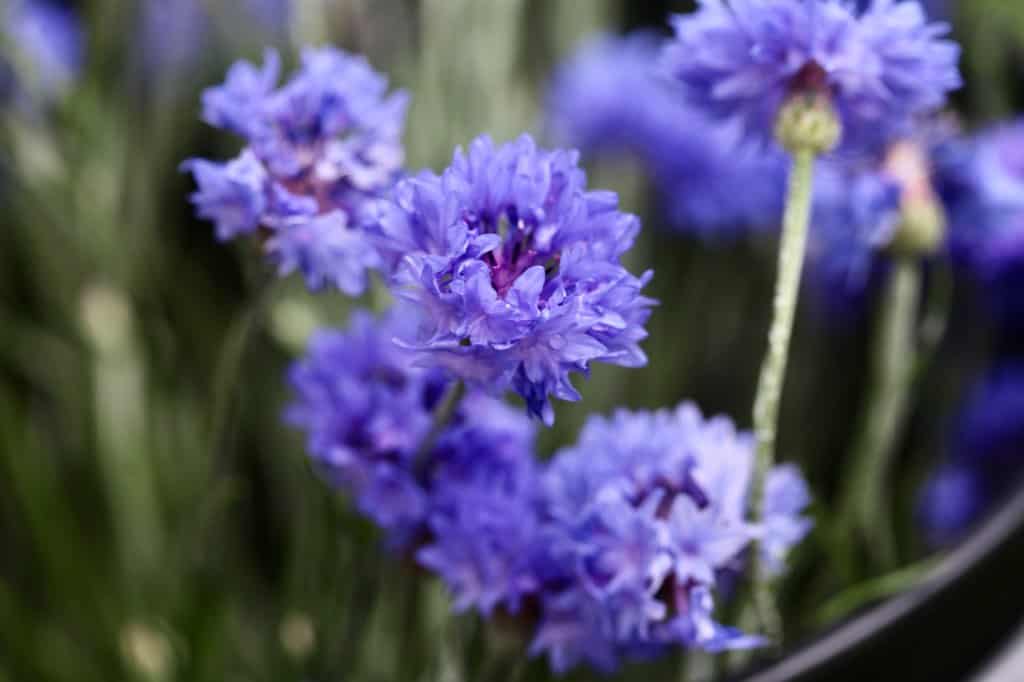
In comparison to Centaurea Montana, the flowers are more compact and full. The flowers are also smaller in size at about 1 to 1.5 inches in diameter.
Another difference between the annual and perennial plants is their fragrance. When you smell the flowers of Centaurea Cyanus you will notice that they do not have the same sweet smell that perennial bachelor buttons have.
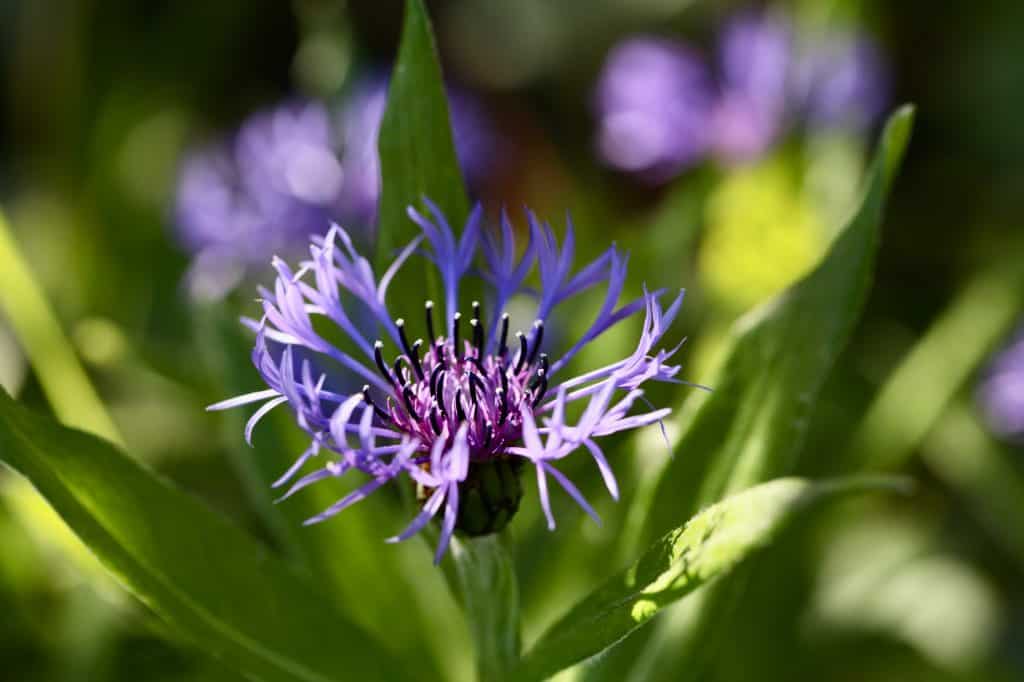
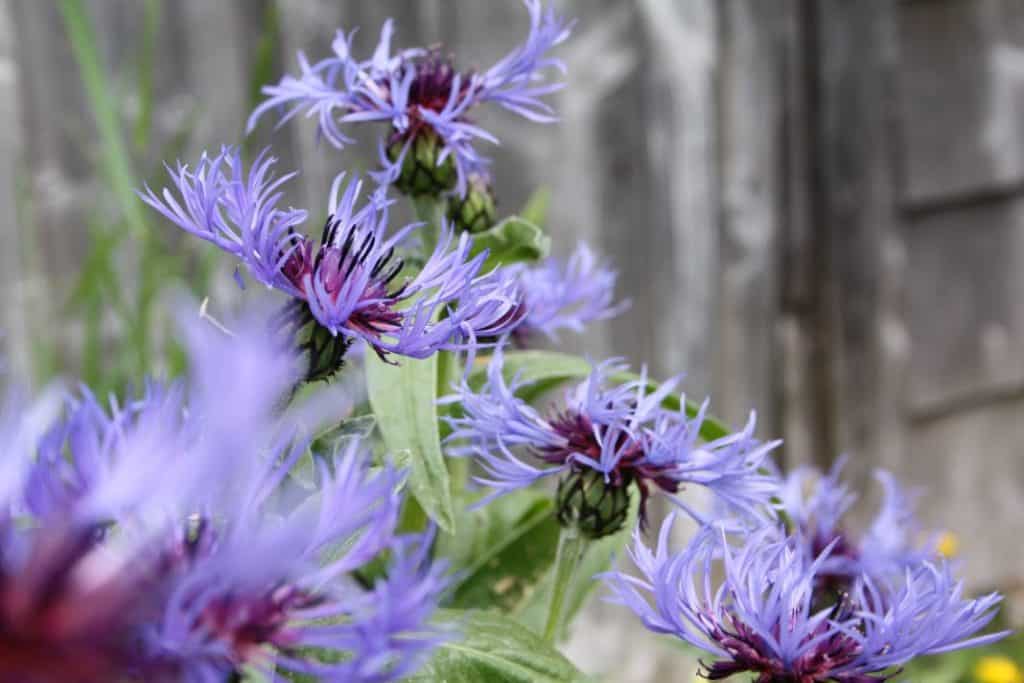
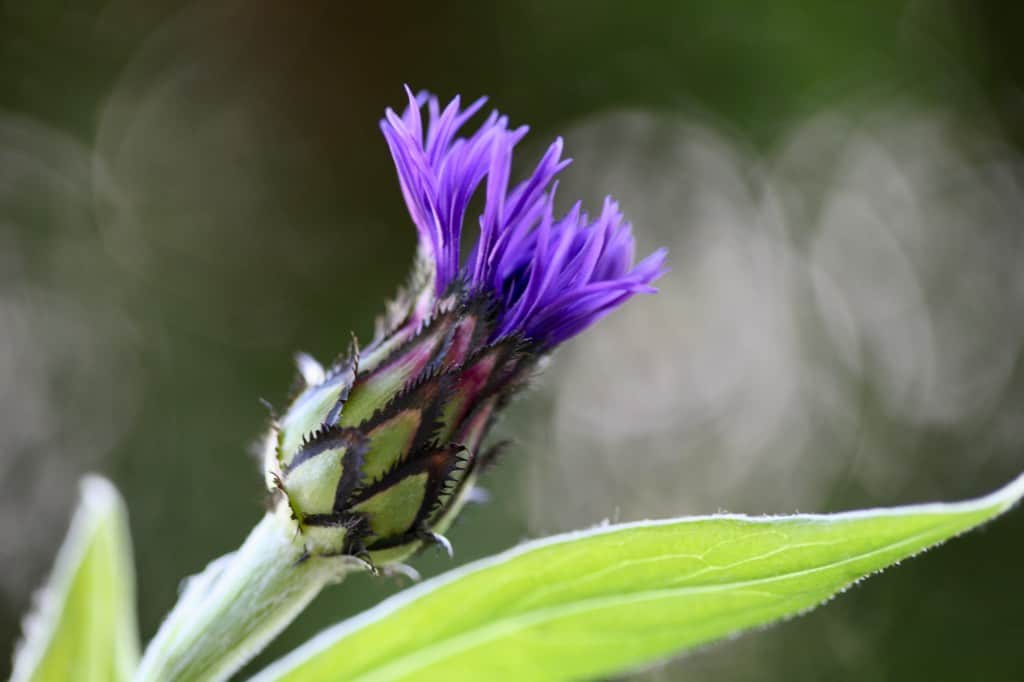
Centaurea Montana- Perennial Bachelor Buttons
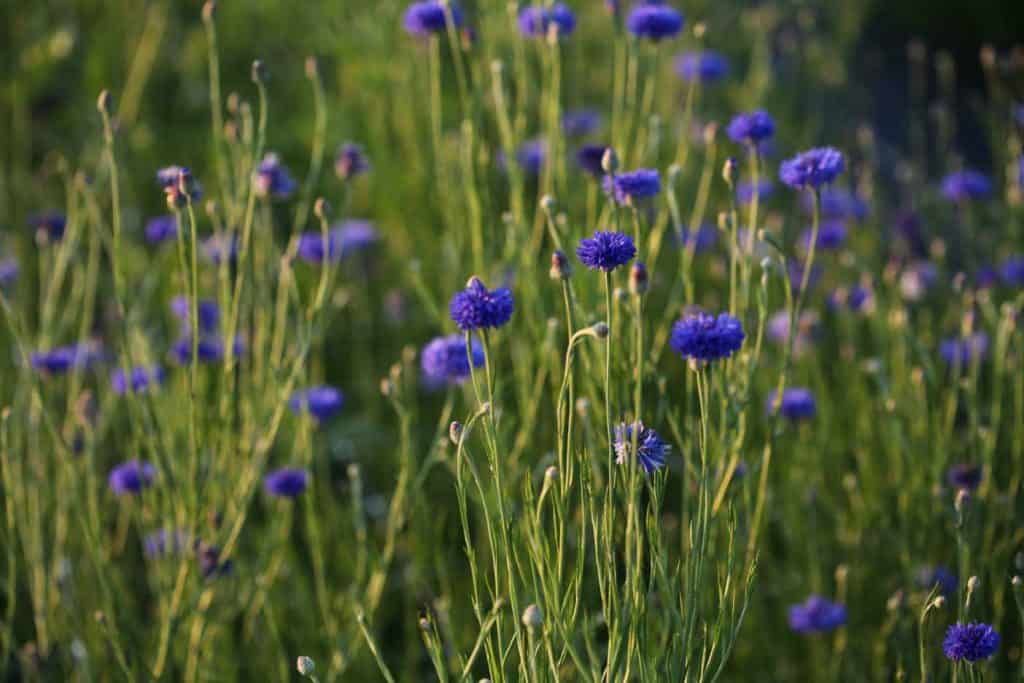
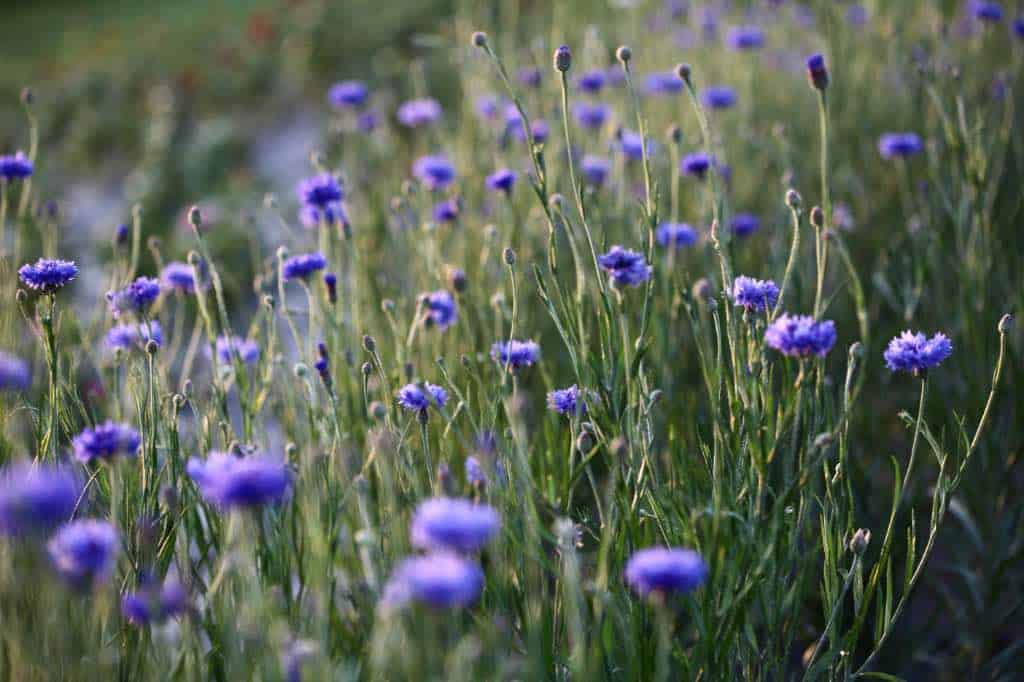
Perennial Bachelor Buttons are the species known as Centaurea Montana. These flowers are often found growing wild in the countryside.
They are the perfect cottage flower with their airy appearance. Just like with annual bachelor buttons, these flowers also come in different colors, although are most commonly seen in a beautiful blue.
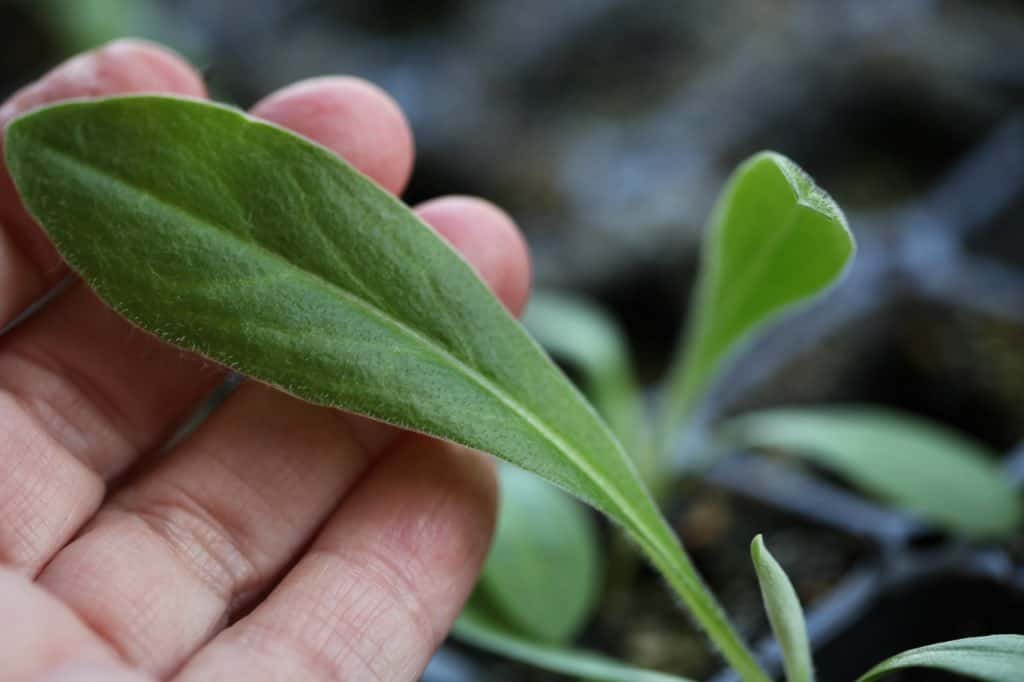
The stems and leaves are covered in fine white hairs.
Centaurea Montana has a wonderful sweet fragrance which you'll notice when you take a sniff of the flower up close.
These plants are sturdy perennials, with a bloom time of approximately 3 weeks in early summer.
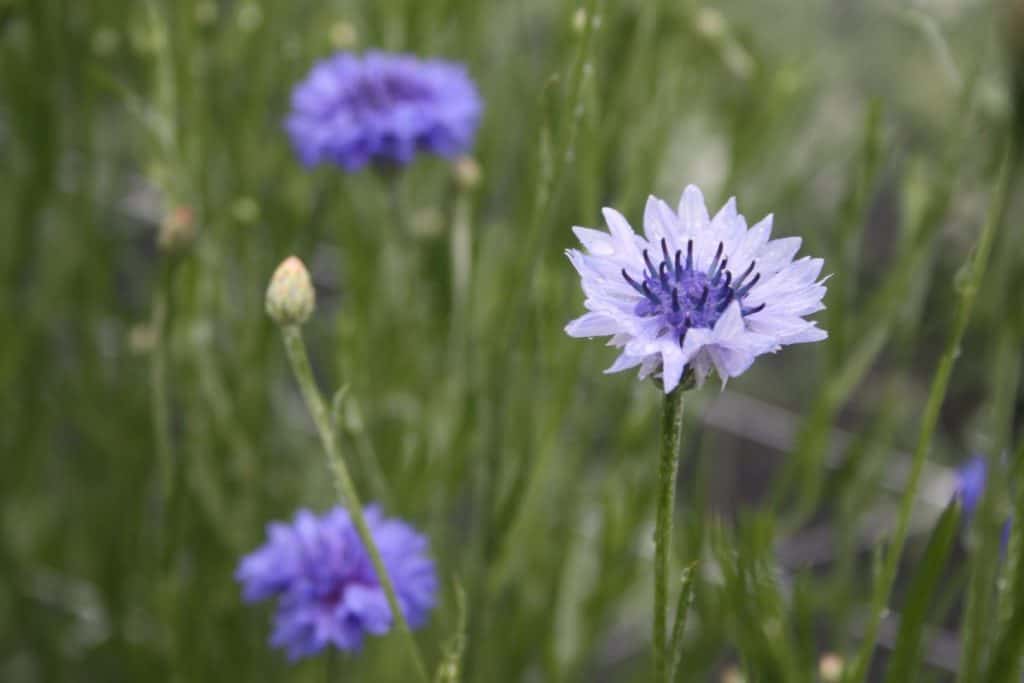
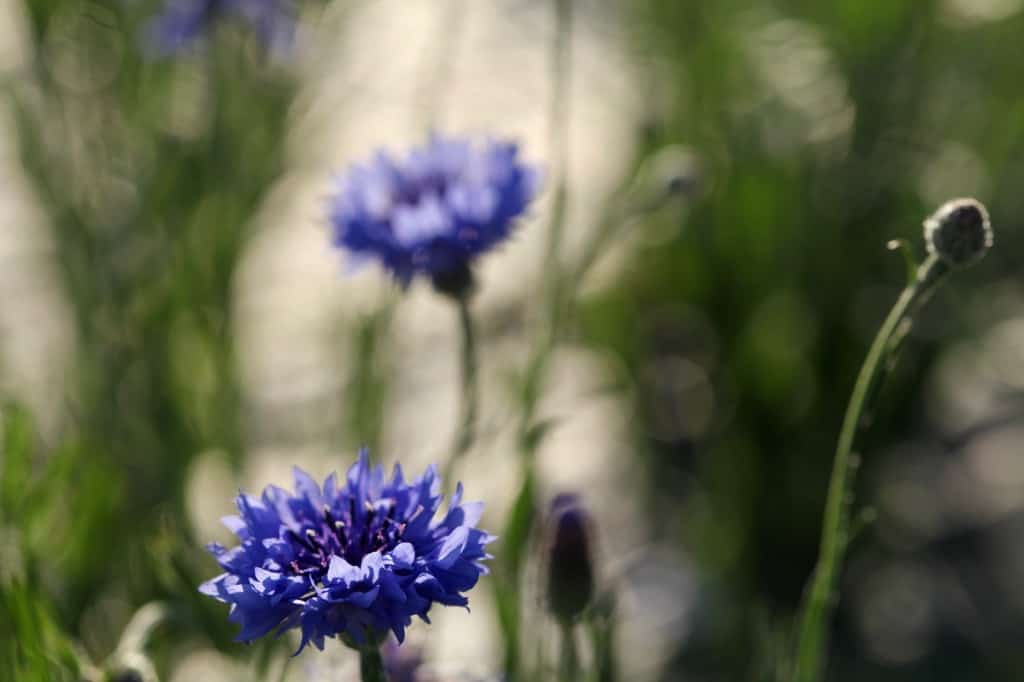
The petals are more wispy and feathery than those of it's annual counterpart. It's easy to differentiate between the two just from the appearance of the blooms.
Perennial bachelor button blooms are whimsical and soft in their appearance. We love having this plant in our perennial border.
Compare the photo above of Centaurea Cyanus to the one directly below of Centaurea Montana. Can you see the difference in the petal shape and airiness? Montana's petals are further apart and wispy.
Learn more about the perennial nature of Bachelor buttons, and the plant's lifespan here.
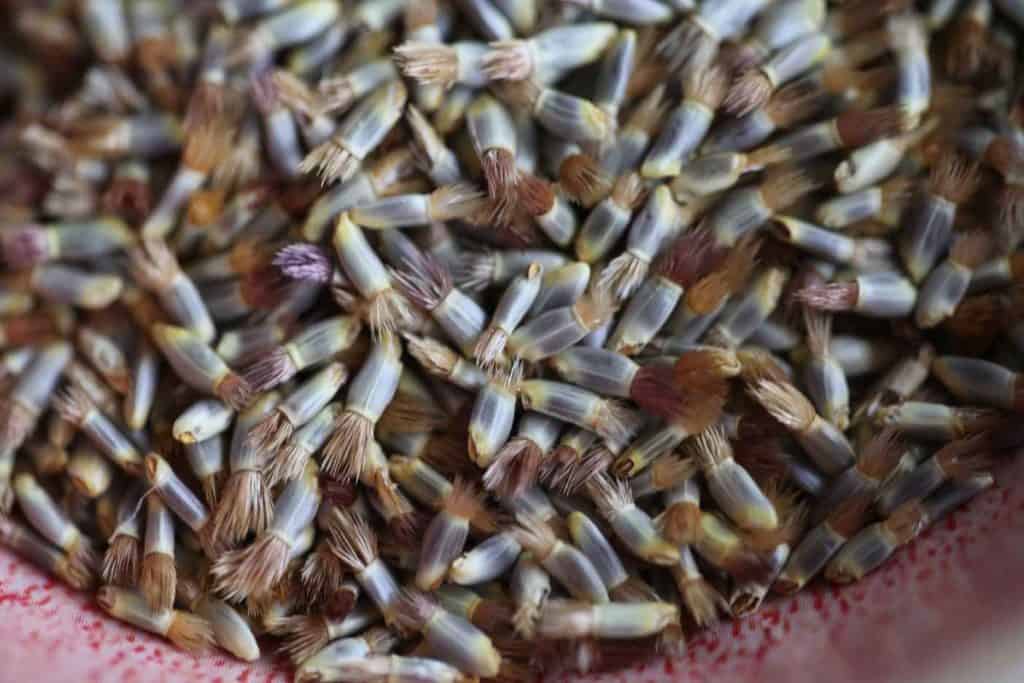
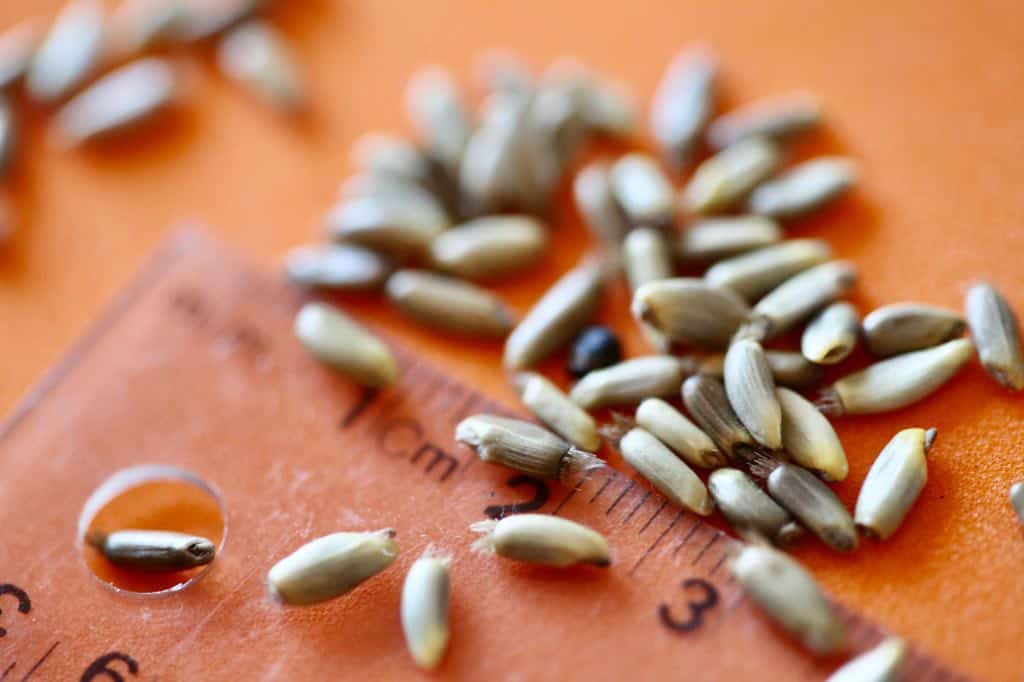
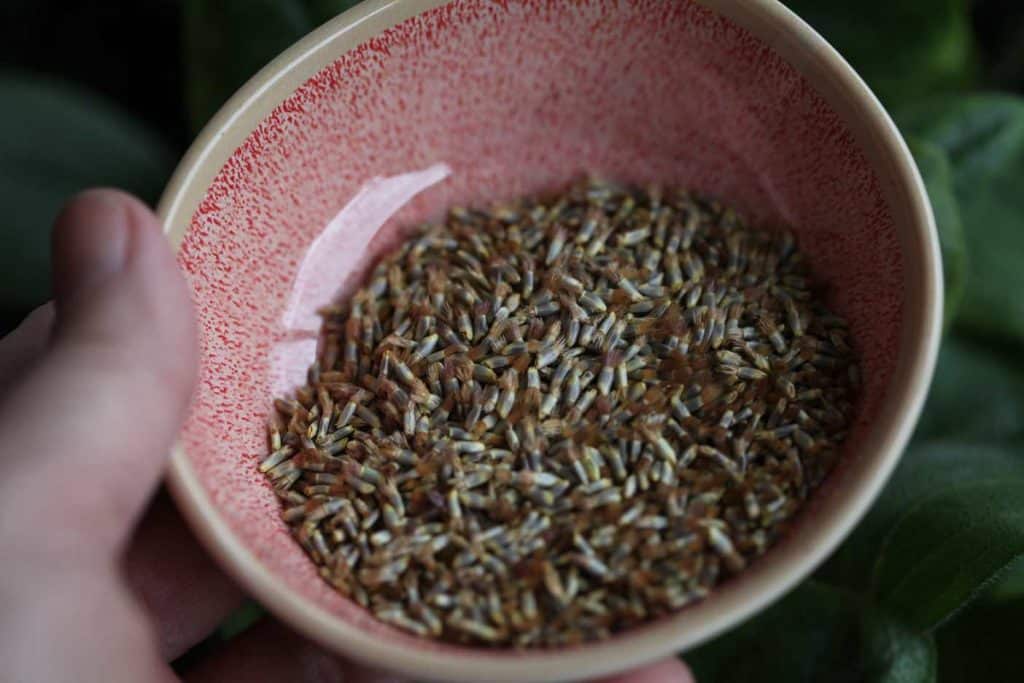
What Do Bachelor Button Seeds Look Like?
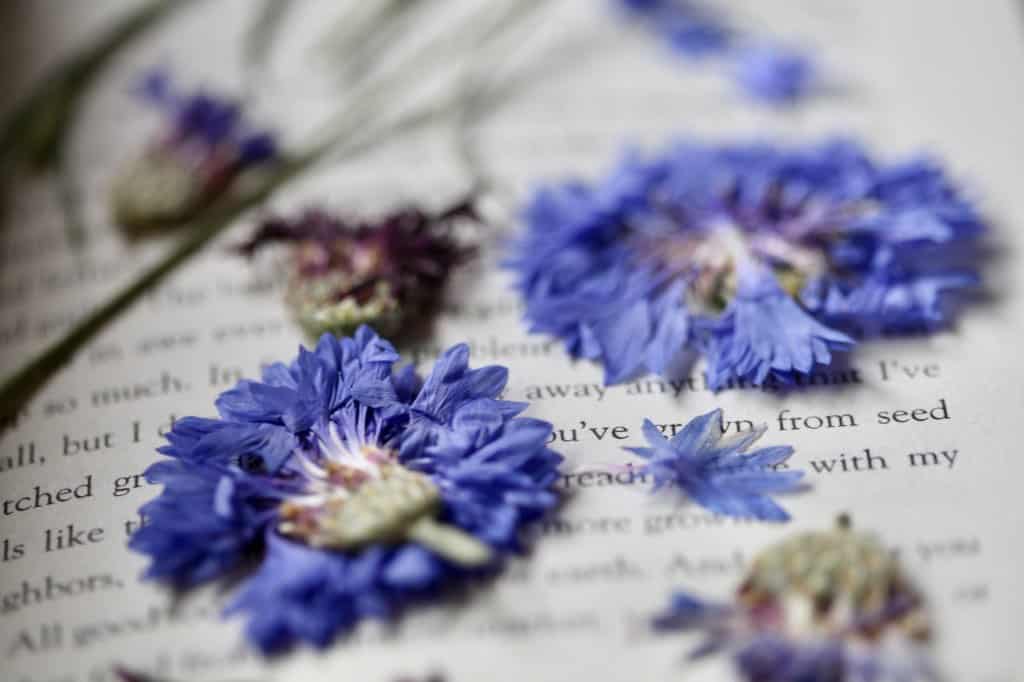
Both annual and perennial Bachelor button seeds are approximately 0.5 cm long.
The seeds are beige in color, and have small hairlike projections on one end, which resemble tiny paintbrushes.
Perennial Bachelor button seeds look less like tiny paint brushes than their annual counterparts.
Learn how to harvest and store Bachelor button seeds from your own plants here!
How To Grow Bachelor Buttons From Seed
Are Bachelor Buttons Easy To Grow?
Both annual and perennial Bachelor Buttons are very easy to grow.
The seeds are easy to germinate and the plants do not require a lot of care. They are great plants to grow for the beginning gardener.
The seeds can be directly sown straight into the garden, winter sown, or planted indoors in late winter or early spring, and transplanted outside when the weather warms up.
Direct Sowing
Bachelor button seeds can be sown in the fall or in the springtime.
Fall sowing
Bachelor buttons flowers are hardy annuals and in zones 5 and up they can be direct sown into the garden in fall.
To do this, direct sow into the garden, into a weed free prepared garden bed. Cover lightly with soil.
The seeds will overwinter well in the garden, since they are hardy annuals, and will benefit from the stratification process which will occur over the winter months.
This method of growing will produce large and healthy plants the following spring.
Spring Sowing
Bachelor buttons can also be direct sown in early spring, in any zone.
These blooms may not be as large as those sown in the fall initially, however they will catch up and bloom well, later on in the summer.
Sow into a prepared garden bed, and cover the seeds lightly with the soil, as they require darkness for germination.
You can also sow the seeds directly into containers, and have a summer container full of your favorite bachelor button flowers throughout the summer months. Make sure that there are drainage holes in your containers for good drainage of the moisture.
From my experience, the flowers will grow best in the garden, however will also grow in containers with good depth.
Winter Sowing
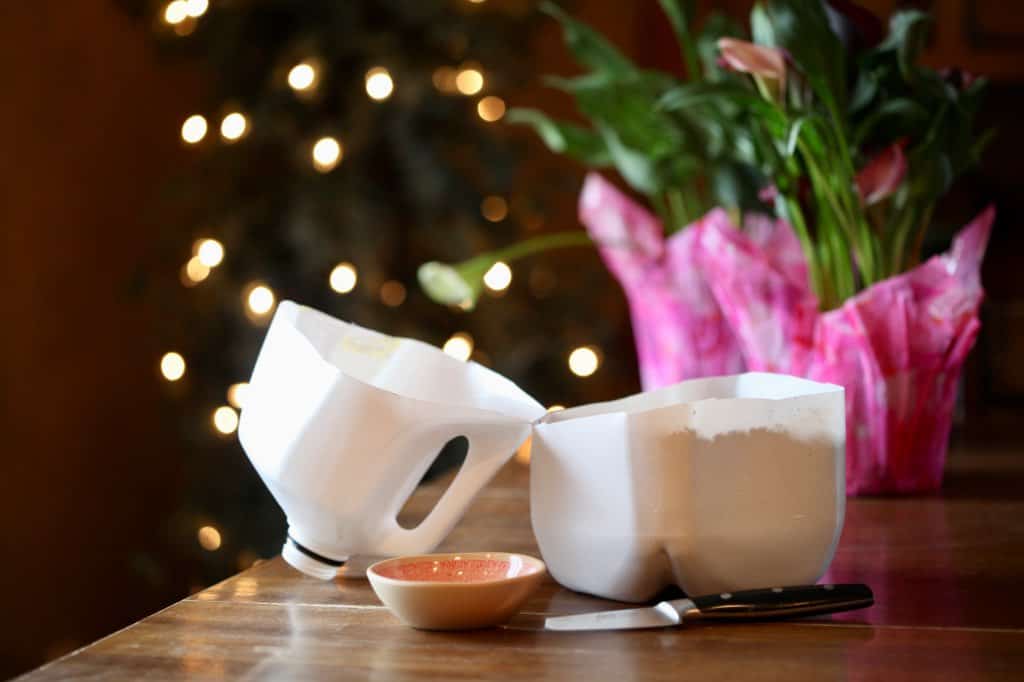
Bachelor buttons are also perfect for winter sowing in milk jugs.
These plants are hardy annuals, and they are excellent candidates for winter sowing.
To Winter Sow The Seeds:
- Cut a recycled milk jug in half, leaving a hinge between the upper and lower portions.
- Make drainage holes in the bottom of the container.
- Fill the bottom half with a soilless medium, and moisten the medium.
- Sow seeds onto the top of the medium, and cover with a fine layer of more of the mix or vermiculite.
- Place a label on the inside of the jug.
- Tape the jug together with duct tape, and label the outside of the jug with a permanent market.
- Leave the cap off, and place the little mini jug greenhouse outside in winter, leaving it in a secure area until spring.
- At just the right time for your growing zone, the seeds will germinate and begin to grow.
- Harden off and transplant into the garden when the weather warms up.
- When the seedlings begin to grow, they will tolerate a light freeze in early spring.
Sowing Seeds Indoors
We start our seeds indoors in late winter or early spring, to give them a head start on the growing season.
The seeds are started indoors four to six weeks before the last frost, and the plants are some of the first to be planted out in early spring.
Supplies You Will Need:
- Bachelor button seeds
- a good growing medium, such as a sterile seed starting mix
- vermiculite (optional)
- a cell tray
- heat mat
- grow lights
- shelving
- container for bottom watering
Growing From Seed Indoors
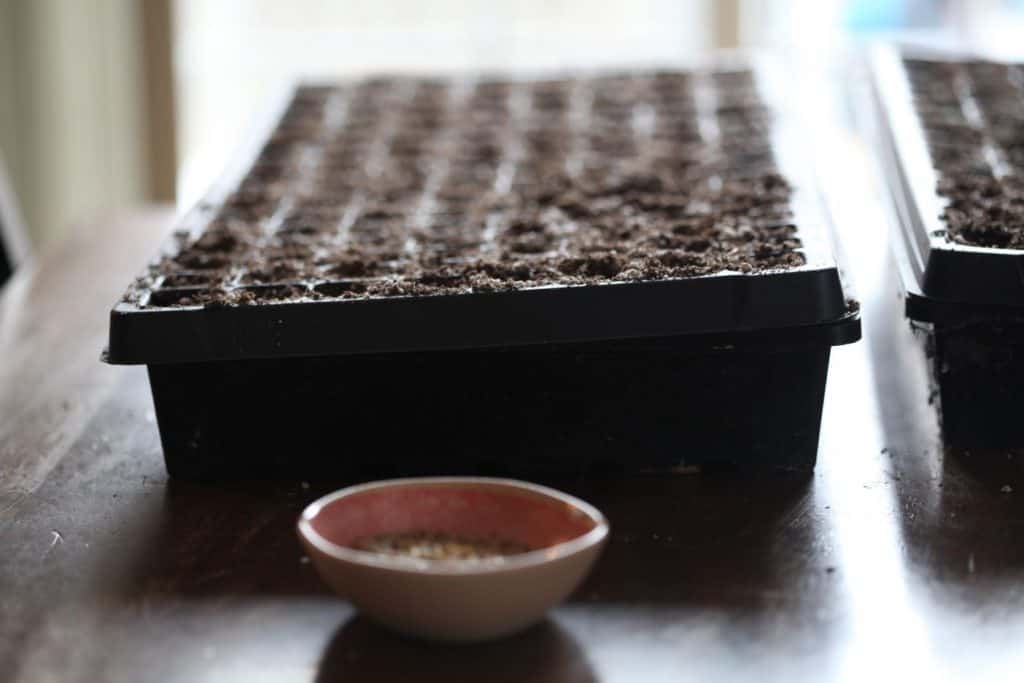
We plant our seeds in cell trays, generally the 128 cells. The plants grow in these trays, until they are ready to be planted out into the garden in spring.
Plant The Tray
- Fill the tray with the potting medium. You can fill them with the dry medium, and bottom water after planting.
- Give the tray a gentle bang on the counter or table to release any air pockets, and refill as needed.
- Make a small indentation on the top of each cell. I usually do this with my finger, but you can also use any object, such as an eraser on a pencil.
- Sow bachelor's button seeds into the small indentations you have just made in each cell. Place one seed into each cell. They should be planted approximately ¼ "deep.
- Cover the top of each cell with some vermiculite. If you do not have this on hand, you can use more of the seed starting mix to cover up the seeds.
- Bachelor buttons require darkness for germination.
Label The Tray
- Make sure to label your tray. We use duct tape and a permanent marker for labelling.
- You can also use masking tape, taped to the end of the tray.
- We also place another label inside a small baggie between the cell tray and the holding tray, as a backup just in case the first label gets washed off.
Water The Tray
- Bottom water the tray, allowing the cells in the tray to become moistened.
Learn more information on bottom watering, and tips for watering your seeds indoors here.
Place On A Heat Mat
- Next we place the tray on a heat mat for 12 hours per day.
- Bottom water the cell tray as needed, and make sure that the soil does not dry out during the germination process.
- Germination generally occurs within 7-14 days.
Place Under Grow Lights
- After 60% of the seeds have germinated they no longer need to remain on the heat. They are then moved off the heat and placed under grow lights.
- The seedlings will require fourteen to sixteen hours of light a day under the grow lights.
- The plants will remain under the grow lights until they are ready to be hardened off and transplanted outside, when the danger of frost has passed in spring. Know your frost dates for best times to transplant outside.
Hardening off
- Harden off the seedlings before planting out, to acclimatize the indoor grown plants to the outdoor environment.
- When the seedlings have finished the hardening off process, they will be ready to plant out into the garden.
- Transplant the bachelor button plants into the garden when the time is right for your growing area, and risk of frost has passed.
Transplanting Bachelor Buttons In Spring
- Bachelor's buttons plants transplant well from the cell trays into the garden in late spring.
- Plant into a prepared planting area which is free of weeds.
- A great trick to get the plugs out of the cell trays without injury to the plants is to use a butter knife to guide them. It's a simple and ingenious tool, and very helpful to guide the plants out of each cell.
- We plant into landscape fabric to reduce our weed pressure, with a spacing of 9 inches between plants.

Bachelor Button Care
Growing Zone
- Annual bachelor buttons will grow in usda plant hardiness zones 2 to 11.
- Perennial bachelor buttons are hardy from zones 3 to 8.
Light Requirements
- Transplant the bachelor buttons into a full sun location in the garden.
- The plant will have best flowering when grown in direct sunlight.
Soil Requirements
- The plants will grow well in any well-drained soil, with medium fertility.
- This is one of the reasons that bachelor buttons grow so well in the cornfields.
Moisture Requirements
- Bachelor buttons benefit from a moist soil when first establishing in the garden. Once established, they become quite drought tolerant, and don't need much water.
- The plant will grow well with about an inch of water per week, although will also respond well to occasional watering.
- Plants grown in containers will require regular watering, and will often wilt in dry conditions.
- Mulch well when grown in containers to help to maintain moisture in the soil.
Deadheading
- Deadhead spent flowers to ensure longer blooming.
- Deadheading allows the plant to redirect energy that it would require for seed production, back into the plant for reblooming and growth.
What's In A Name
Bachelor buttons and Cornflower are common names of Centaurea Cyanus and Montana.
Origin Of The Name Bachelor Buttons
The origin of the name Bachelor Buttons has a unique history.
This name evolved as eligible bachelors went courting their true loves, wearing the bachelor button flowers on their lapels as boutonnieres.
It was believed that if the flowers remained fresh and did not wilt, that their love would be reciprocated.
Hopefully these daring bachelors conditioned their blooms ahead of time, to keep them plump and fresh.
Origin Of The Name Cornflower
Cornflower is also a common name for these plants.
The name originates from the habit of these flowers growing and reseeding themselves in meadows and cornfields. The plants easily reseed, even in cold climates, making beautiful displays in open fields.
The plants are commonly known as cornflowers because of the cornfield location in which they grew.
Origin Of Cornflower Blue
As you may have guessed from the title, this brilliant blue cornflower has also influenced the name of a certain color of blue, known as "cornflower blue".
Cornflower blue is a defined color, in a shade of medium light blue.
Frequently Asked Questions
How Tall Do Bachelor Buttons Grow?
The Bachelor button plant is a fairly tall plant.
Bachelor buttons grow to be approximately three feet high, depending on the conditions in which they are growing.
When Do Bachelor Buttons Bloom?
Annual Bachelor button seeds, sown directly into the garden in fall, or winter sown, will start growing in early spring and will bloom in early summer.
For those grown indoors, bloom time is 65 to 75 days from transplant date into the garden.
Our own bachelor buttons that were started from seed indoors, are planted out in mid May, and will bloom in mid July.
Once annual bachelor buttons start to bloom, the blooming period will continue throughout the growing season, and well into fall.
Perennial Bachelor buttons on the other hand will not bloom until the second year of growth, as is common with most perennials.
In the first year, the young seedlings use their energy for growth and to establish their root system in the garden.
In the second year the young plants will continue to grow and mature, and will produce their first blooms.
Once they begin to bloom, perennial bachelor buttons will bloom in late spring to early summer, for a period of approximately three weeks.
Do Bachelor Buttons Reseed?
Bachelor Buttons do reseed, and we always have volunteer plants of this sweet flower.
If you want to prevent reseeding, deadhead spent blooms before they go to seed.
Do Bees Like Bachelor Buttons?
Bees and other pollinators, including butterflies love this flower.
Planting Bachelor buttons is a great way to attract pollinators and beneficial insects to your garden.
Are Bachelor Buttons Good Cut flowers?
Bachelor Buttons are great cut flowers. They are used as accent flowers rather than focal flowers, and offer a special punch of blue in just the right places.
You can also dry the flowers to use them in dried floral arrangements.
How To Cut For The Vase.
- Harvesting Bachelor Buttons is not always straight forward.
- Once you know the process however, it becomes quite easy.
- Harvest when the blooms are ¼ to ½ open for longer vase life.
- Follow the stem with your hand to the base of the plant, and make your cut there. Cut off most side branches on the stem, leaving only a few branches in place.
- This technique will help reduce the extra foliage and therefore reduce the hydration needs of the stem.
- It's important to condition the flowers and hydrate them before using in bouquets.
Are Bachelor Buttons Edible?
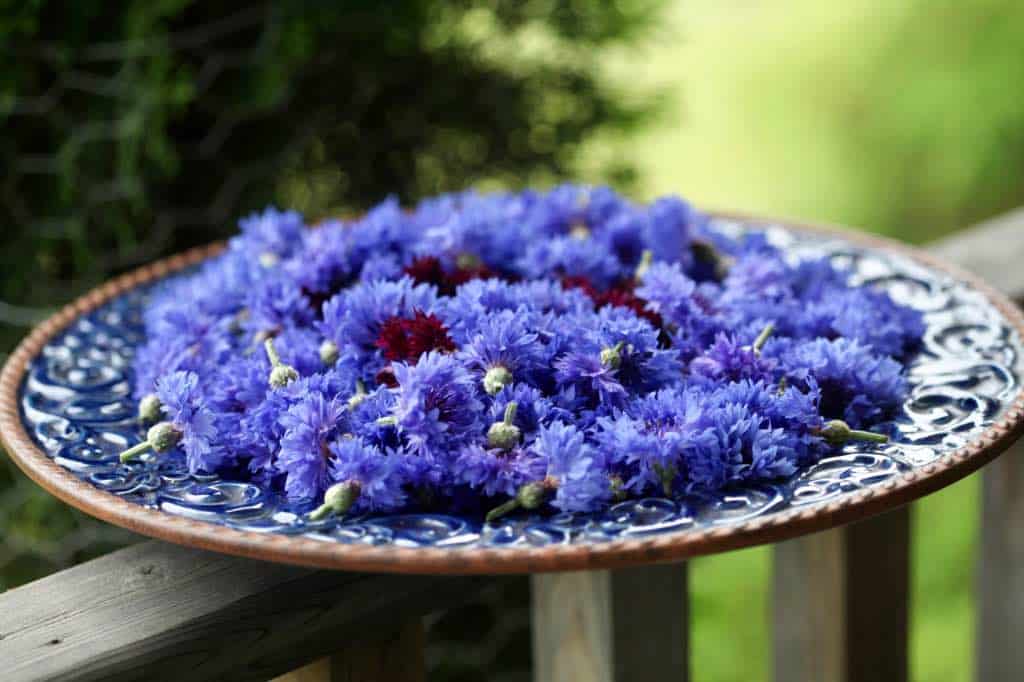
Annual bachelor buttons are edible flowers.
The bright blue petals can be used as a garnish for salads, and to decorate your baking.
The soft blue color adds a whimsical touch to any culinary project, and are especially colorful when combined with other edible wildflower petals.
Conclusion
Bachelor buttons are easy to care for flowers, and are great plants for cottage gardens.
A wonderful plant for the bee and butterfly garden, this plant will be buzzing with beneficial insects in your garden for sure.
The annual bachelor buttons are also edible plants, and have culinary uses. Use the bright petals to garnish your baking or fresh salads, for a beautiful touch.
Both annual and perennial bachelor buttons make excellent cut flowers for both dried and fresh arrangements. These are great plants to choose for your cutting garden.
These cool season annuals and perennials are will always have a place in our garden, whether planted, or grown as volunteer plants. We look forward to growing them for many years to come.
Have you ever tried to grow bachelor buttons in your garden? Be sure to leave a comment below to share your experience!
Other Posts You May Like:
PIN IT FOR LATER!


Leave a Reply