
Have you ever considered growing clematis from seed? It can be a fun and exciting gardening project with a rewarding outcome and brand new clematis plants. Learn how to grow clematis from seed, and enjoy new and unique clematis hybrids in your own garden.
Growing a clematis plant from seed will result in a different plant than the parent plant, if you are growing from hybrid seeds. The resulting seedlings will not be exactly the same as the parent, but rather can have different characteristics.
They may look the same in some ways, but different in others. For example they may have a different size, shape, or colour tone.
If grown from species plants however, the seedlings will likely be very similar to the parent plant.
I ordered clematis seed several years ago from an online store. The seeds germinated easily and successfully, and I was thrilled to have tiny clematis seedlings.
Due to a planting backlog, those clematis seedlings perished before getting planted out into the garden. It was pretty disappointing.
So this season I gathered some seeds from our own clematis vines, with a plan to germinate them throughout the winter.
I love growing new hybrids, and have had wonderful success hybridizing daylilies.
Although I did not do the actual dabbing of pollen on these clematis, I am hoping that the seeds will contain a variety of genetic material and hopefully produce something new and unique.
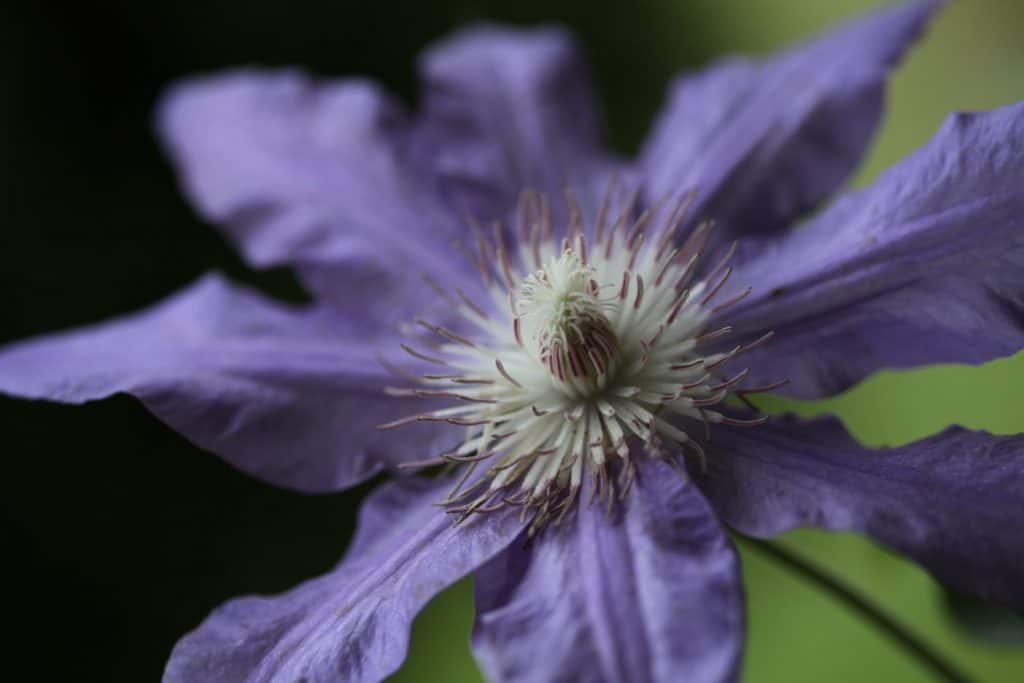
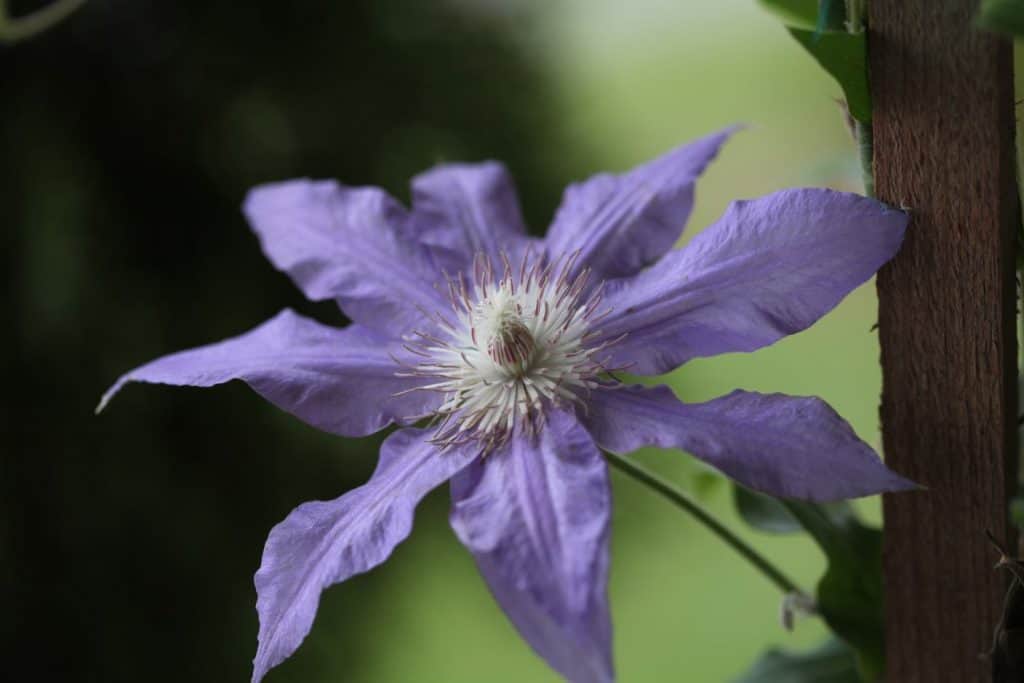
We have two clematis growing in our garden, Jackmanii Clematis and Countess of Lovelace Clematis. With any luck the two will have cross pollinated.
There is also the chance of self pollination to produce seed, which is always a great option as well.
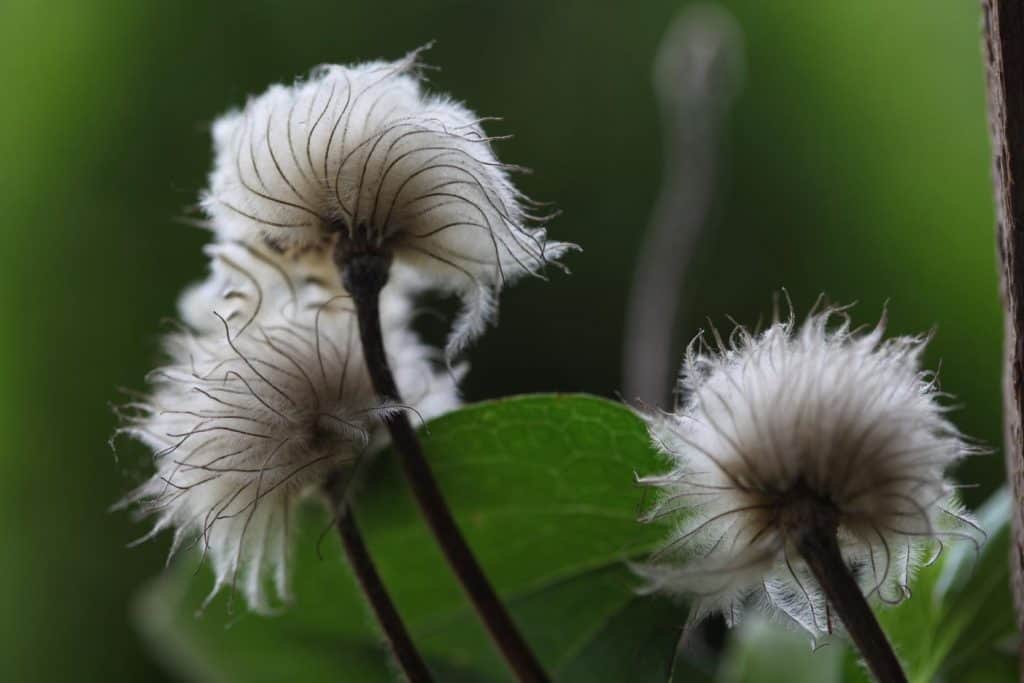
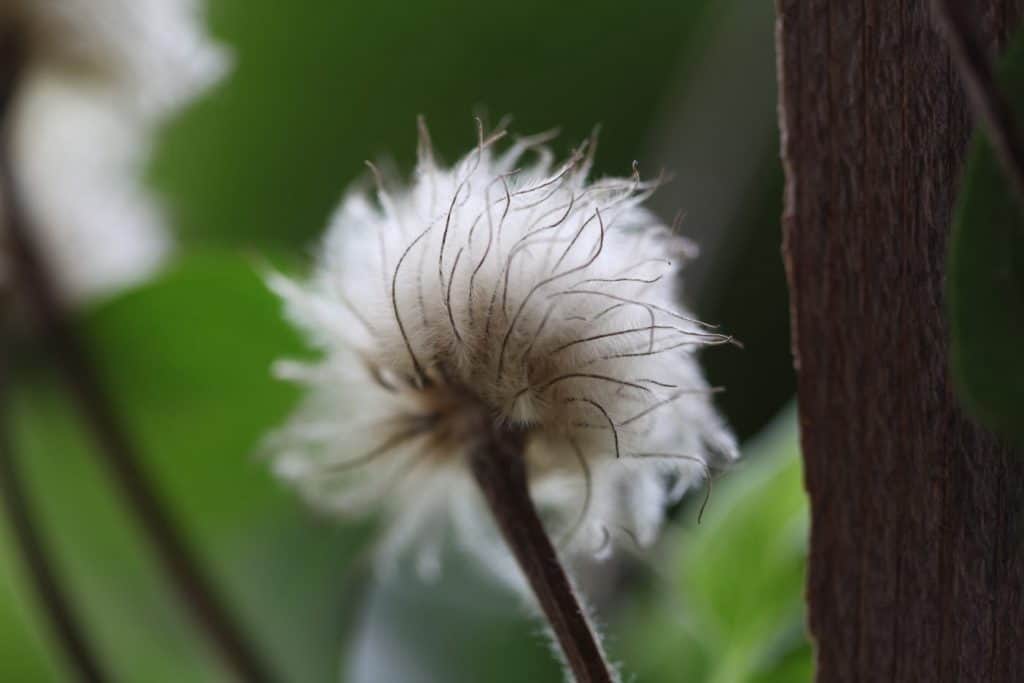
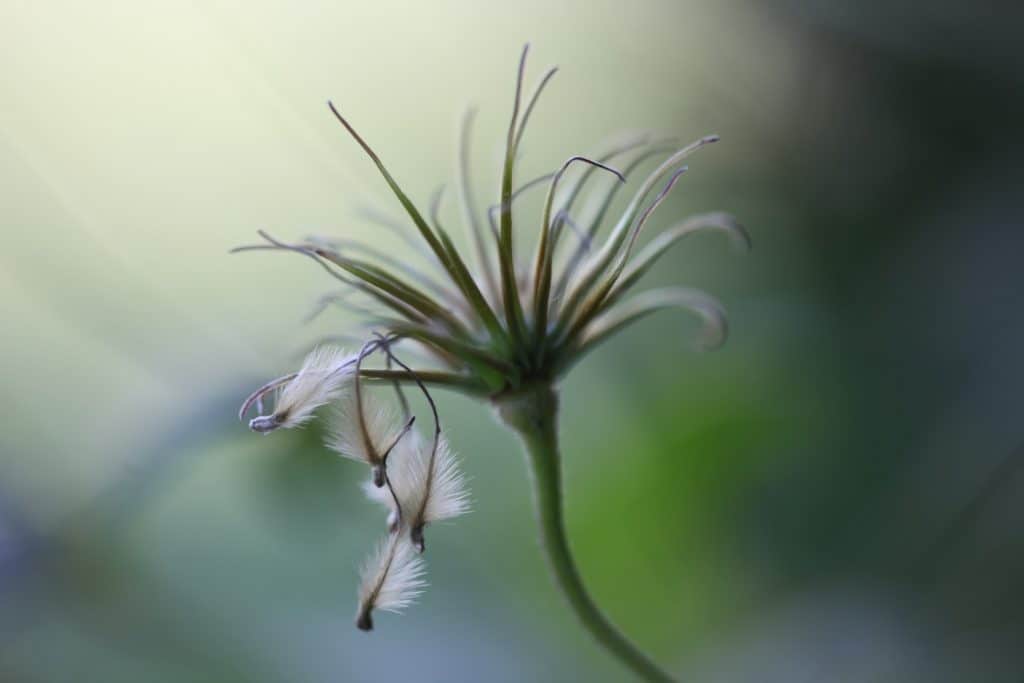
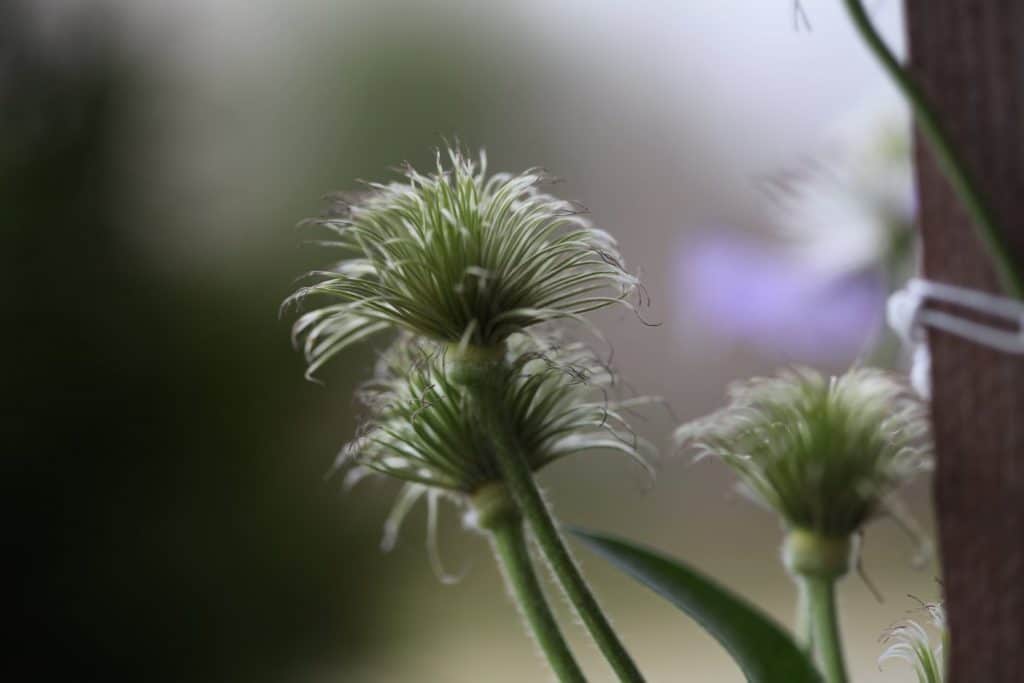
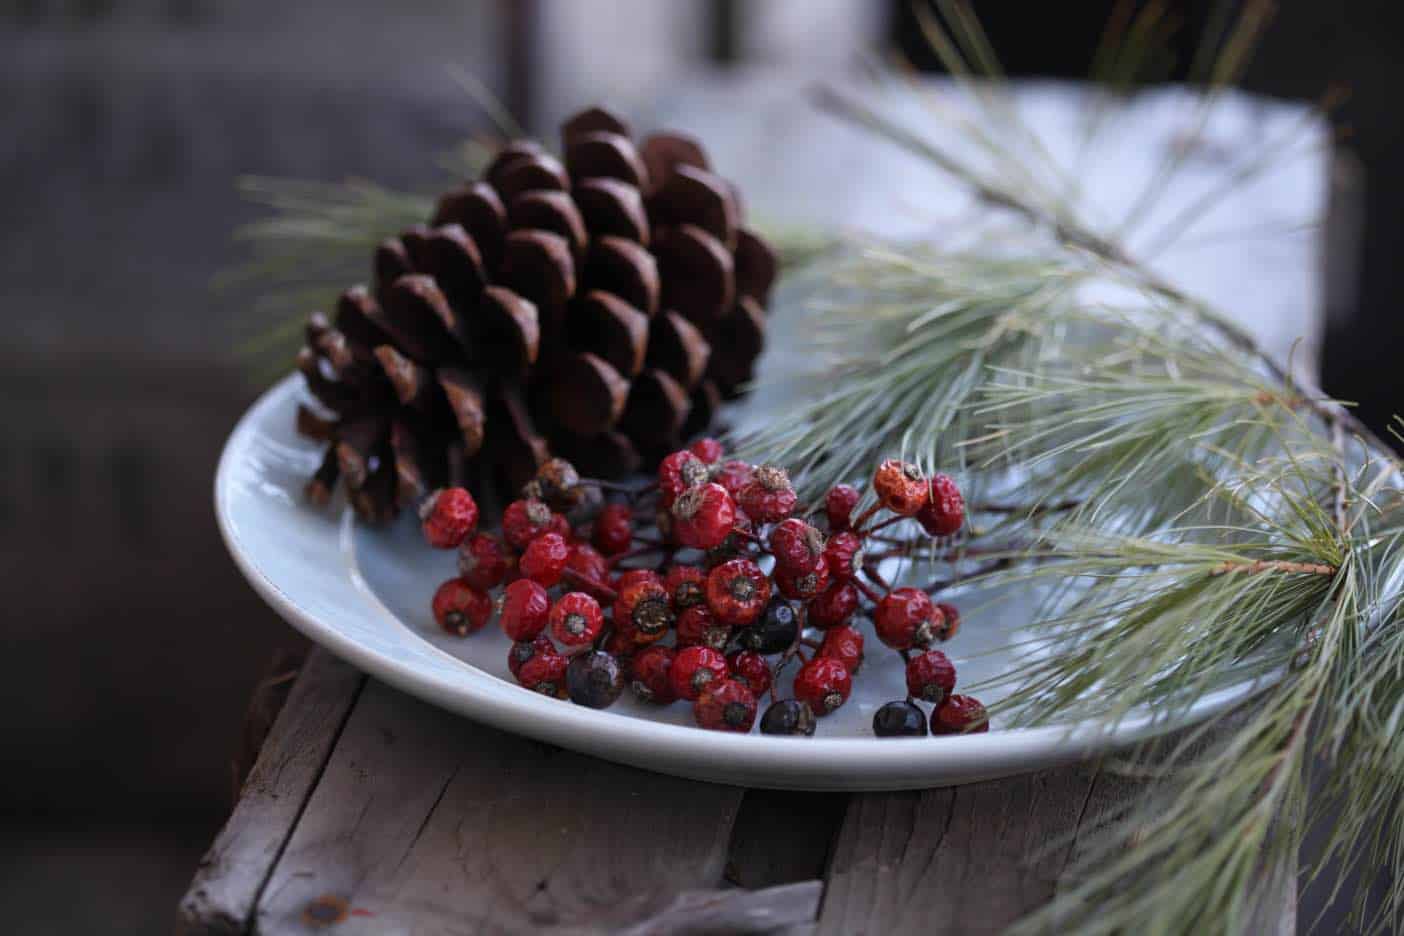
Clematis Seed Heads
Clematis seed heads will vary in their appearance, depending on the cultivar and stage of maturity. When fully ripe these seed heads are soft and fluffy in appearance, and consist of swirls of multiple feathery seed pods with attached tails. Viable seeds will have long tails that protrude up past this cottony ball. Once fully ripened, the seeds and feathery tails separate from the seed head and are dispersed in the breeze to germinate in a new location.
Interestingly the common name for Traveller's joy clematis is Old Man's Beard due to the resemblance of the seed head to an old man's beard.
It's certainly easy to understand this comparison.
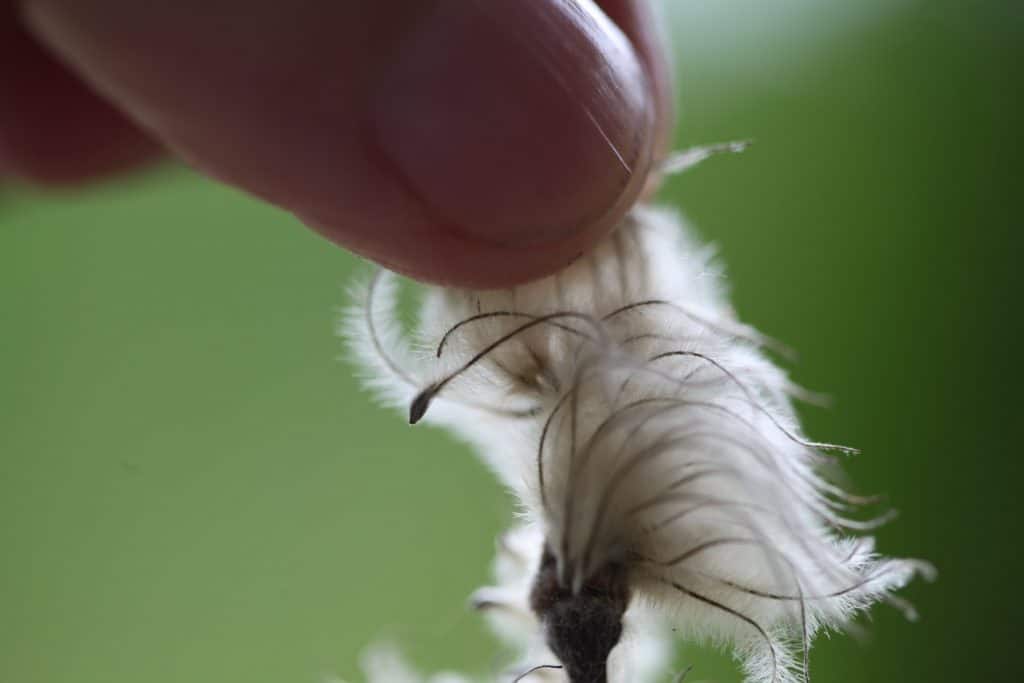
What Does A Clematis Seed Pod Look Like?
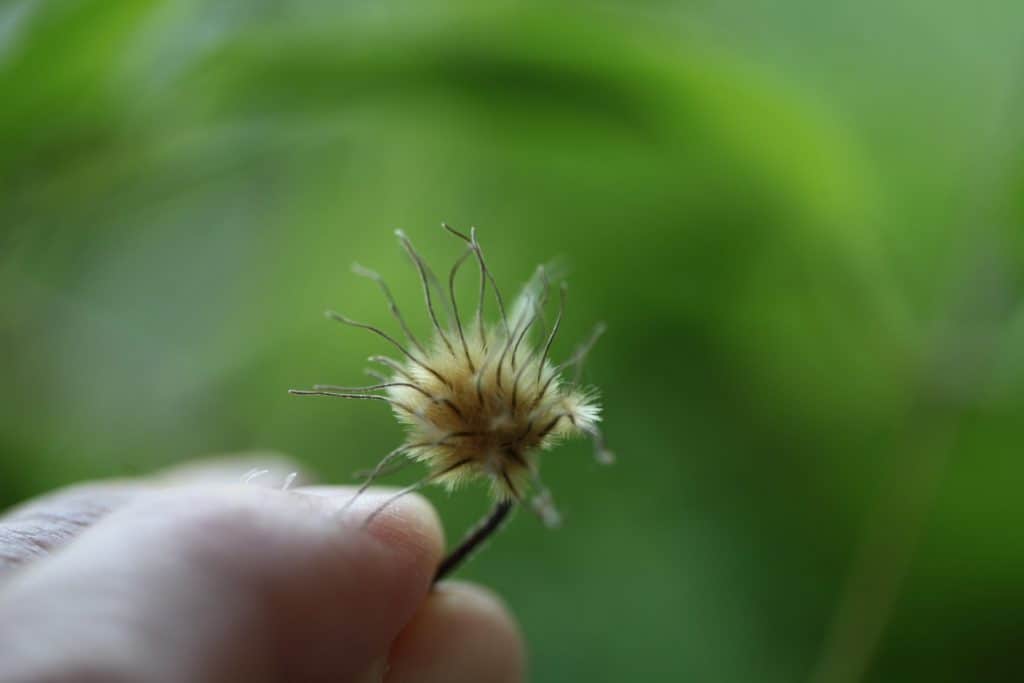
Clematis seed pods consist of the seed itself, also known as the achene. Most often there will be a feathery tail attached to the seed pod. There are however some varieties of clematis that do not have a tail attached.
What Do Clematis Seeds Look Like?
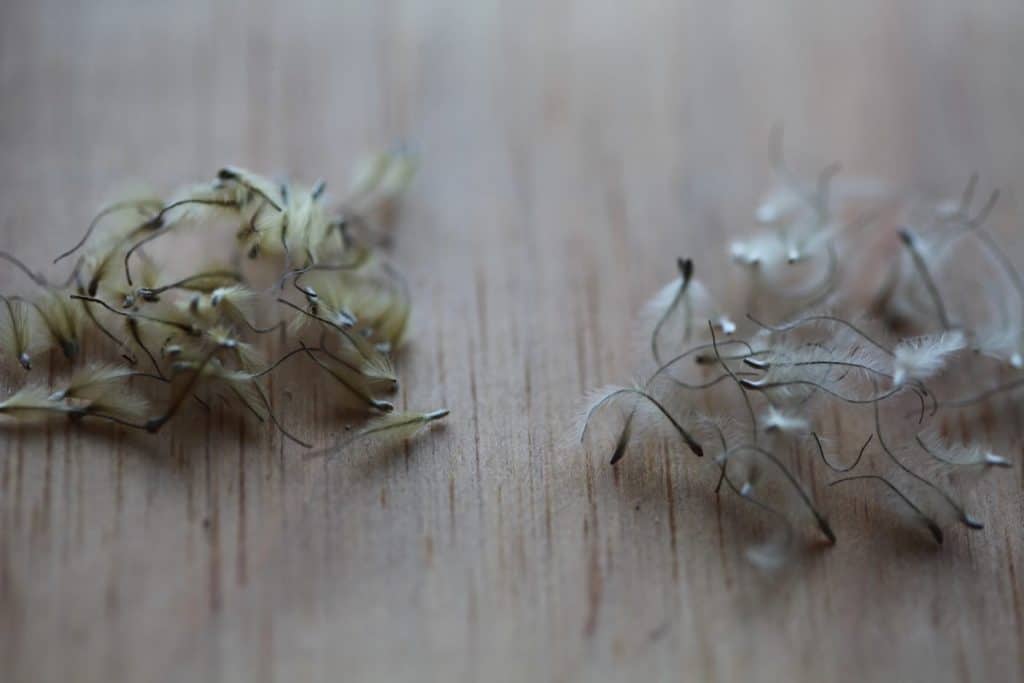
Not all of the potential seeds in the seed heads will be viable.
Some are just duds and have not been fertilized, although they still will have a feathery tail. They are often smaller and lighter in color than viable seeds.
Viable mature clematis seeds will be full and brown.
The tails of the viable seeds are longer, and the seed pods are firm and generally darker than the duds or non fertilized seeds.
How Do You Harvest Clematis Seeds?
When they are fully mature, the clematis seed pods separate easily from the seed heads, with just a gentle touch or slight breeze.
It's important to harvest when fully mature, however it's also important to catch those seeds before you lose them in the wind.
One way to save the seeds from escaping before harvest is to cover the seed head with an organza bag while it is maturing. That way if the seed pods mature before you get to them, they will fall into the bag when they break away from the seed head at maturity.
I was fortunate enough to catch the mature seed pods from both of my clematis before they blew away.
After harvesting the seed, place in a dry container or envelope to store until you are ready to plant.
Is It Hard To Grow Clematis From Seed?
Clematis can be easy to grow, and easy to germinate, depending on the cultivar.
There is much debate and difference in information on germination of clematis seeds.
Some clematis cultivars have seeds which can take long periods to germinate, with time frames of six months to up to three years, so patience is definitely important with some of these varieties.
Other clematis cultivars have a history of readily self seeding, as is the case of Clematis tangutica.
I'm pretty sure that those first clematis seeds that I so easily germinated were those of Clematis tangutica. They germinated well within a three week period.
If you find that you are having difficulty with germinating your clematis seed, place some seed in a baggie with moist vermiculite, and then place in the fridge for thirty days. This can help to stratify the seeds, which can help with the germination process.
After this period of stratification, you can then plant the seeds.
Not all clematis seeds require stratification however.
This winter I plan to plant some clematis seeds in a milk jug and will place them outside for the duration of the winter.
This winter sowing process can be highly successful and will provide stratification. I can then compare germination results to those that were planted without this technique.
How To Grow Clematis From Seed
We started our clematis from seed by sowing indoors, just as we do with most other flower seeds that we sow.
To start clematis from seed, first you will need to gather up your supplies.
Supplies Needed:
- mature clematis seeds
- a good seed starting mix
- container to plant in ( a deep container is ideal, as clematis has a long taproot) - I used a cell tray and will pot up the seedlings into bigger pots when they are bigger
- a heat mat
- a light source
- container for watering
Sorting The Clematis Seed
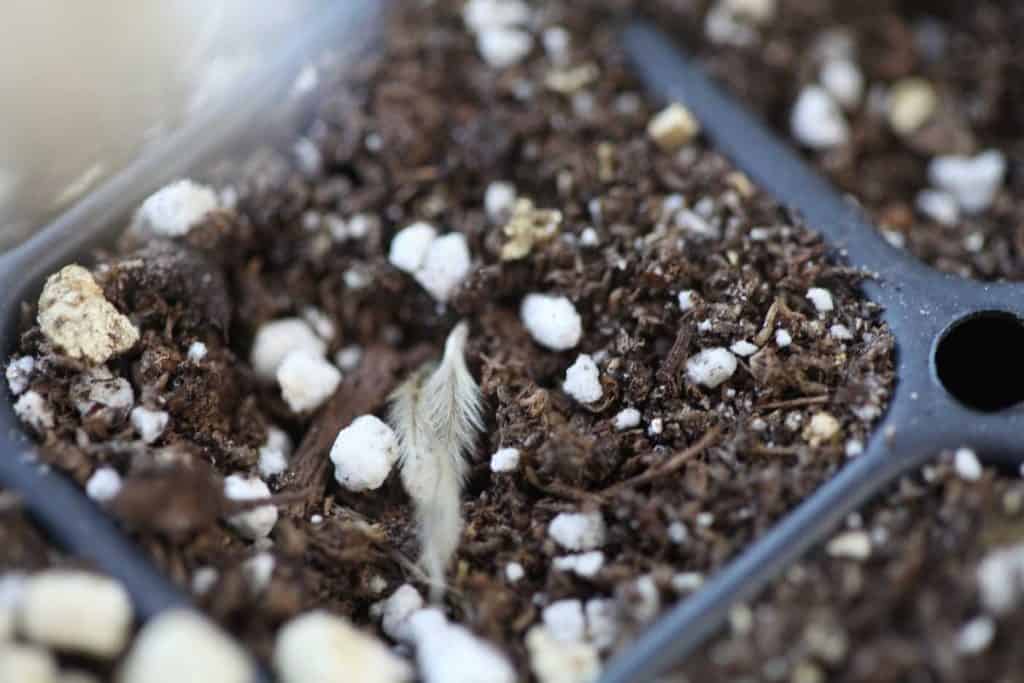
If you purchase clematis seed, you will most likely receive just the seed itself without the feathery tail. If you have harvested the seed yourself, the feathery tail will be intact ( remember however that the seed of some clematis cultivars will not have a tail ).
You can remove the tail before planting, or just leave it in place.
I left it in place and planted the seed with the intact tail.
Make sure that you chose the largest and plumpest seeds to plant, and avoid any duds, which will not germinate if planted.
Directions For Planting:
- Fill your chosen container with the seed starting mix.
- If you are using a cell tray, make a little indent in the middle of each cell in which to drop a seed. I often just use my finger to make a little hole, although any small object will work just as well, such as the eraser end of a pencil.
- If using any other type of container, you can use the same technique.
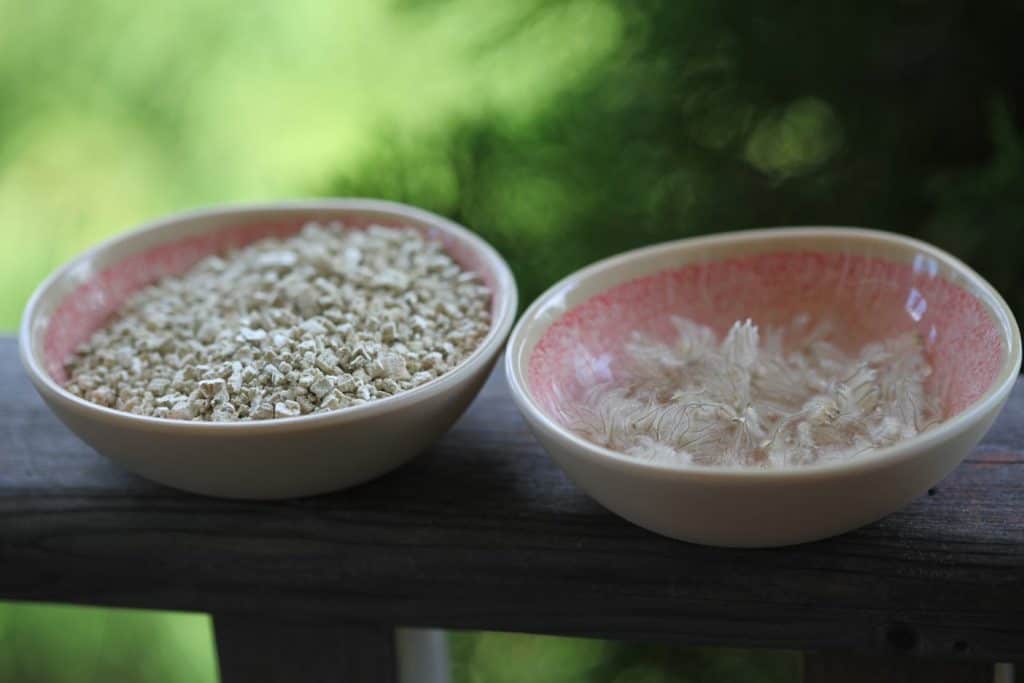
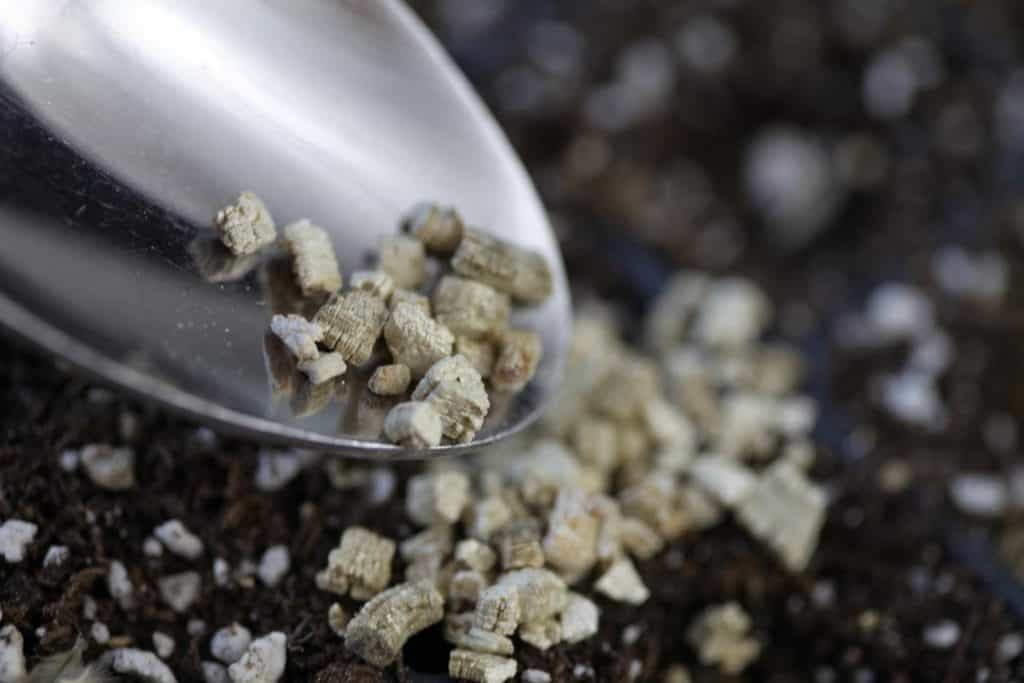
- Place the clematis seeds in the holes and cover. You can use the seed starting mix or vermiculite to cover the seeds.
- I usually use vermiculite, as it is very useful in helping to keep the moisture in the soil, and it also helps to prevent damping off.
- Moisten the soil, and keep moist until germination occurs. If using a cell tray, bottom watering is a fabulous way to keep the tray watered without disturbing the seeds.
- It is very important to keep the seed starting mix moist while the seeds are germinating. If left to dry out completely while the seeds have started to germinate, the seeds will most likely perish.
- Place the cell tray on a heat mat, which can help the seeds to germinate.
- Light can also aide in germination, so consider placing a grow light above the cell tray on the heat mat.
- Most often I don't place seedling cell trays under the grow lights until they have germinated by 60%. For clematis however it seems that the time frame may be somewhat more prolonged, and I didn't want to keep the already germinated seedlings in the dark for a prolonged period.
How Do You Germinate Clematis Seeds
For successful germination of clematis seed you will need to plant them in a good seed starting mix which is sterile and free of pathogens. Moistening the soil will initiate the germination process, and providing light will also aide the process. Some clematis seed will also benefit from a period of cold stratification, although this is not always necessary.
I found this article to be a helpful resource for considerations in the germination of clematis seed. The author studied various factors in germinating different cultivars of clematis seed, such as stratification, removal of tails, provision of warmth, provision of darkness and more.
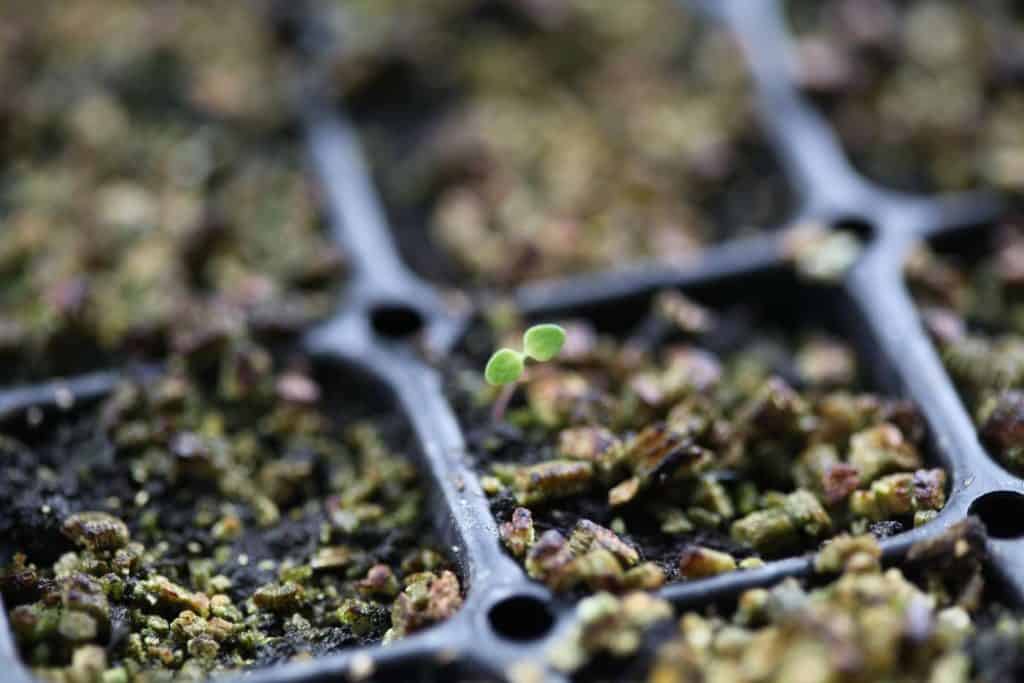
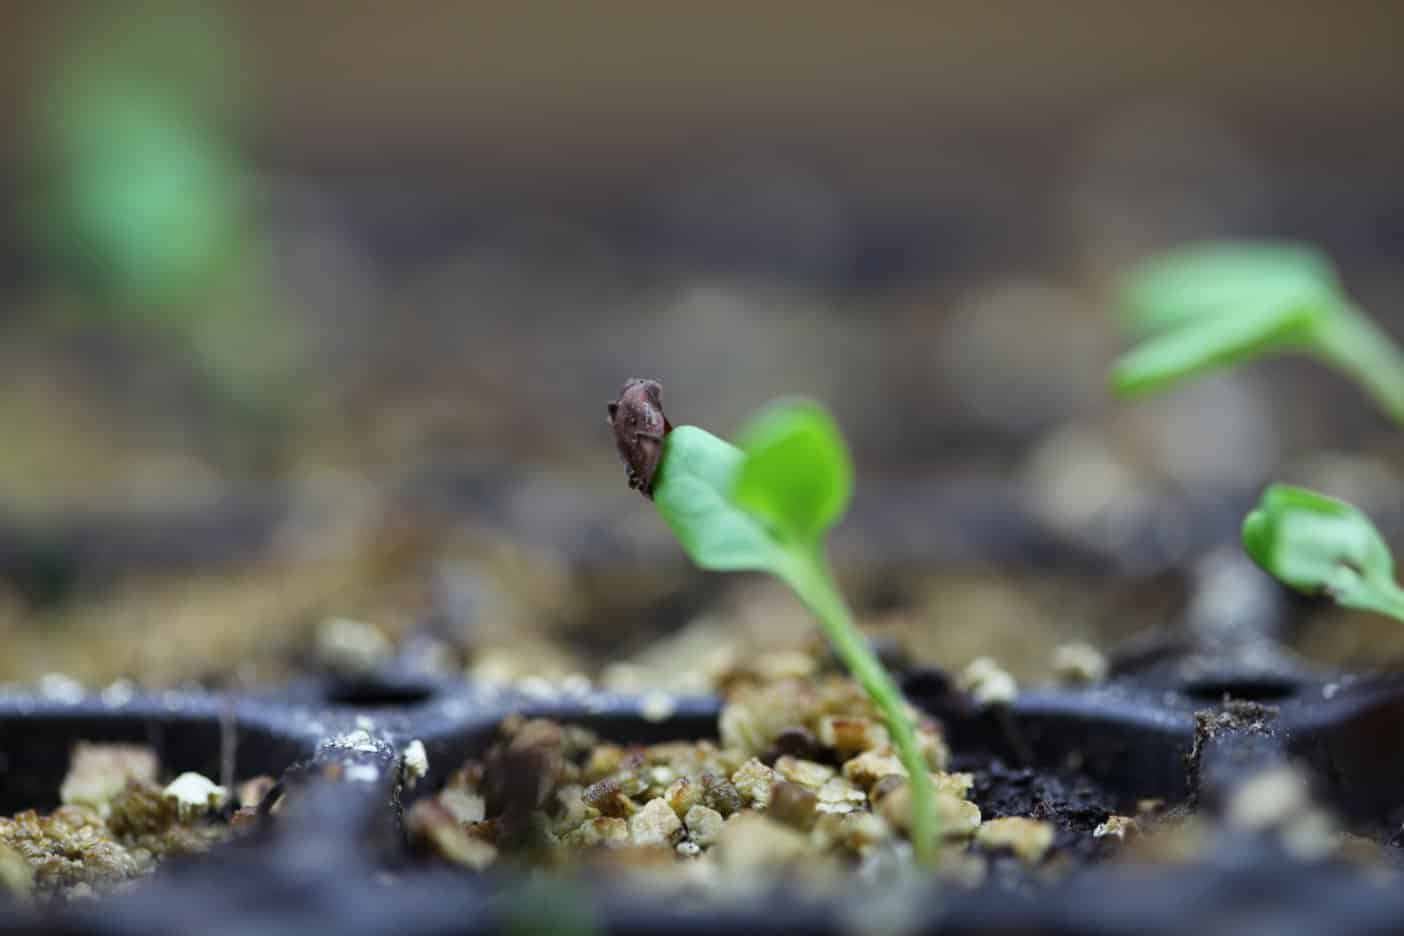
I planted Countess of Lovelace clematis seeds at the end of August. The seeds were not stratified. The tails remained intact.
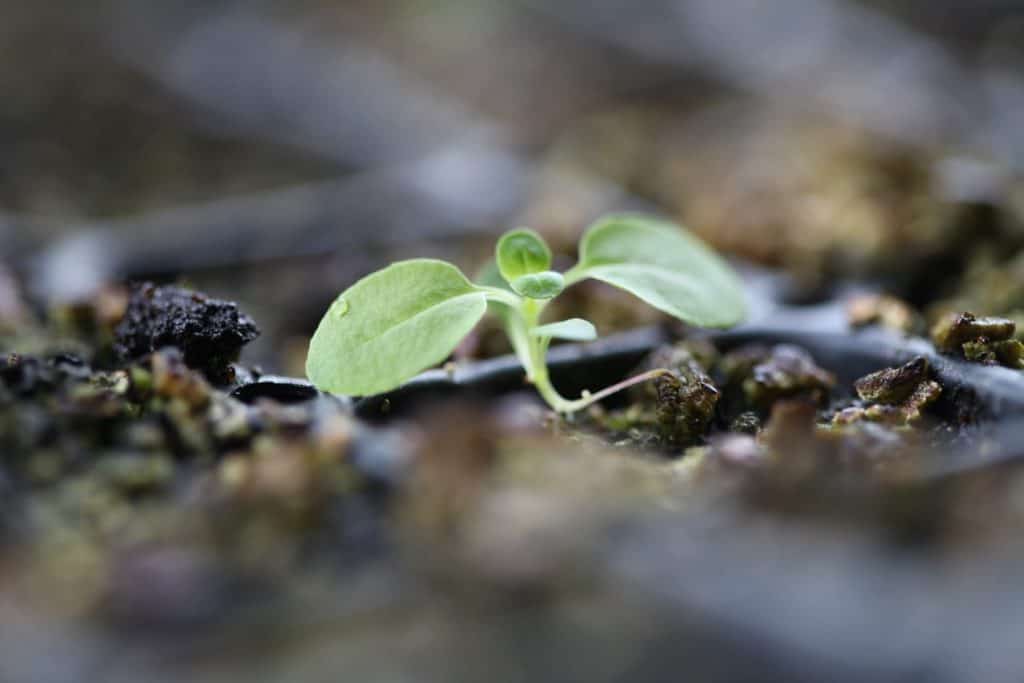
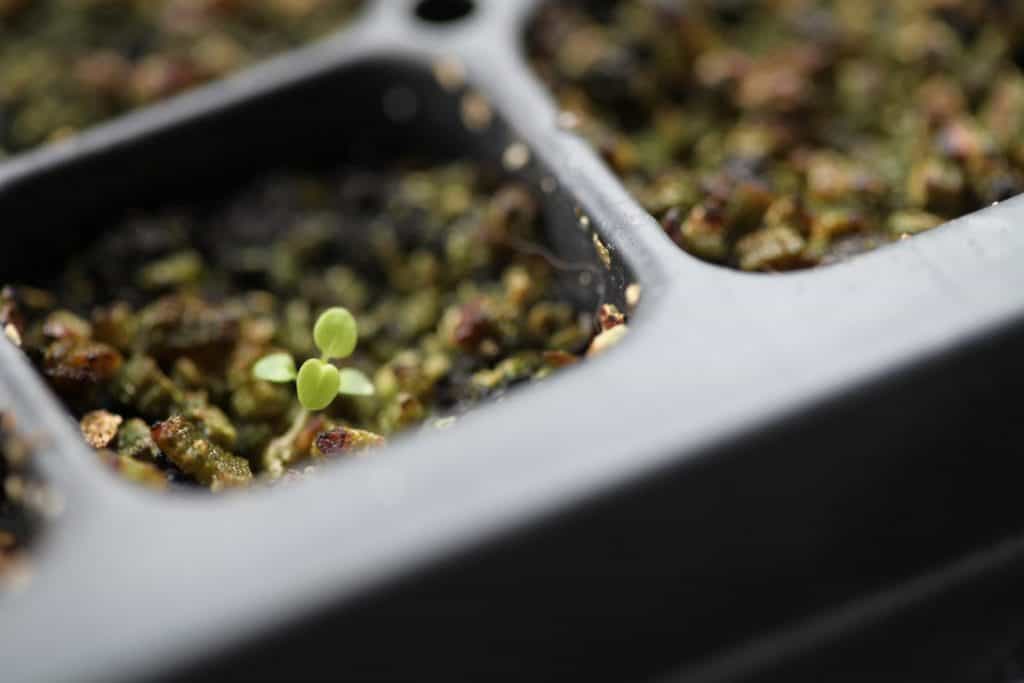
Within three weeks I had six tiny seedlings using the above techniques.
I am hopeful that more will germinate over the next few months.
Some clematis seed can take quite long to germinate, with some taking up to three years.
As the tiny seedlings grow they will be removed from the cell tray and potted up into a pot of their own to grow on.
How Long Does It Take To Grow Clematis From Seed
It may take up to three years to germinate some clematis seed, although some others can germinate within ten to twenty days.
Species clematis can germinate more quickly than some of the larger flowered hybrid clematis.
Once the clematis has germinated and started to grow, it will take some time for these tiny seedlings to grow and bloom. As with most perennials, it can take two to three years to grow clematis from seed to achieve maturity and blooming size.
Planting Clematis Seedlings
- Clematis seedlings should be planted out into the garden when the risk of all frost has passed.
- Make sure to harden off the seedlings gradually to the outdoor environment to acclimatize them before transplanting out.
- Choose a sunny spot with well drained neutral soil. Clematis will tolerate some shade, however these plants need at least six hours of sunlight per day.
- Dig a planting hole and amend the soil with some rich garden compost.
- Place a support near the planting hole so that the vine can attach as it grows. You can place a stake close to the planting hole to give some support until the plant gets larger.
- Attach the seedling gently to the support as it grows. Using soft twine will help prevent damage to the vine.
- Take care when transplanting the seedling so as not to damage any of the root system.
- Water in well, and keep moist while the plant is getting established into the garden.
- It's a good idea to mulch around the base of any clematis plants to help keep the roots cool.
How Fast Does Clematis Grow
Rate of growth of each clematis plant is dependent on a number of factors, such as the cultivar itself and the growing conditions in which it is grown.
Some cultivars will grow up to three metres in one growing season once fully established, such as the Jackmanii clematis.
Ideal growing conditions for clematis include a sunny location with at least six hours of sunlight per day, neutral well drained and moist soil, along with compost fertilizer added seasonally.
Your new clematis seedlings will be unique plants.
Provide them with their ideal spot and they will reward you with their maximum growth.
Growing any plant from seed can be lots of fun.
Growing unique hybrids can be even more so, as you never know exactly what you will be getting, and sometimes it can be such a spectacular surprise!
Have you tried to grow clematis from seed? Be sure to leave a comment below to share your experience!
OTHER POSTS YOU MAY LIKE:
See the Web Story on Growing Clematis From Seed To Bloom!
PIN IT FOR LATER!


Leave a Reply