
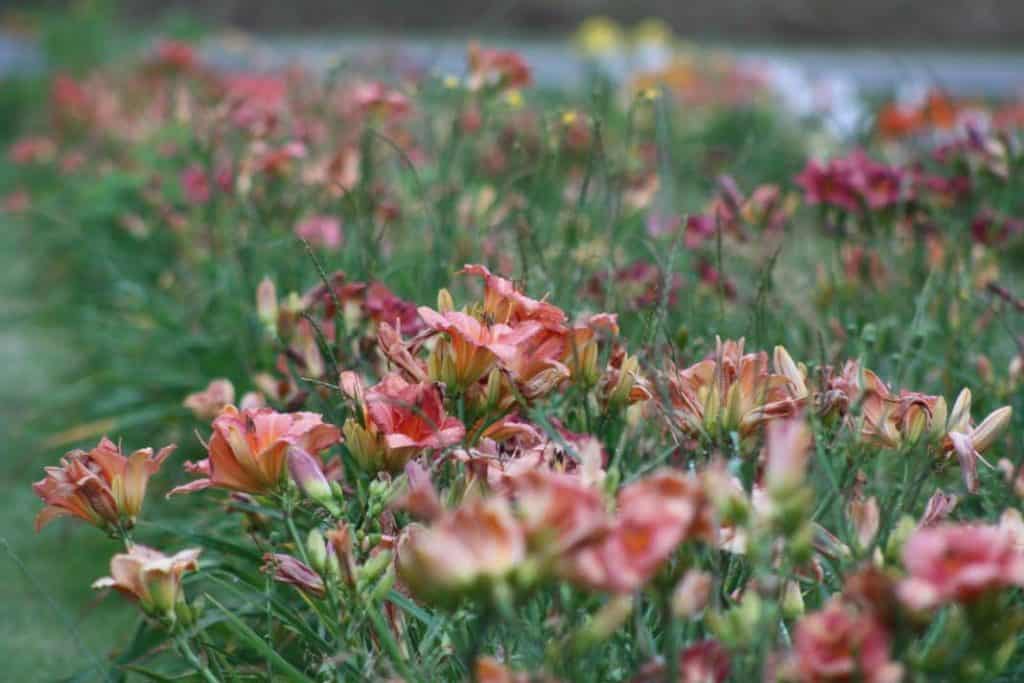
Daylilies are fabulous plants to have in the garden landscape. The foliage and blooms make a nice contrast amidst other cottage garden plantings. The clumps are easy to divide and transplant if you know the right techniques. Learn how to transplant daylilies, to spread these beautiful flowers throughout your garden.
Daylilies, also commonly referred to as Hemerocallis, are from the genus Hemerocallis.
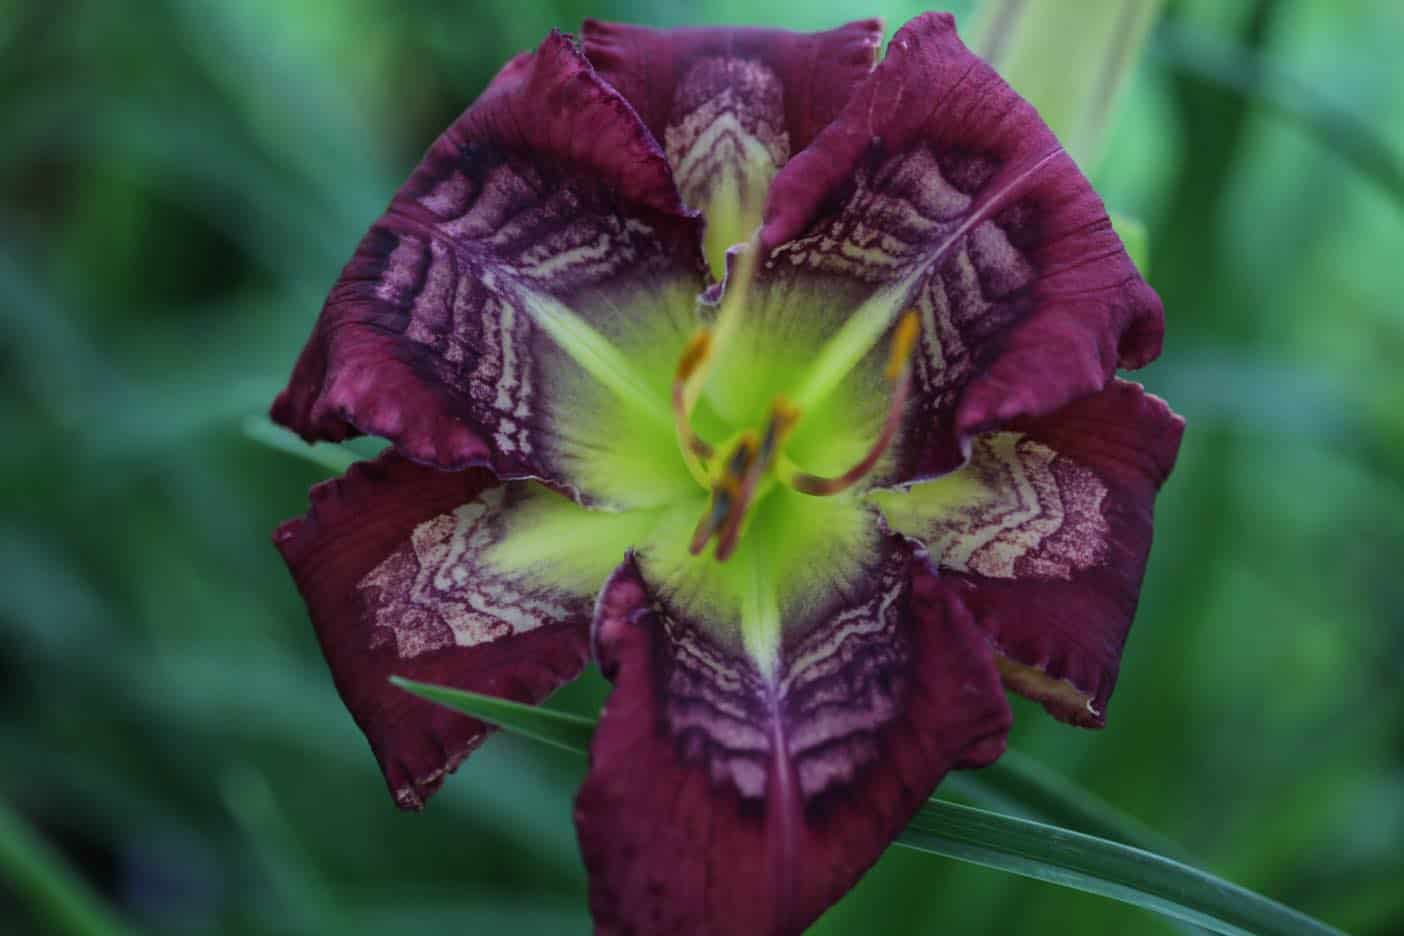
Daylilies are flowering perennial plants. We have been growing them for many years in our garden.
My fondness for daylilies started out innocently enough.
First and foremost, I loved how they looked in the garden. The flowing leaves are fountain-like and the flower scapes stand tall and straight.
Each daylily produces many blooms over a month long period, although each bloom lasts only a day.
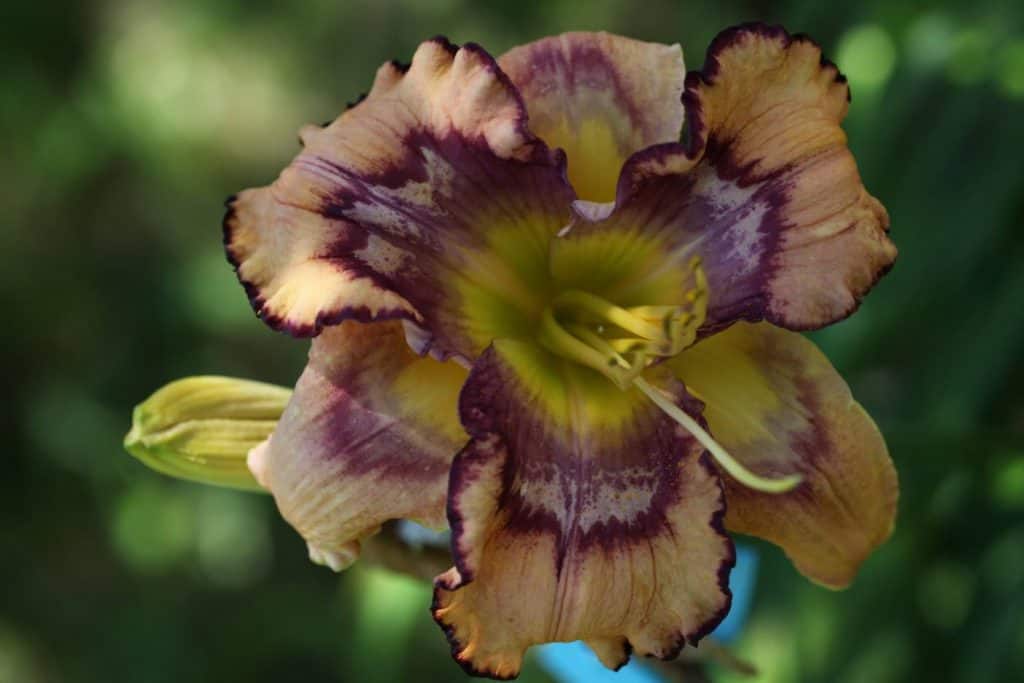
I loved how there were so many different types to chose from, from toothy edged blooms to large complex eye zones, and everything in between.
When I started to hybridize daylilies, my collection increased. I ended up with a very large collection of hundreds of different cultivars.
Every year there were new daylily seedlings grown and planted, and every year there were new seedlings blooming.
These plants added up quickly, and soon it was time to dig some up to relocate.
These daylilies have been moved around many times, and transplanted from one location to another.
I am forever digging up seedlings and planting them in beds to further evaluate.
Many of the daylilies have been gifted to neighbours and friends. It's a great way to spread the joy of these fabulous flowers.
Daylilies are one of the easiest plants to divide and transplant. They tolerate the process very well. They are very forgiving, and exceptionally hardy.
Reasons To Transplant Daylilies
There are a number of reasons to transplant daylilies.
1. Overgrown Daylilies
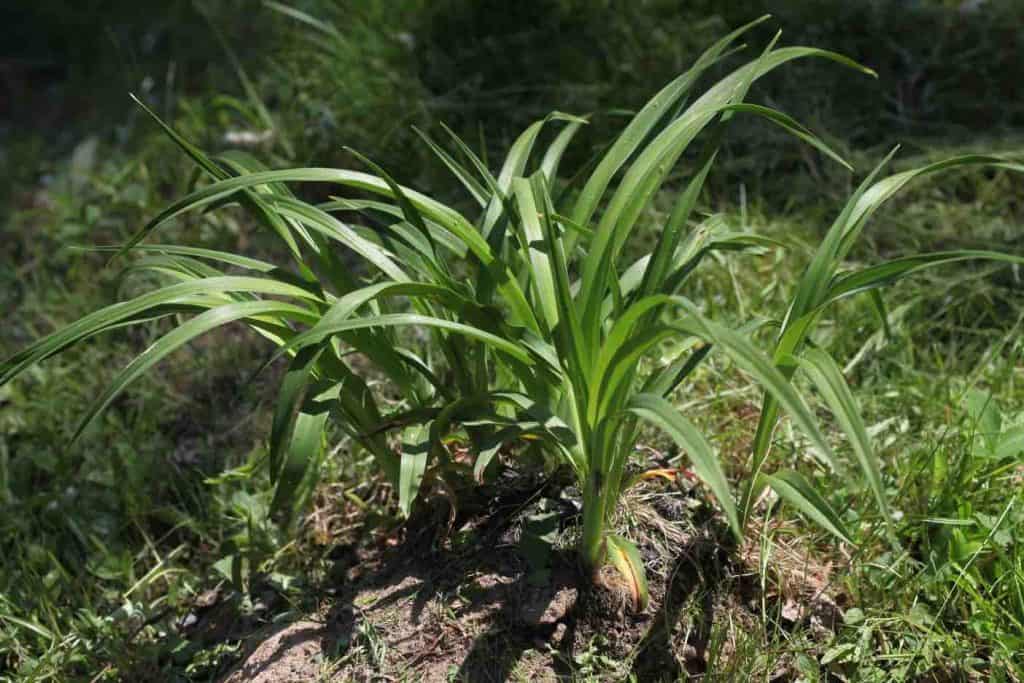
Sometimes daylilies will grow into very large clumps, especially the species plants, and will need to be lifted and divided, and maybe even relocated.
There are a number of different daylily species, although a common one that many may be familiar with is Hemerocallis fulva, the common orange ditch lily.
I love this daylily, mainly due to it's simplicity and bright orange colour.
Some people however may choose to relocate this daylily, since it has a tendency to sometimes get out of hand.
This orange daylily grows in large groupings and spreads via an underground tuberous root system. Sometimes the clumps can become very large and overgrown, and will need to be dug up, thinned out, and transplanted.
What Can I Do With Overgrown Daylilies?
Overgrown daylilies can be managed by digging and dividing the clump, then transplanting what you would like to keep back into the area.
The extra plants can be given away or even culled if you have many.
If you are dealing with species daylilies, try to remove the roots from the soil, as they spread by underground roots, which can travel some distance.
Most often these large patches of daylilies have been growing for years, so have become very welll established.
It will take a bit of effort to thin them out or remove them, however it is definitely doable.
Do this task in spring before the foliage and root system grows for the season. The process will be slightly less daunting and a little lighter at that time.
2. Time To Move To A Different Spot
Sometimes gardeners just like to move plants.
Our creative eye sees a need for a certain type of foliage or colour just over there in that bare spot in the garden. So we dig up our plants and move them.
This is always a great reason to transplant daylilies, or any other plant for that matter.
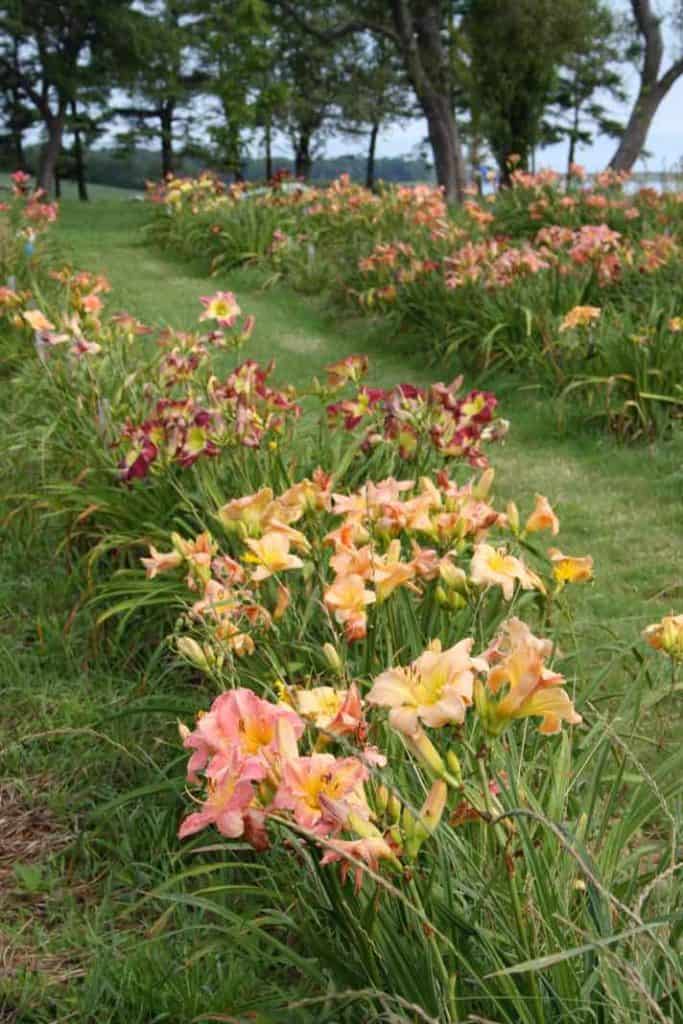
3. Too Many Daylilies In One Location
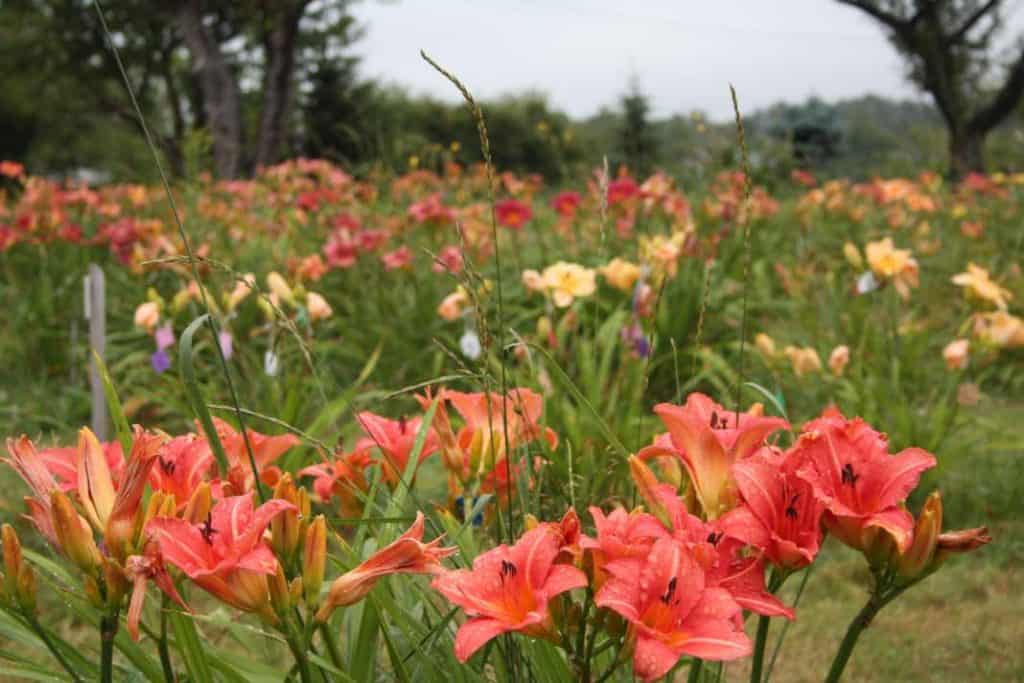
As was the case at our farm, we had collected a field full of daylilies. In fact our front lawn was also full, so a field and a half or so of beautiful daylilies.
When we started the flower farm, we had to clear out some of the plants.
We gifted most of them, and transplanted the rest to a different location.
Do Daylilies Need To be Thinned Out?
Daylilies do not always need to be thinned out.
If you are growing a species daylily and the clump is getting large and overgrown, then this plant should be considered for lifting and dividing, and thinning out.
Many hybrid daylilies however do not grow large, and will grow into a clump and maintain that same size for many years.
Each daylily hybrid is unique, and will have it's own genetics and grow to it's own potential size given the right growing conditions.
When Is The Best Time To Transplant Daylilies?
The best time to transplant daylilies is dependent on your growing zone.
Here in zone 5b which is a colder zone, we like to transplant daylilies in spring or early summer.
The reason for this is to give the plants a good amount of time to establish and set down new roots during the growing season and before the frosts of winter.
In our zone, transplanting in the fall is riskier for the daylilies if the clumps are smaller. Many tend to be heaved up by frost in the winter.
Larger clumps however will tolerate a fall planting.
Small seedlings should be in the ground no later than the end of July in our zone.
We have lost many daylilies due to winter heaving. These were usually smaller daylilies or seedlings transplanted at the end of the season.
In the south, transplanting in spring and fall is preferable. Transplanting in the heat of summer in warmer zones is stressful to the plants and is not best practice.
How To Divide And Transplant Daylilies
If you are considering digging up a clump of daylilies to divide and transplant, make sure that you consider the right time for your growing zone.
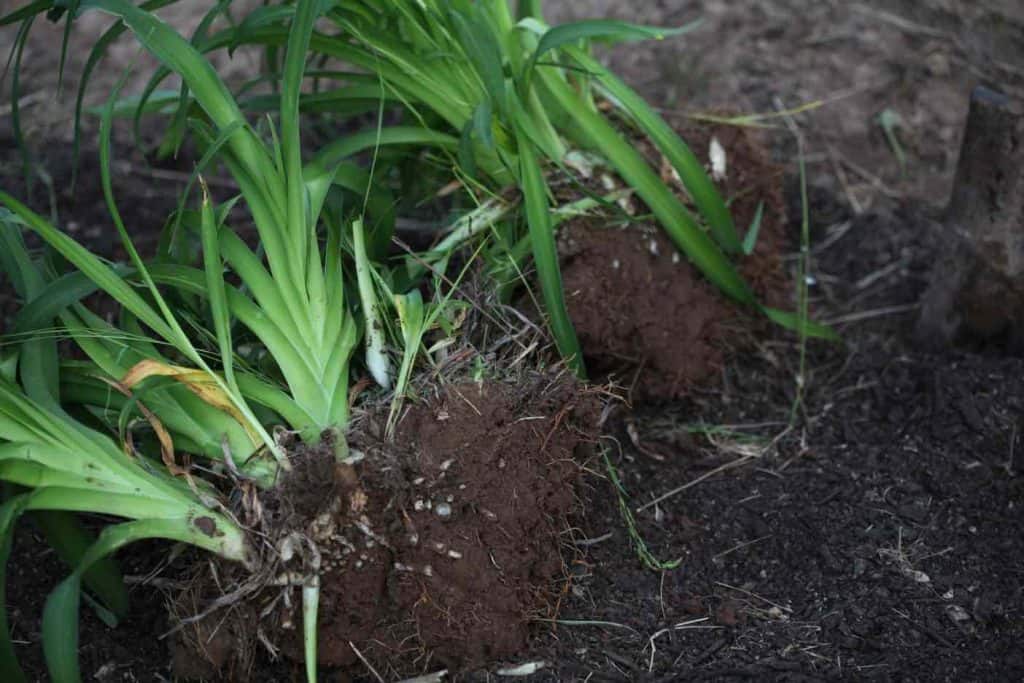
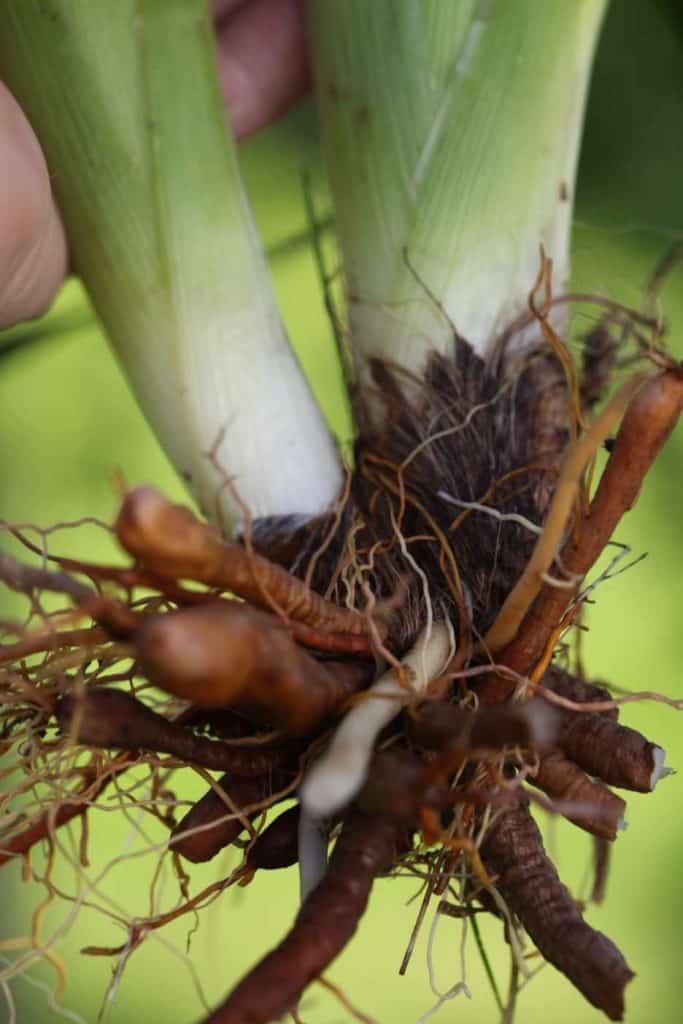
Step 1. How Do You Dig Up Daylilies?

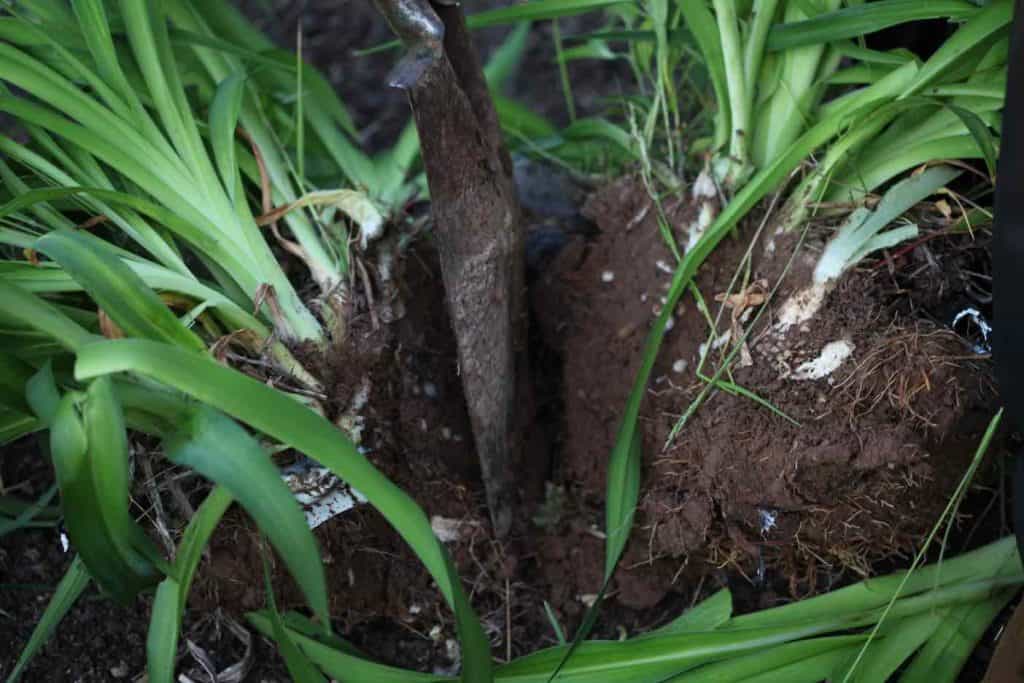
- Dig up your daylily plant with a sharp clean shovel.
- Place the shovel at the outer edge of the clump about six inches away from the plant, and dig a circle all the way around the plant.
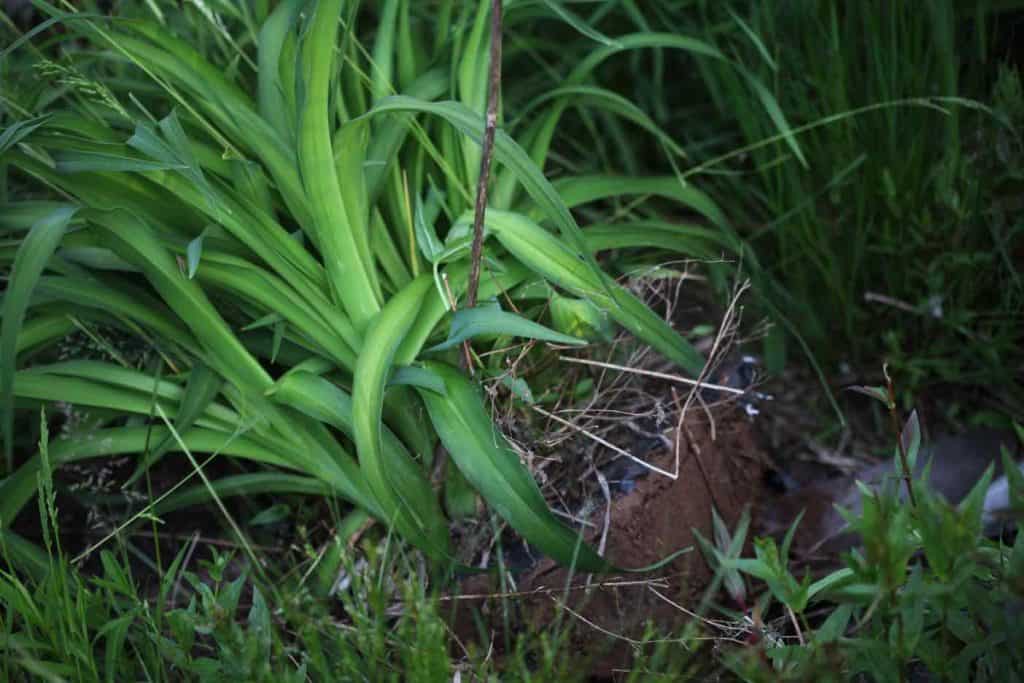
- As you dig, push the shovel in a downward direction, which will help loosen the daylily from it's base in the ground.
- Once the circle is completed, work your way around the clump again, pushing down on the shovel until you feel the clump break free from the ground.
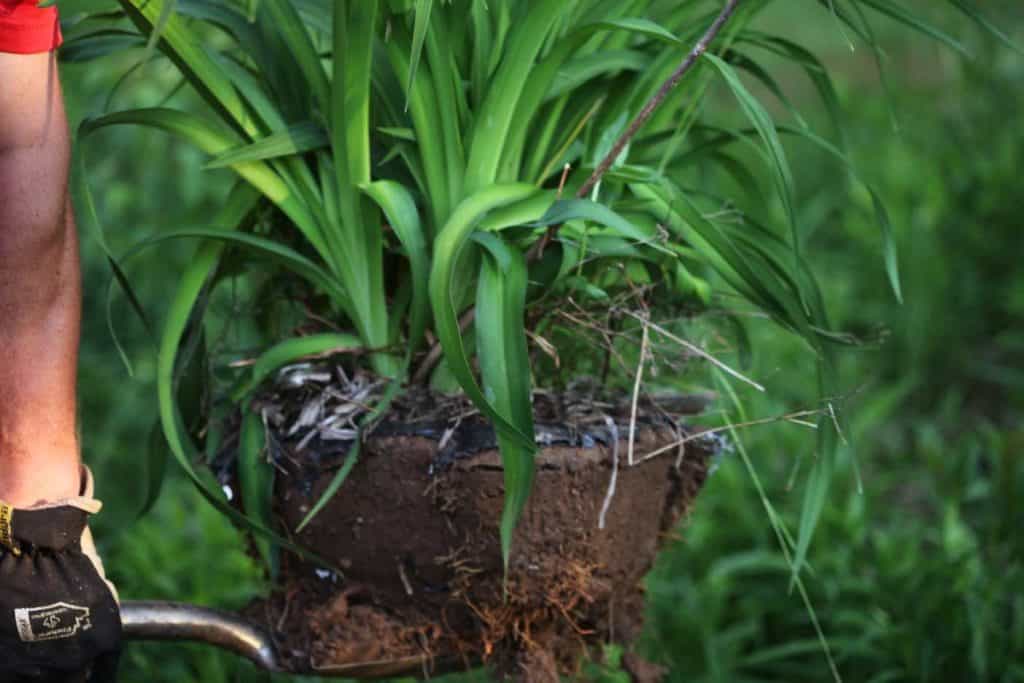
- Be careful when lifting the clump out of the ground, especially if you grow in heavy clay soil. The clump may be very heavy, depending on the size.
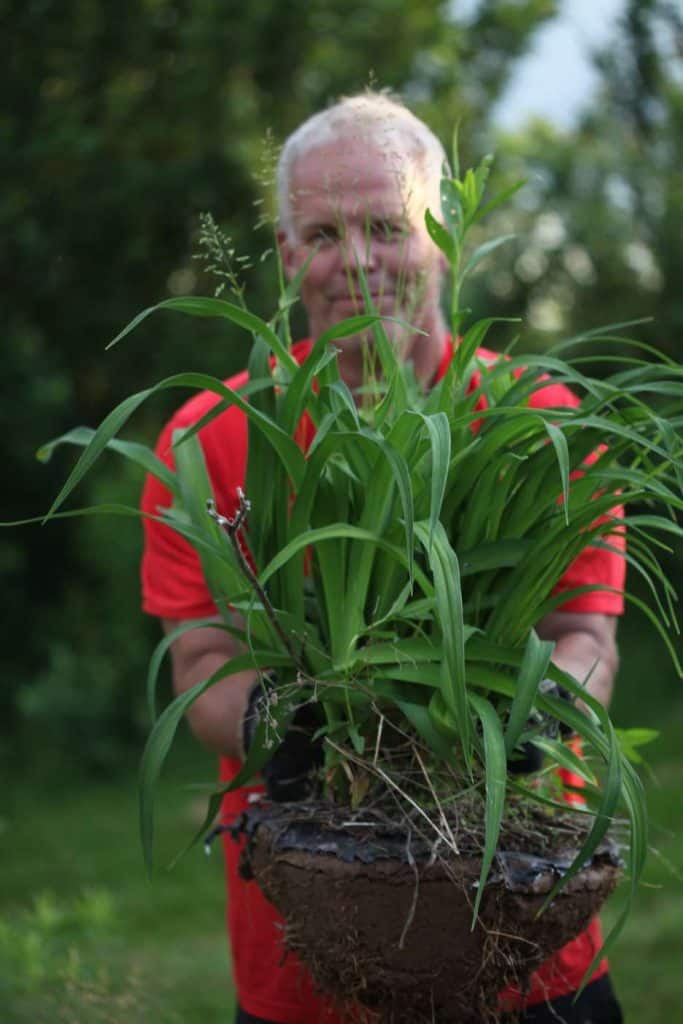
- At this stage you can relocate and plant to another location as a whole, or divide up and transplant.
Step 2. How To Divide The Daylilies
Divide the daylilies only if you wish to multiply your plant or give some away. This step is not necessary in the transplanting process.
We often just lift the plants, and directly transplant them to a new location.
How Often Should You Divide Daylilies?
- There is no standard rule for frequency of dividing daylilies.
- Unless your plants have become too large in the area they are growing in, there is no need to divide.
- If you want to divide your plant to share with others, or multiply your plant stock, then this is certainly a good reason to divide them.
How To Divide The Daylilies
- Divide with a sharp clean tool between the daylily fans.
- We use a clean sharp shovel or a sharp knife.
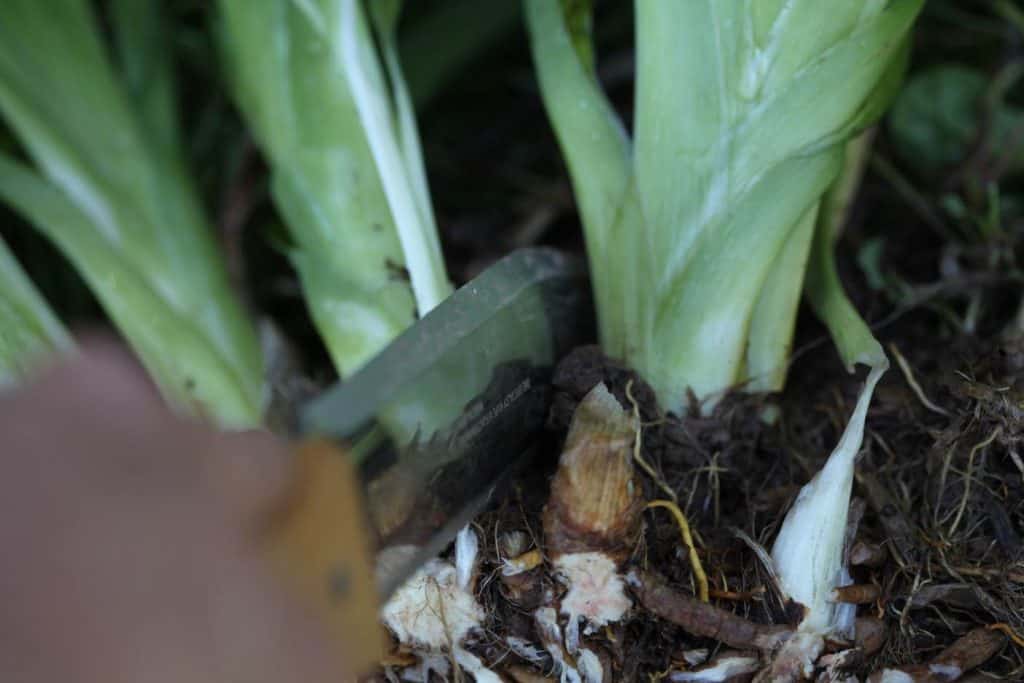
When To Divide Daylilies
- Divide your daylily plants after you have lifted them from the planting hole.
- The timing for this process is dependent on your growing zone, and when it would be considered the safest time to lift and divide.
- Certainly another consideration is bloom time. If you are hoping to preserve some bloom for the season, divide in spring before the scapes are produced. The scapes are the stems on which the daylily blooms will form.
- Not all daylily fans will produce a scape, although the larger ones most likely will.
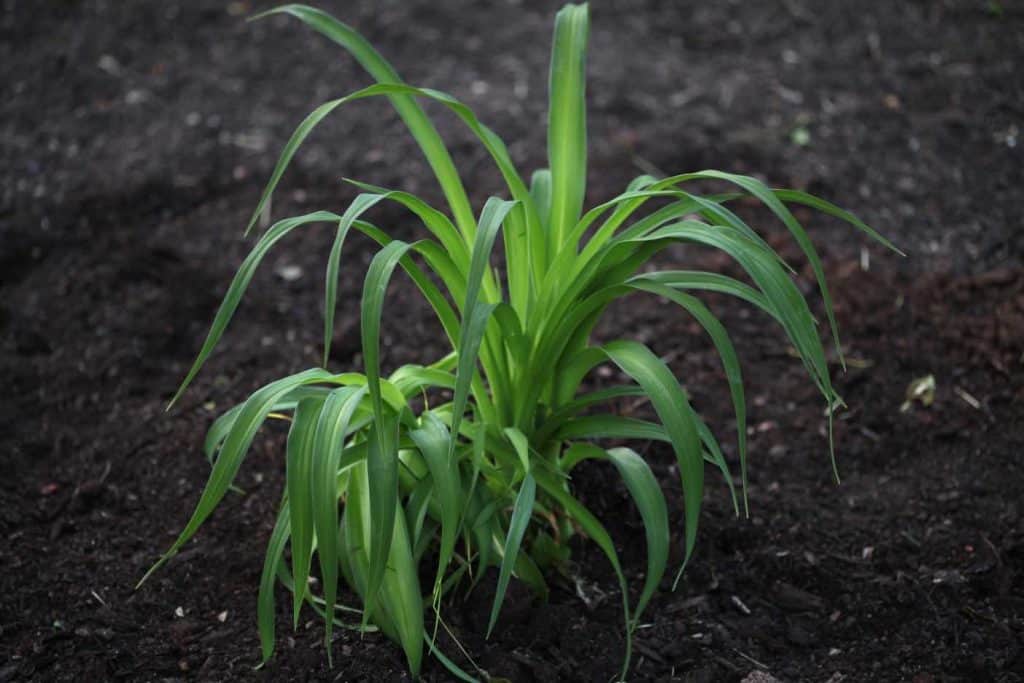
Step 3. How To Transplant Daylilies
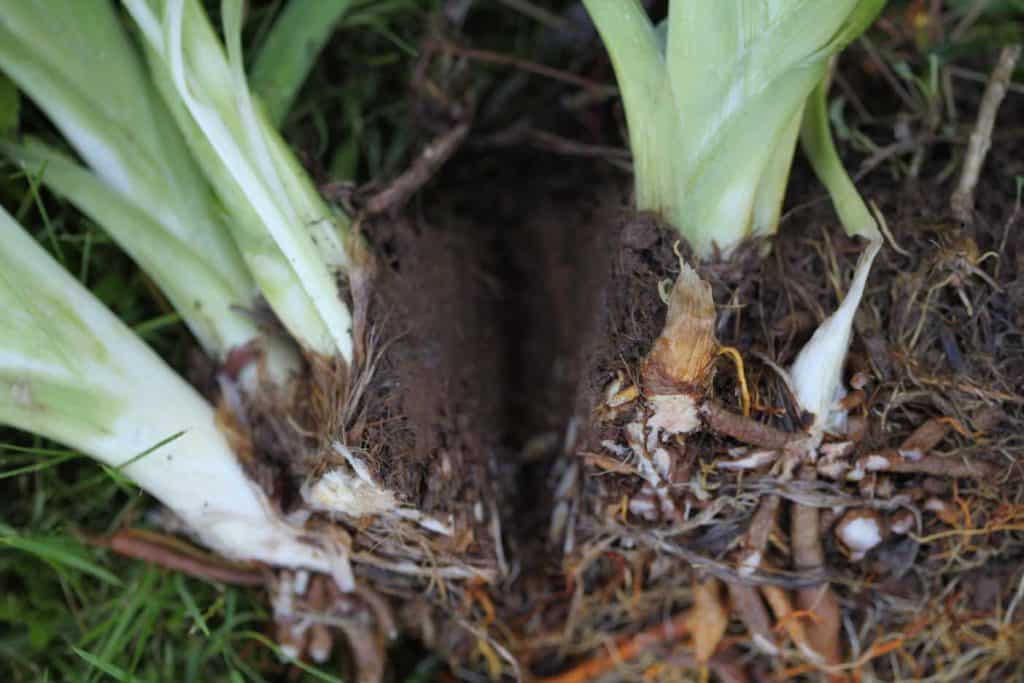
- After you have lifted your daylily plant and divided it, it is now time to plant.
- If you have divided the clump, you can wait a few hours until the wounds start to heal before planting, or you can plant directly. Generally there will not be a problem.
- If you live in an area where crown rot is common, allow the wound from the division to dry for 24 hours prior to transplanting.
- The daylily will benefit from a planting hole containing good soil and compost at the time of transplanting.
- Daylilies will reward you with great blooms and foliage if they are well cared for!
- One important thing to consider when transplanting is not to bury the crown too deeply. The crown of the daylily should be no more than an inch under the soil.
- Any deeper places the daylily at risk for crown rot.
Step 4. Where To Plant Daylilies
- Plant daylilies where they will receive lots of sunlight.
- They will tolerate average soil, however will bloom better with great nutritious compost filled garden soil.
- I generally plant my seedlings in a sunny spot straight into clay soil at the farm.
- They do exceptionally well in this clay soil, which is full of great nutrients for plantings.
- If I am planting into pots, I make sure that the growing medium is good quality, and I always add some compost to the mix.
Can Daylilies Grow In Partial Shade?
Daylilies will grow in partial shade and they will flower in partial shade, however they will not grow to be their best in this location.
We have a large garden bed against the west side of our house. This bed is full of daylilies.
These daylilies get morning shade, and then sun from about 1PM onwards during the summer months.
I have used these daylilies for hybridizing and have taken note of their flower production over the past few years.
There has been a considerable decline in flower production and size of these daylily clumps growing in partial shade.
Most of these daylilies only put up one or two scapes, if any at all during any given summer.
I should also mention that these daylilies are all registered hybrids, and were previously very productive before being transplanted into this partially shaded bed.
Step 5. How Many Daylilies Can You Plant Together?
This aesthetic is really up to the gardener.
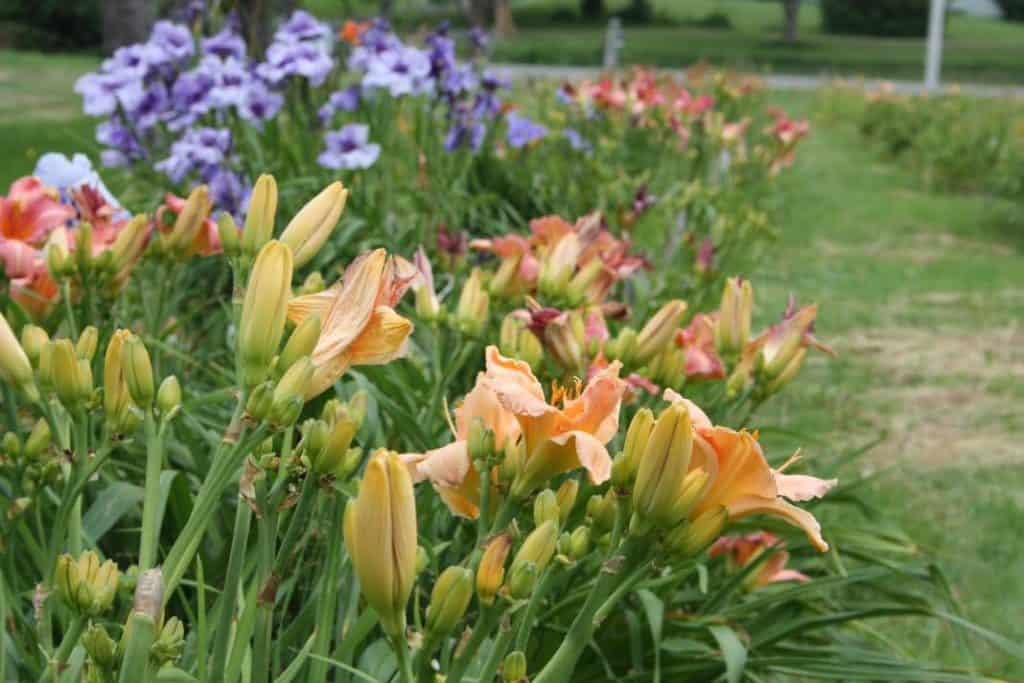
Planting in groupings of odd numbers is always pleasing to the eye, such as a grouping of three to five daylilies in one spot.
Other things to consider would be each individual daylily, as all are unique in their size, shape and height.
Mass plantings of the same daylily are always attractive, especially if it is a reblooming daylily with extended flower production, like Stella de Oro.
How Long Can Daylilies Stay Out Of The Ground?
This is a very interesting question, to which there is a very interesting answer.
Daylilies can stay out of the ground for a prolonged period of time, if the roots and tubers are enclosed in soil.
Three years ago we dug up a daylily and placed it on a grassy patch at the back of the yard. This poor daylily was unfortunately forgotten about, and did not get transplanted that season.
The next spring, the daylily grew, right where it sat. It also bloomed. So we left it again.
This is the third year with it growing out of the ground. It had just enough soil around it to protect it and grow, and no doubt has established a root system underneath.
Then there was a field of daylilies, dug up and set on the ground. There were hundreds of daylilies, and no time to plant immediately. So they sat and waited.
These daylilies were then moved to another location where they sat, all together on top of the ground. They took root and they grew. There they have remained for three years.
They have never been planted.
Since that period of time, many of those daylilies have been given away to neighbours and family, although many still remain, now all settled in.

Daylilies Transplant Shock
Daylilies are usually very hardy and tolerate the lifting, digging and dividing process very well.
To avoid extra stress on any plants, including daylilies, it's always best to dig and divide during the cooler hours of the day, and as well, a cloudy low wind day is always preferred.
If you notice that the daylily leaves are wilting a bit, give it lots of extra watering, and it should bounce back within a day or two.
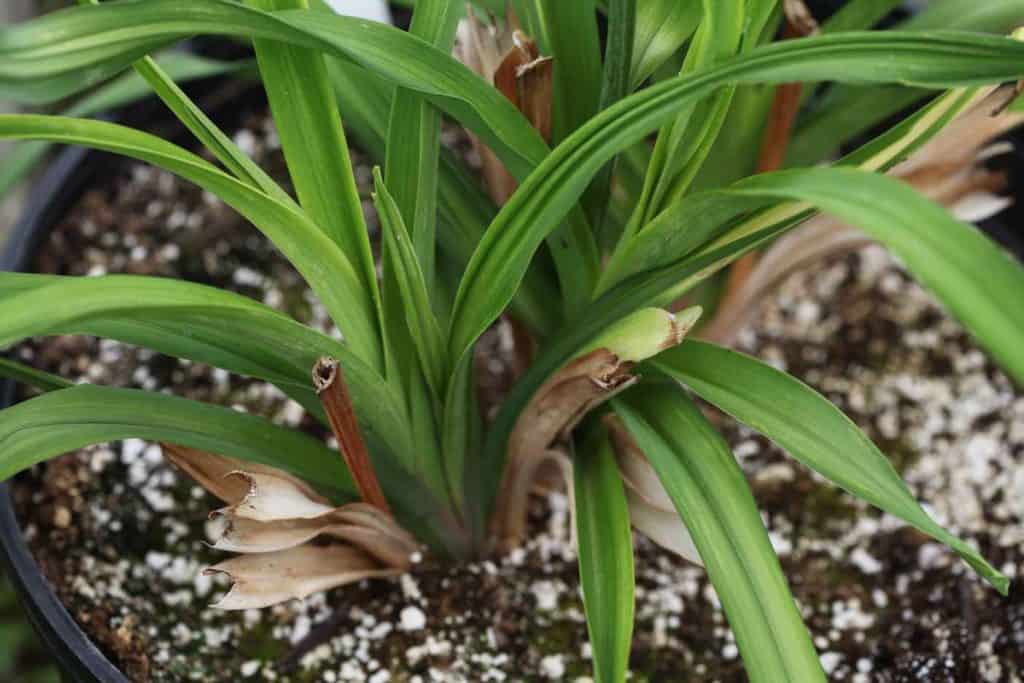
It is normal for the outside leaves of the daylily to turn yellow, this always happens when we receive new plants that require transplanting. We just allow them to turn colour and dry, and then they will easily be able to be pulled off the plant.
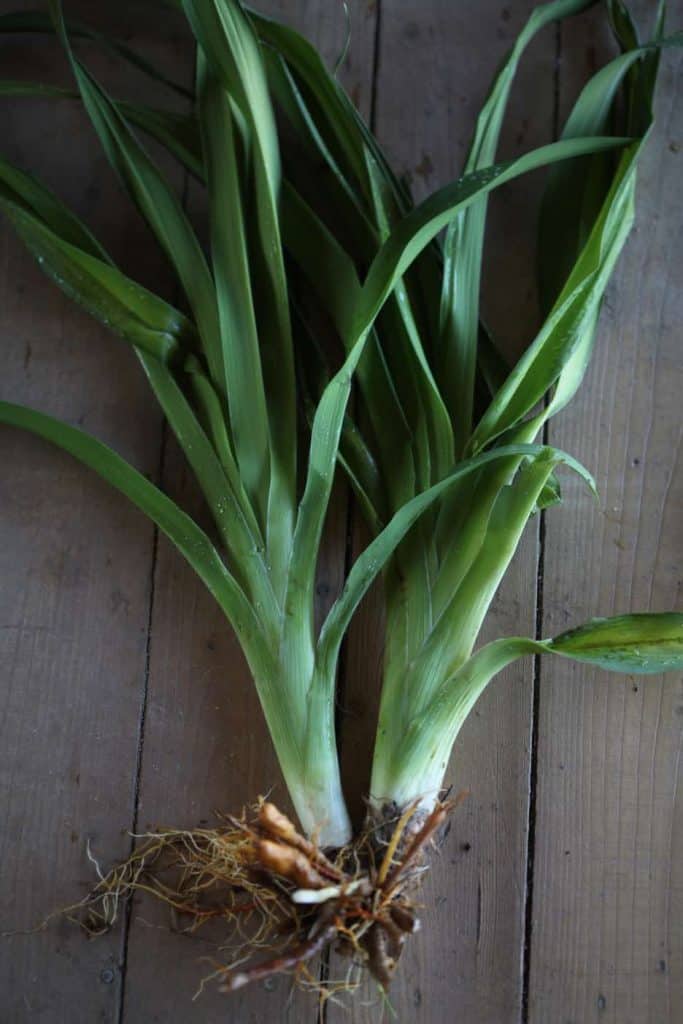
How To Repot A Daylily
Every year we receive a few new daylilies to add to our garden. These daylilies are sent bare root, and tolerate the process of transplanting very easily.
First we give them a good soak in a clean container of water for about three or four hours.
The daylilies are then transplanted into pots with good potting soil and compost..
We plant these daylilies into large sized pots, and keep them in these pots until the end of the season, after which we will transfer them into the ground in our cold frame.
Although we generally never transplant in the fall, these daylilies will have had all summer to develop root growth in the pots, and will be transplanted under the protection of the cold frame. They usually do very well and survive the first winter.
If we are lucky enough they will also produce some blooms the first summer while growing in pots, and we can use the pollen to dab during our hybridizing season.
Repotting A Daylily
Use a large pot to give the daylily lots of room to develop a good root system.
Repotting a daylily into a pot is very simple:
- Fill your pot with a good potting soil.
- Add some compost to the mix.
- Make a hole in the centre, and insert the plant, with the roots draping down.
- Make sure that the crown of the daylily, the part where the roots are attached to the fan, is not too deep under the soil.
- I like to have the crown planted no deeper than one inch below the soil surface for best plant health.
- Firm down the soil around the plant, then water in.
You will find that you may need to add some more soil after watering the first time, as any air pockets are filled.
Expect to have some yellowing of leaves, as this is completely normal. There should still be some green at the tip and the plant should not be displaying any wilting.
Keep well watered until established in the pot.
Have you tried to transplant daylilies? Be sure to leave a comment below to share your experience!


Leave a Reply