
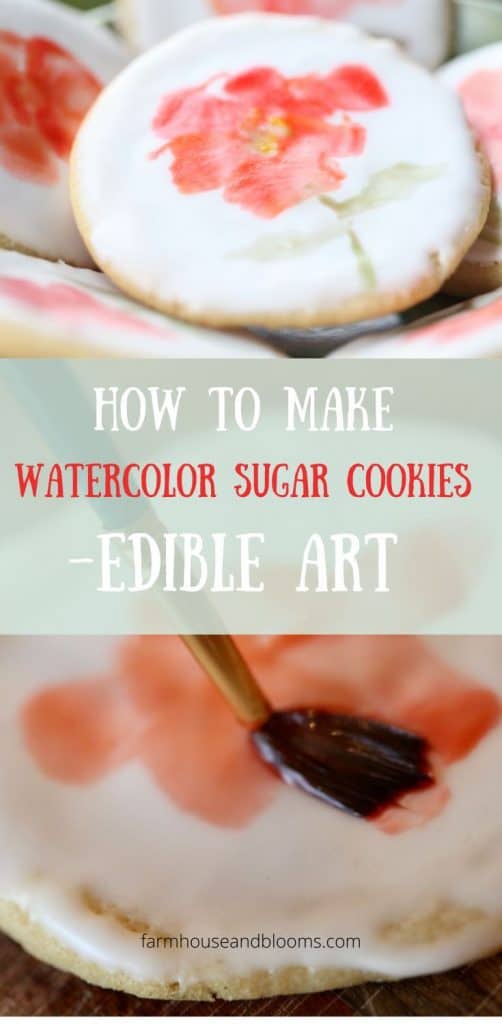
Watercolor sugar cookies are delectable bites of edible art that anyone can make. Try your skill at making these creations, and you will probably be making them for every occasion. Learn how to make watercolor sugar cookies, and awaken the artist in you.
I have been wanting to make these beautiful cookies for such a long time.
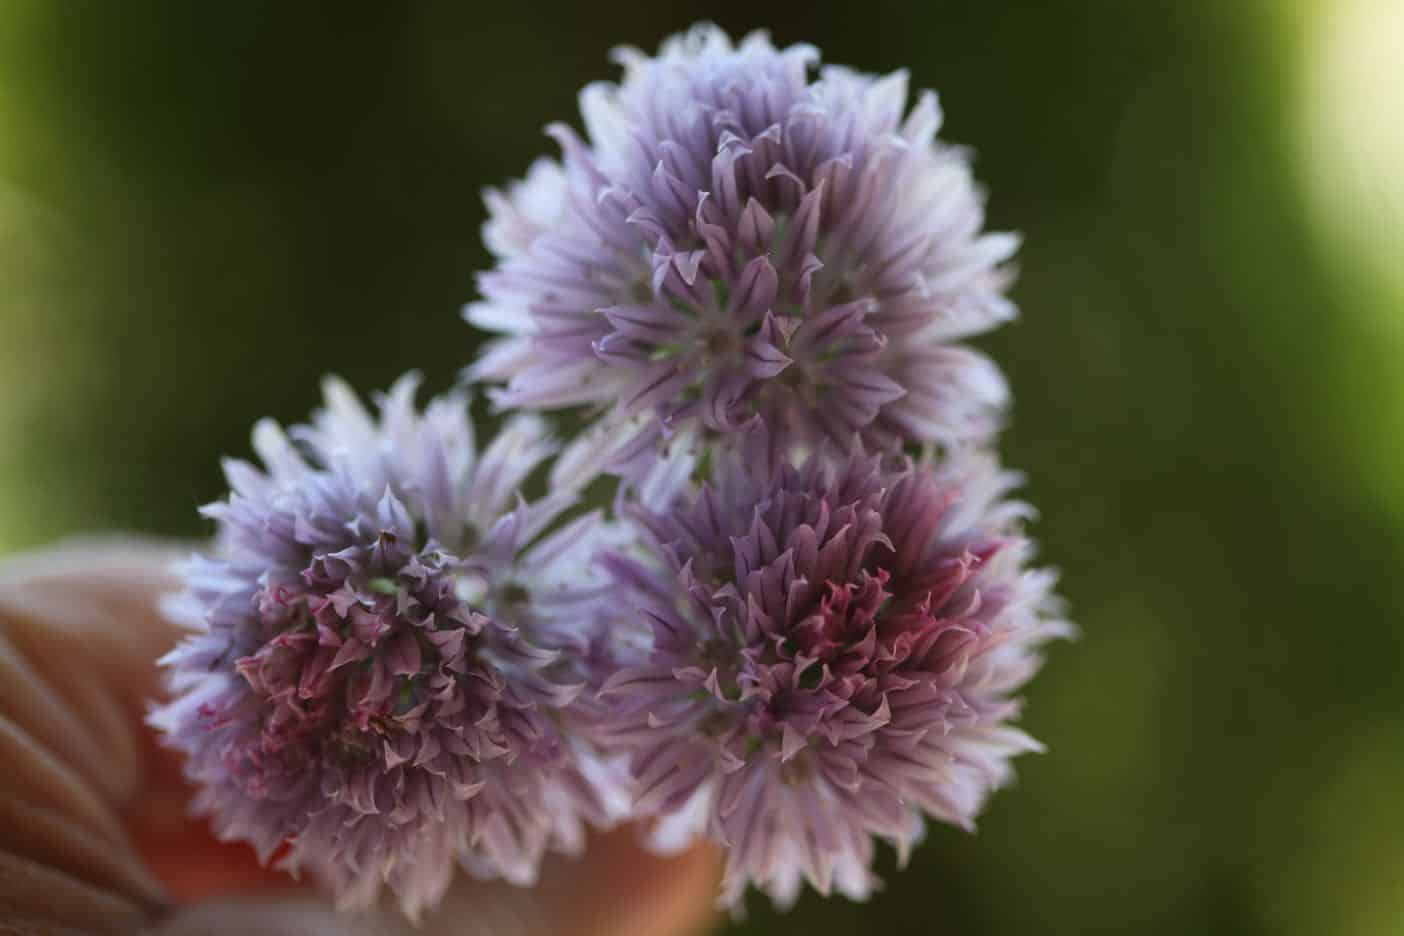
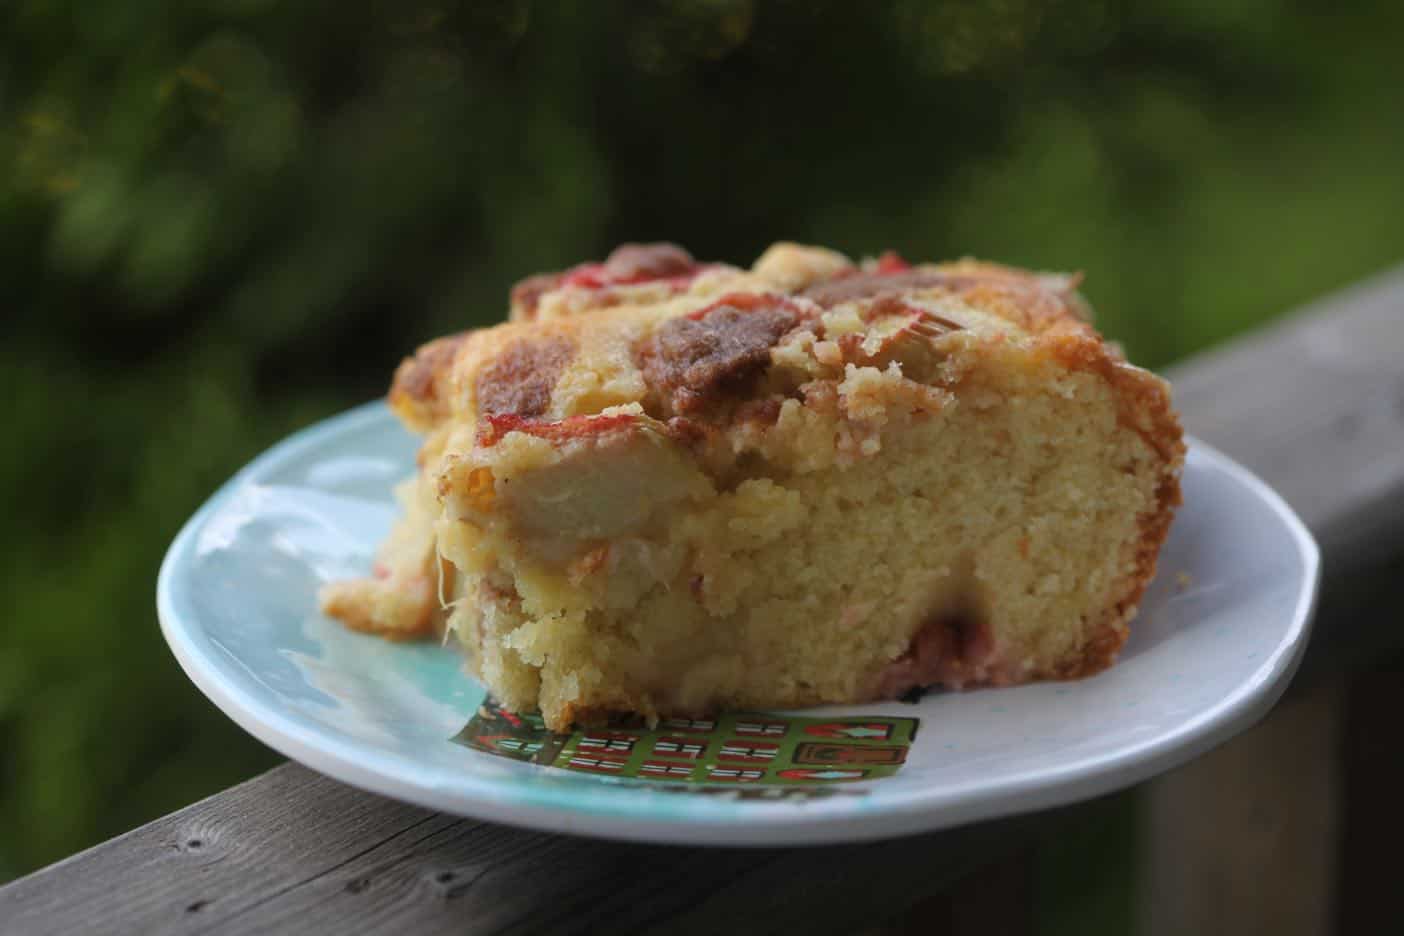
Baking tends to go on the back burner during flower season.
Now that the flower garden has been tucked in for the winter, it is time to get creative in the kitchen, starting with watercolor cookies.
The recipe is fairly easy to make.
Make any simple sugar cookie recipe, and top with royal icing. Allow the icing to dry for twenty four hours before starting to paint your designs on the cookies.
How To Make Watercolor Sugar Cookies
To start, you will need to make your sugar cookies.
You can use your own homemade sugar cookie recipe, or you can even use store bought cookie dough.
I used an old Nova Scotian sugar cookie recipe that I had in an old recipe book.
Sugar Cookie Recipe
I adapted this cookie recipe with the addition of vanilla and brown sugar. You can also add a dash of almond extract for an extra special touch.
The cream of tartar keeps the cookies soft and light.
Ingredients
- 1 cup butter, unsalted
- ½ cup white sugar
- ½ cup brown sugar
- 2 eggs, well beaten
- 1 teaspoon vanilla extract
- 2 ½ cups flour
- 2 teaspoon cream of tartar
- 1 teaspoon baking soda
Directions
- First cream the white sugar, brown sugar and the butter together, until the mixture is light and fluffy.
- Add the well beaten eggs and vanilla extract, and mix until smooth.
- Sift the dry ingredients together, and add them slowly to the mixture, mixing all ingredients well.
- Roll dough between two pieces of parchment paper with a rolling pin, to about a ¼ inch depth, or to your desired thickness.
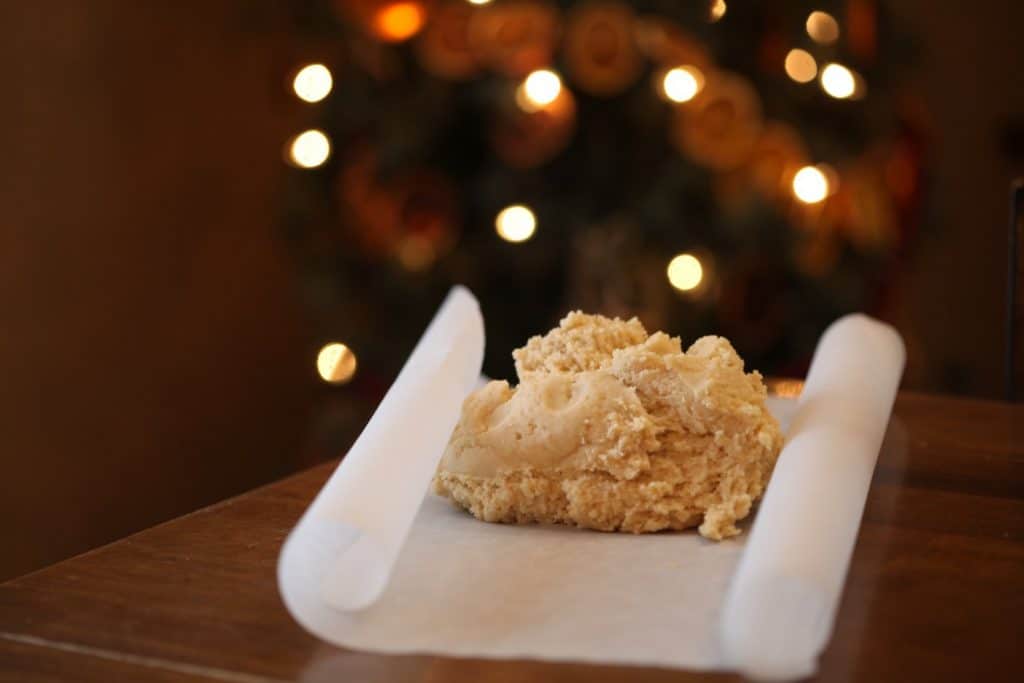
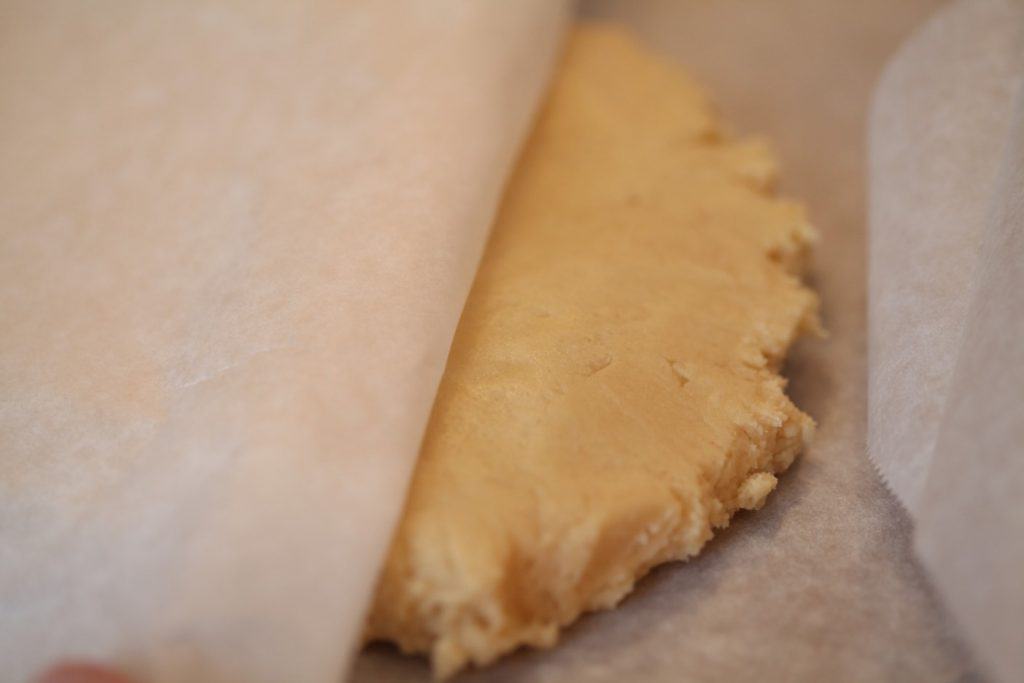
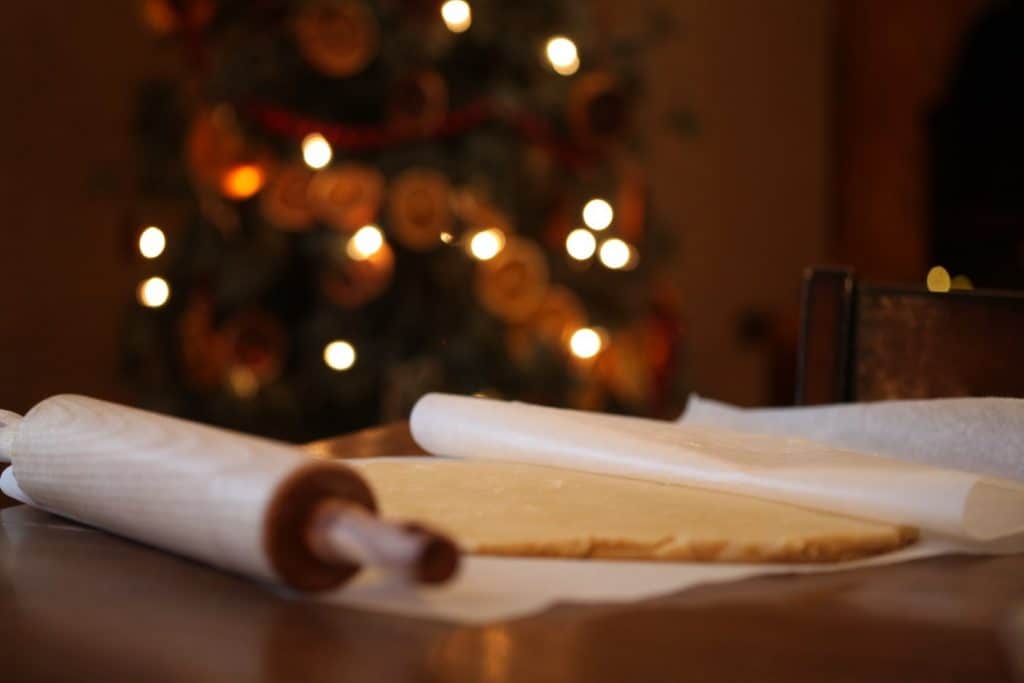
- Place the rolled out dough in the fridge for several hours before cutting out your cookies.
- This will help to keep them from spreading in the oven.
- Use a cookie cutter to cut out your shapes.
- Place the cut out cookies on a greased baking sheet at least one to two inches apart.
- You can also use a parchment covered cookie sheet.
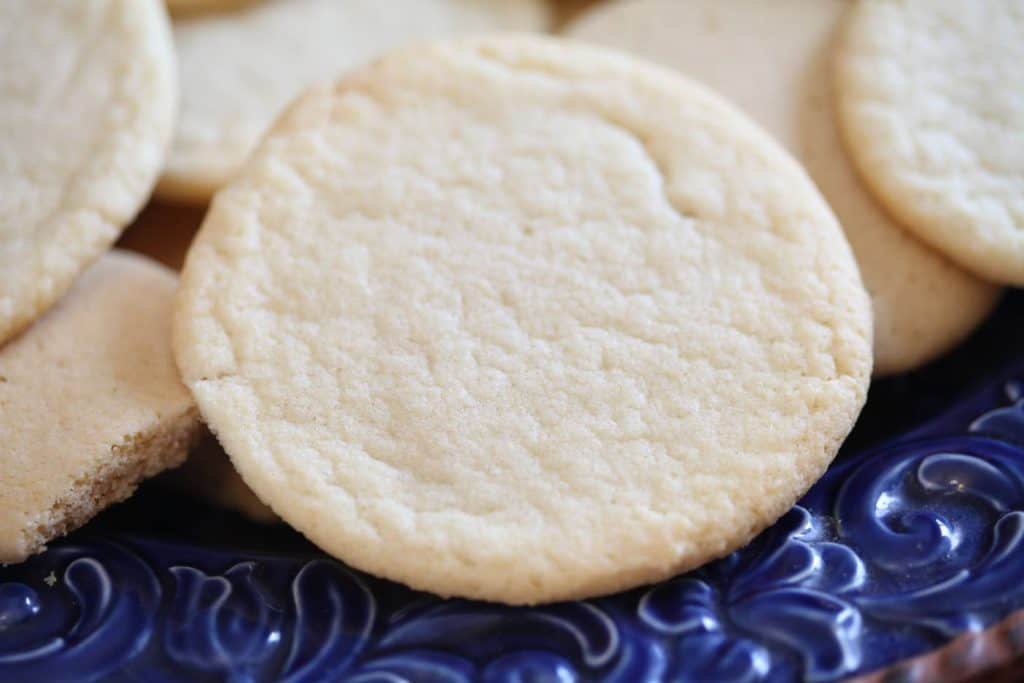
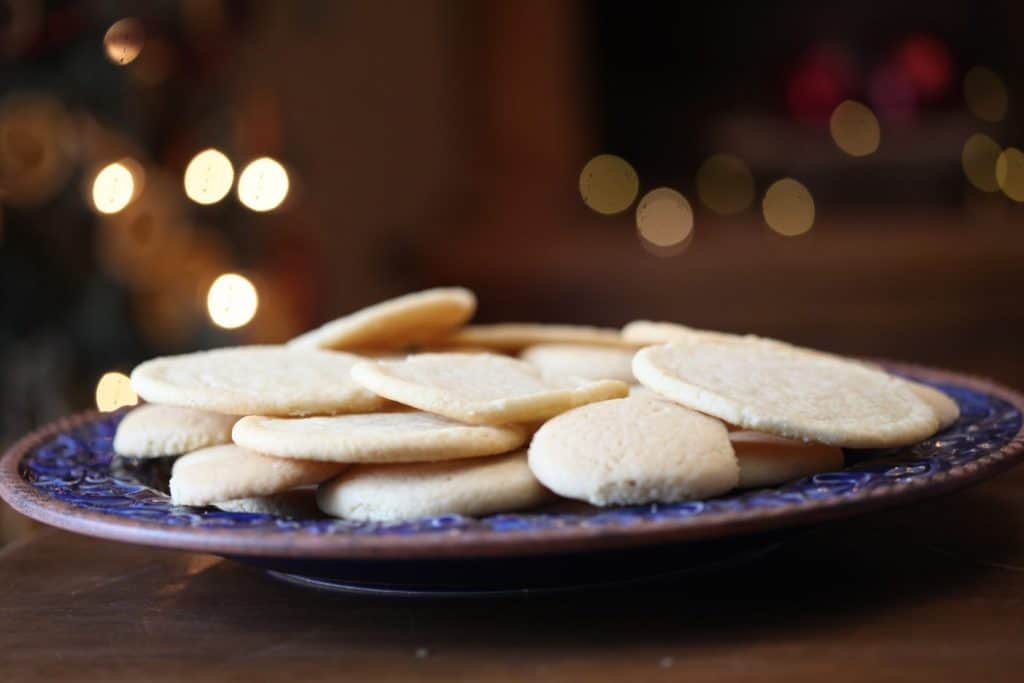
- Bake cookies at 375°F for 7 to 10 minutes.
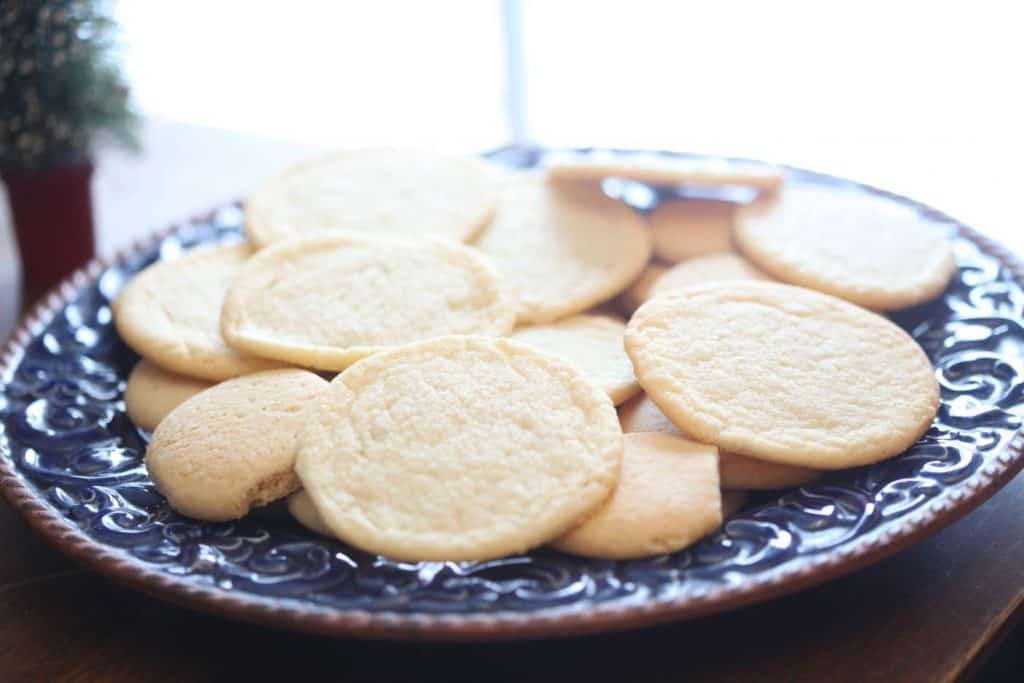
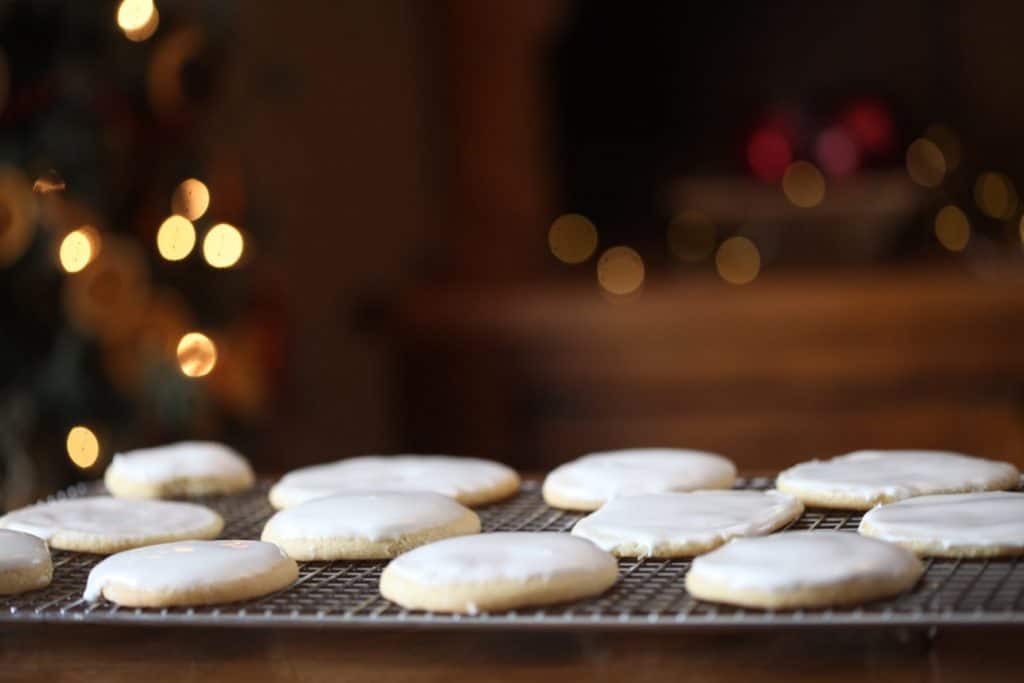
- When finished baking allow them to cool on the cookie sheet for a few minutes, and then place on a wire rack to finish cooling.
- Allow the cookies to completely cool before icing.
- Store in an airtight container.
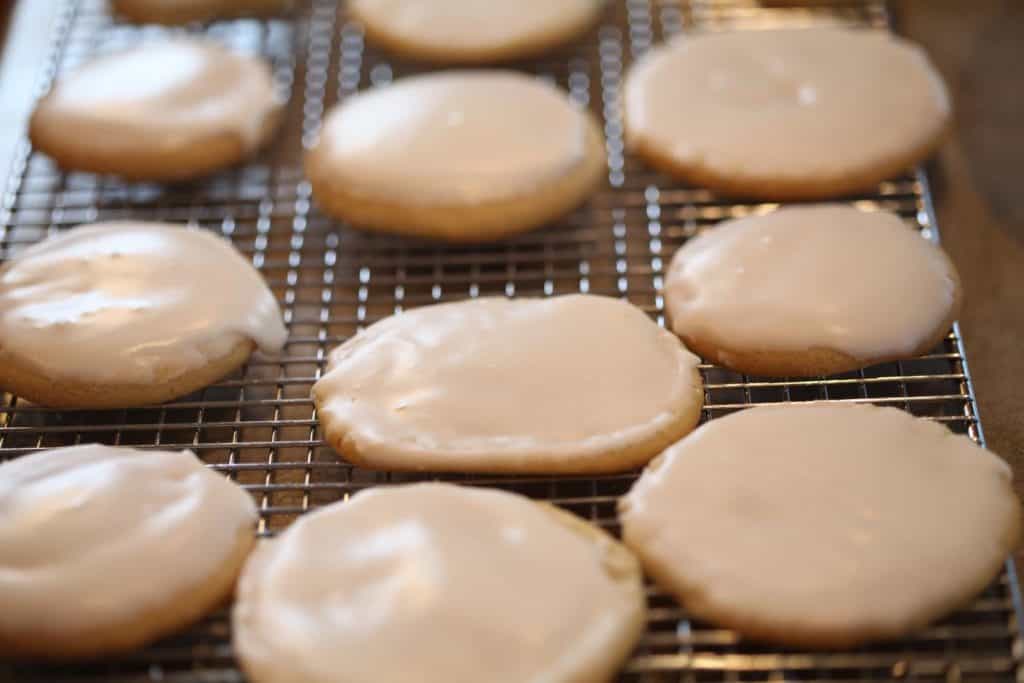
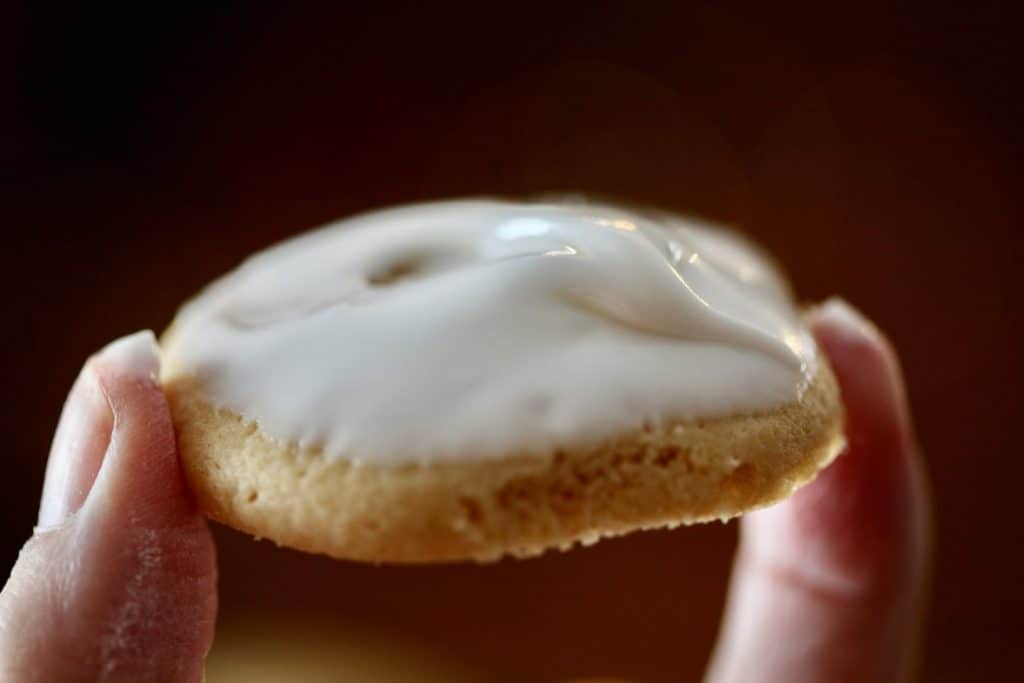
Royal Icing
Next it's time to make a batch of royal icing.
Royal icing will dry to a lovely firm texture on the surface of the cookie, and it is perfect for painting.
It's important to let the icing completely dry for about twenty four hours before starting to paint the cookies.
Ingredients
- 2 cups unsifted icing sugar
- I egg white
- room temperature water-amount to be determined as you make the icing (see directions )
Directions
- Add the egg white to the icing sugar, as well as a small amount of water, and whisk together.
- Continue to whisk, adding small amounts of water as you go, until the icing is the right consistency.
- Make sure to stir in all the sugar completely, scraping it from the edges of the bowl while stirring.
- If the icing is too thick, add a few drops of water. If it gets too runny, just add a bit more icing sugar.
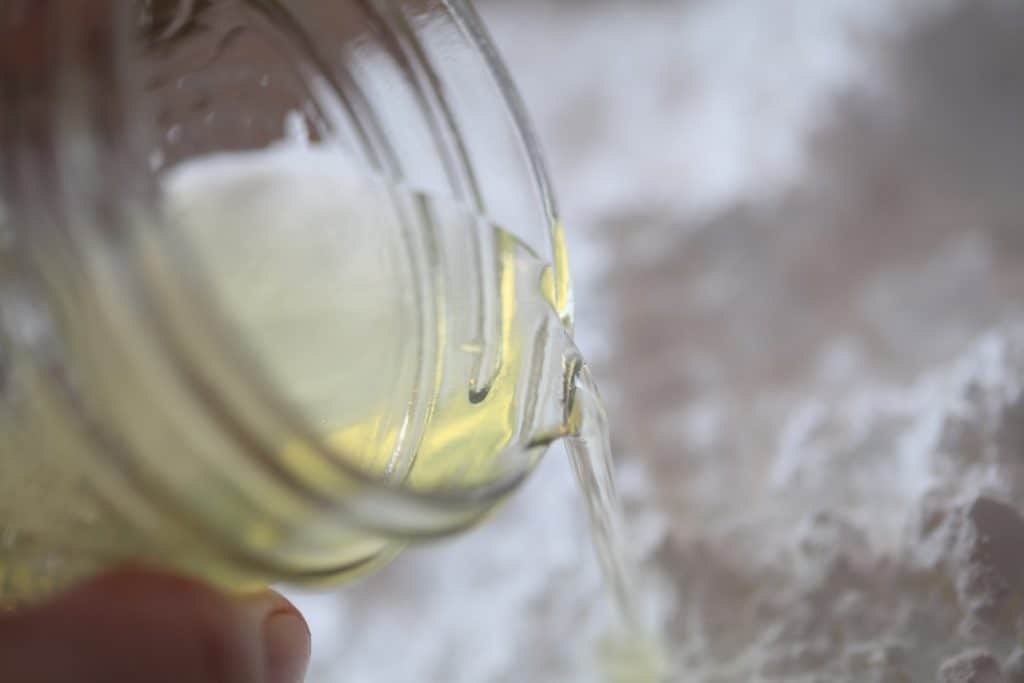
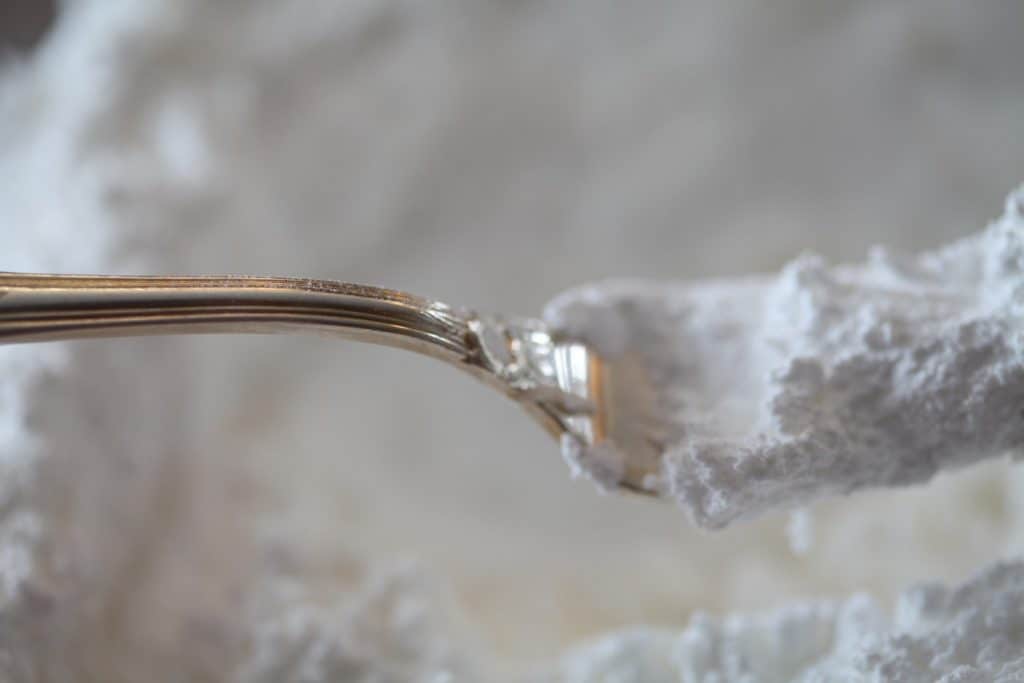
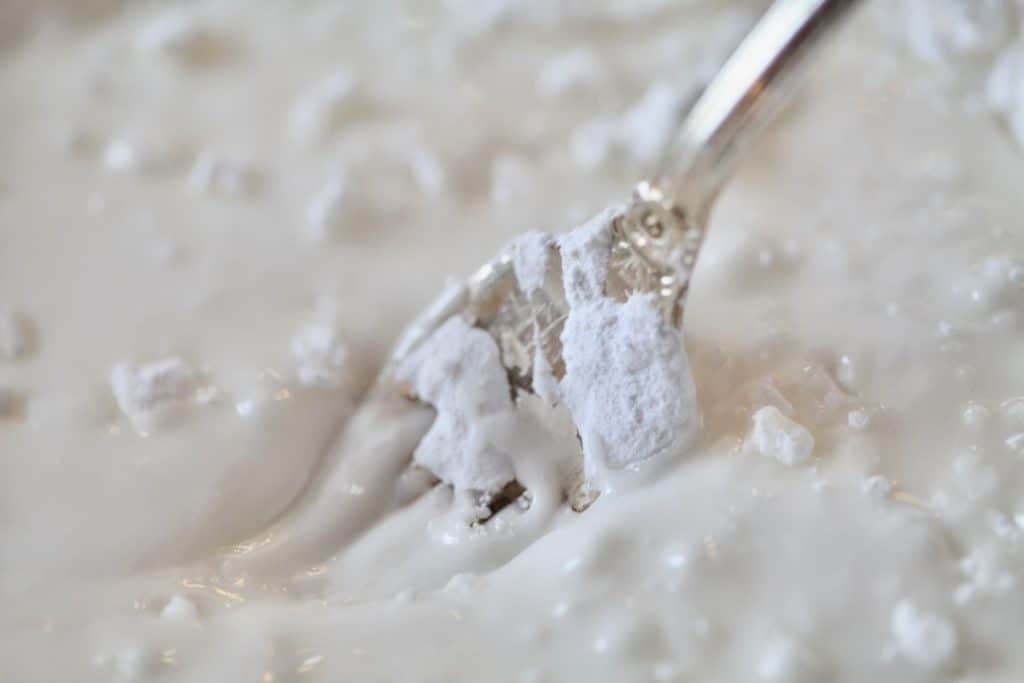

- The icing consistency that you are looking for is not too thick and not too runny, but rather a smooth and light icing that flows slightly but generally sits well.
- I find that the icing tends to thicken as I use it, and so I add a few extra drops when this occurs.
- You can pipe the icing onto the cookies with a piping bag if you choose, and pull it to the edge of each cookie with a scribe tool.
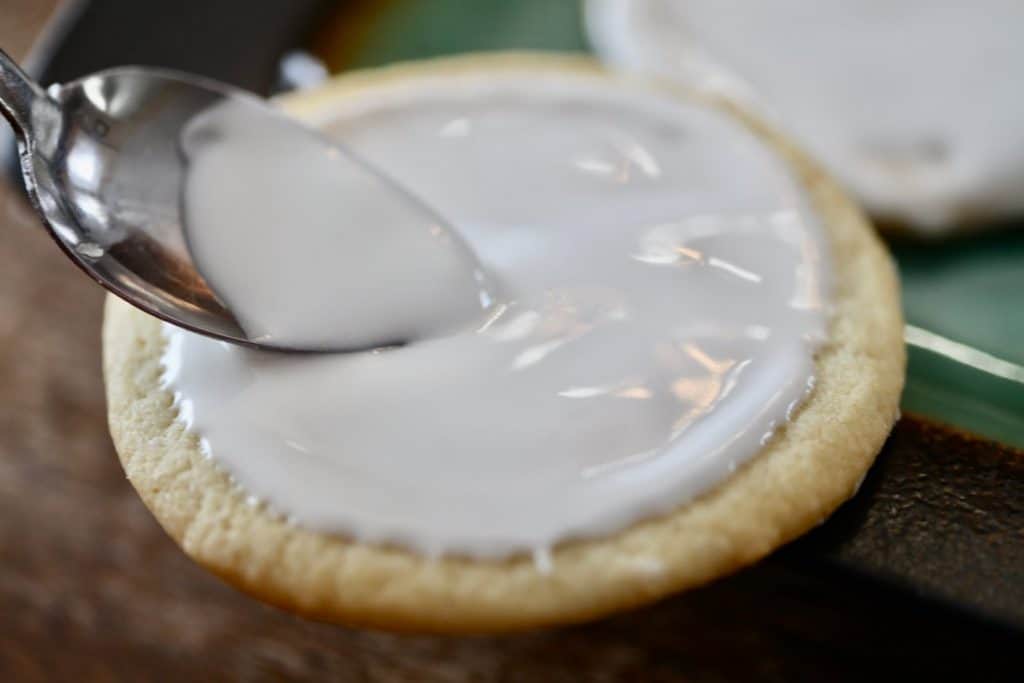
- Another option is to just put a dollop of icing on top of your cookie with a spoon, and gradually smooth to the edges.
- Alternatively, you can do it the easy way and just dip them into the icing, placing the icing directly where you want it.
Dipping The Cookies
- To dip the cookies, hold them by the edges and dip them into the icing face down, placing the icing on the top of each cookie.
- As you lift each cookie, give it a little swirl.
- Hold the dipped cookie over the icing bowl and shake any excess icing off.
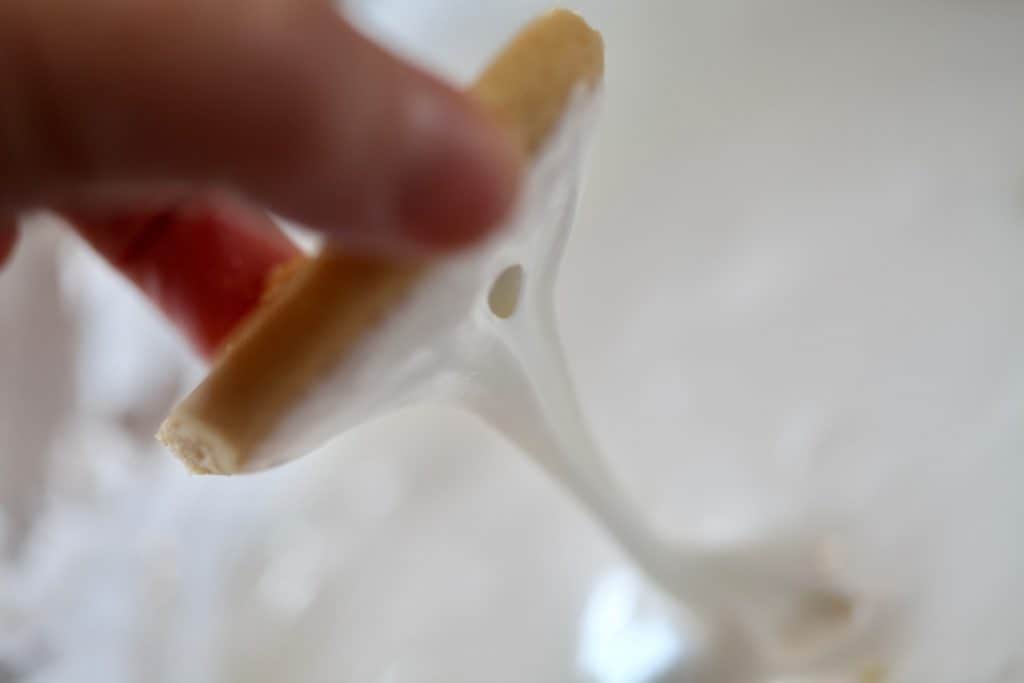
- Next, turn the cookie upright, icing side up and place on a drying rack.
- You can smooth the icing further with a knife or spatula if needed.
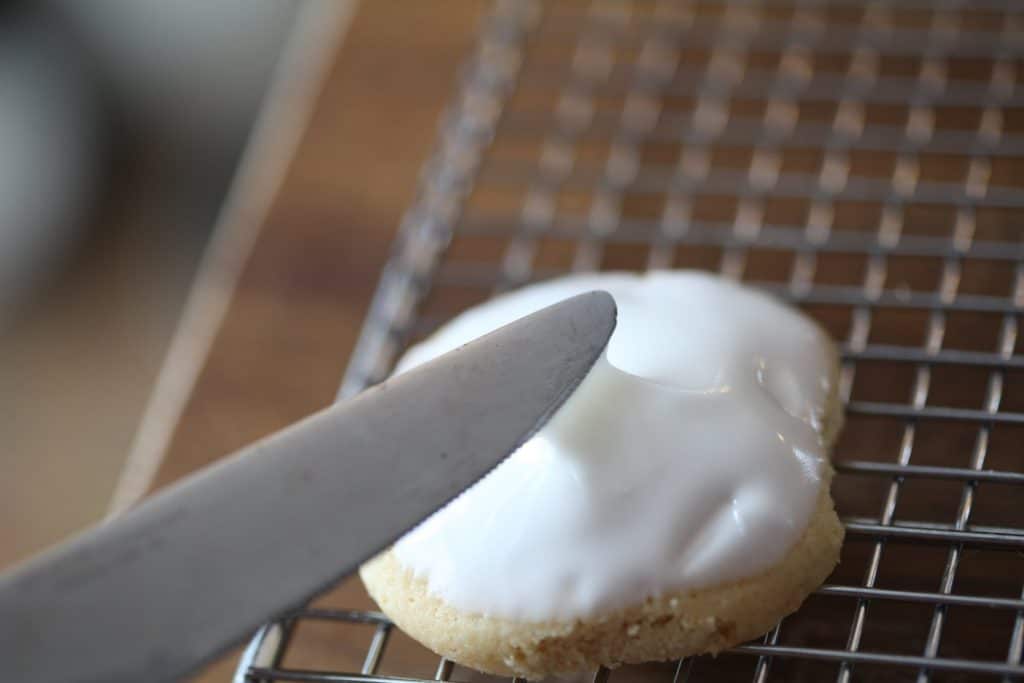
- With the right consistency, the spatula or knife marks will disappear as the icing settles.
- Allow to dry for twenty four hours before painting.
How To Paint Watercolor On Cookies
Homemade watercolor painted cookies are beautiful and unique.
Even if you have never done this before, you've got this!
All you need are just a few simple supplies plus your cookies, and you are ready to create your own homemade and hand painted watercolor delights.
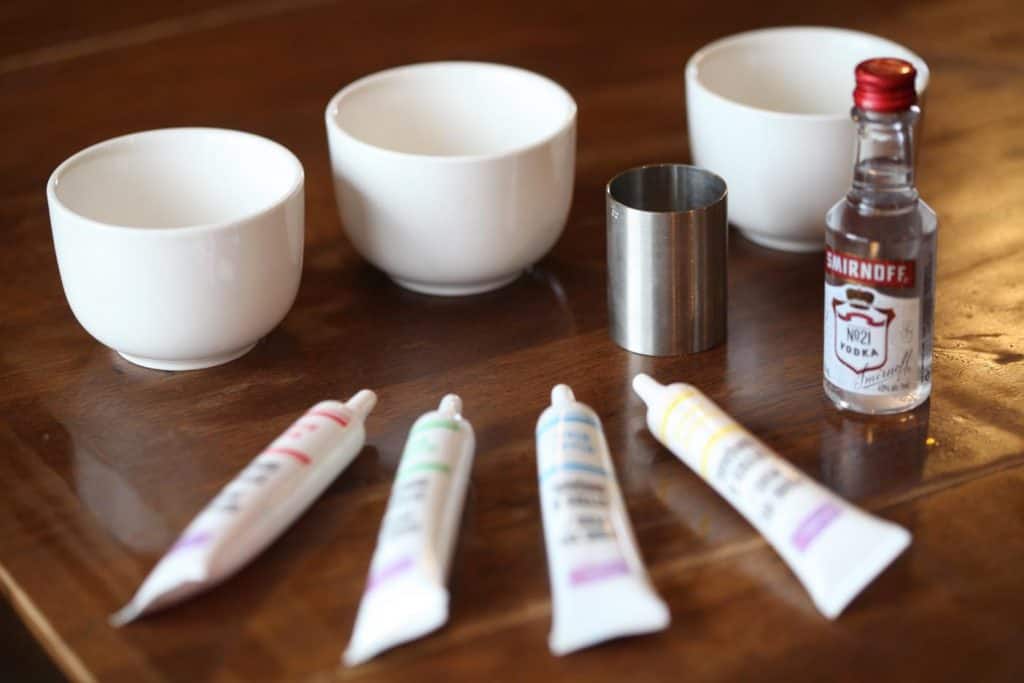
Supplies
- Gel Food Coloring or Icing Gel
- Small Bowls
- Paint Brush
- Paper Towel
- Cookies Frosted With Royal Icing
- Tsp of Vodka or Lemon or Clear Vanilla Extract- for mixing with the icing gel
How Do You Make Edible Cookie Paint?
Edible cookie paint is made by combining food colouring such as such as icing gel, with a consumable alcohol such as vodka or lemon extract, as well as clear vanilla extract.
There are many different colors of food coloring, and you can have a wide range for your watercolor palette.
Make sure not to substitute the alcohol for water when making this paint, as water will cause the royal icing to become wet. The alcohol on the other hand will sit on the top of the icing and will dry very fast.
Edible Paint Recipe
- It doesn't take much to mix up a small amount of edible paint.
- Put a small amount of gel approximately pea sized, into a small bowl or glass, such as a shot glass.
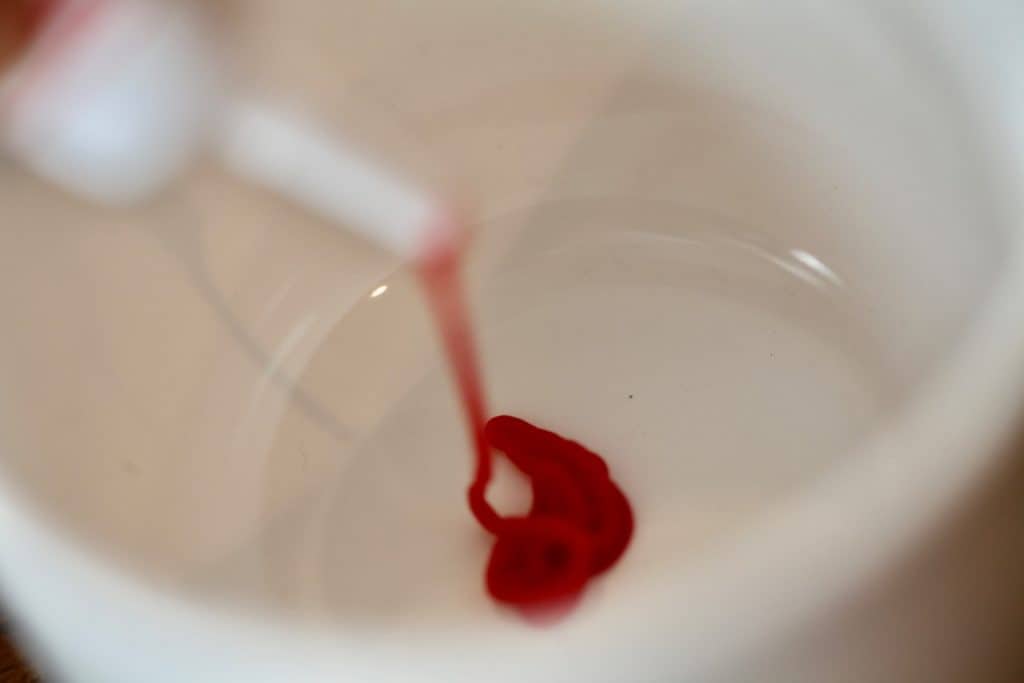
- Add the equivalent amount of vodka or extract and blend together with your paint brush.
- If it's too watery add more gel. If it's too thick, add more vodka.
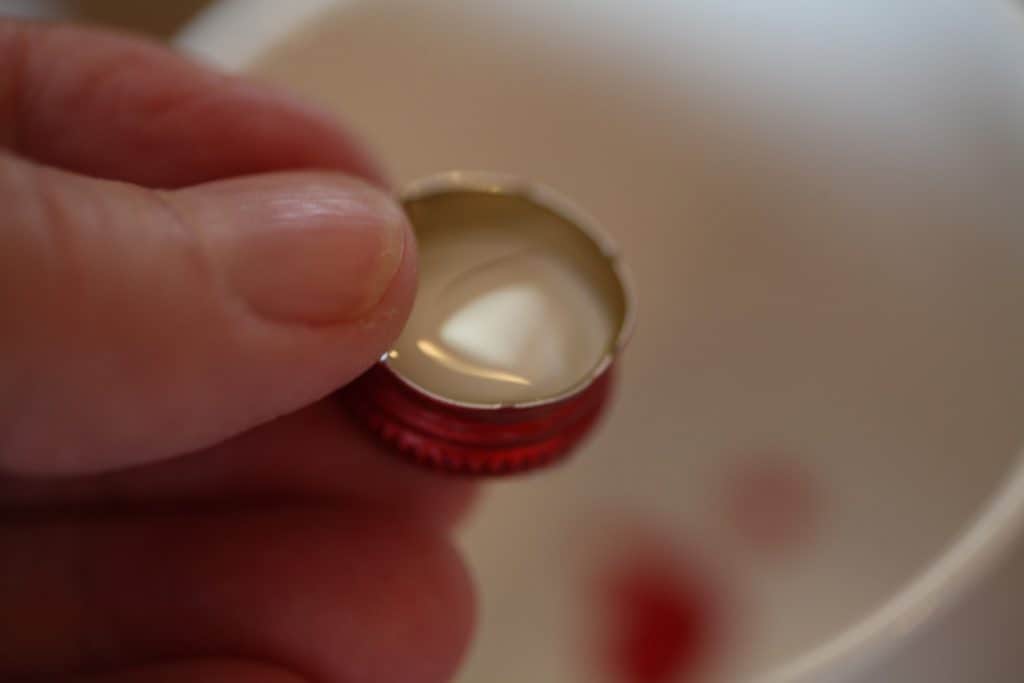
- I like to use the cap of the bottle to deliver the alcohol into the container. It gives you a little more control over the amount that you pour in.
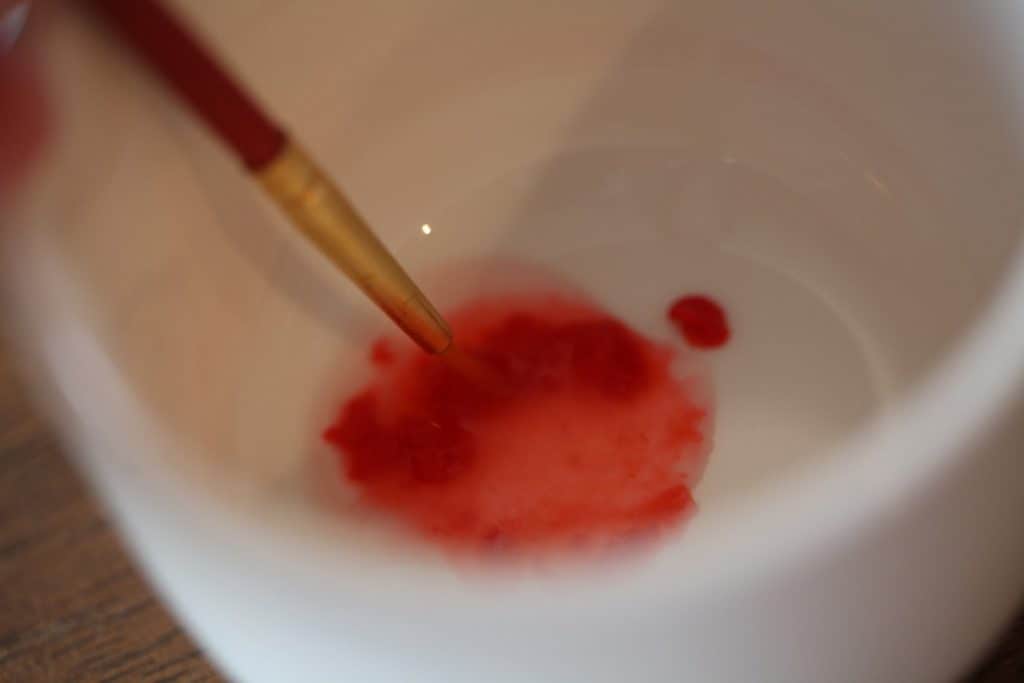
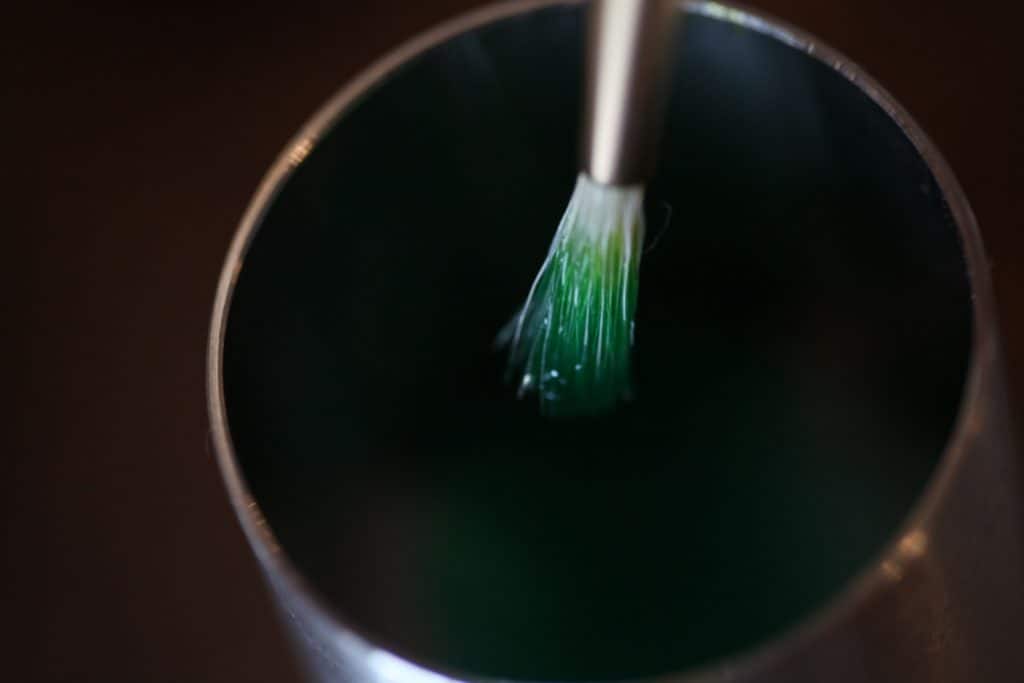
- The key is to turn the gel into a more watery consistency for the watercolor look.
- Adding just a few drops of the alcohol thins the coloured gel or food colouring mixture and makes it more usable and watery to paint with.
- As you continue to paint the cookies, the paint will start to dry. Just add more gel and alcohol, and adjust as needed.
- The alcohol will evaporate so no need to worry about consumption of alcohol when it's time to eat the cookies.
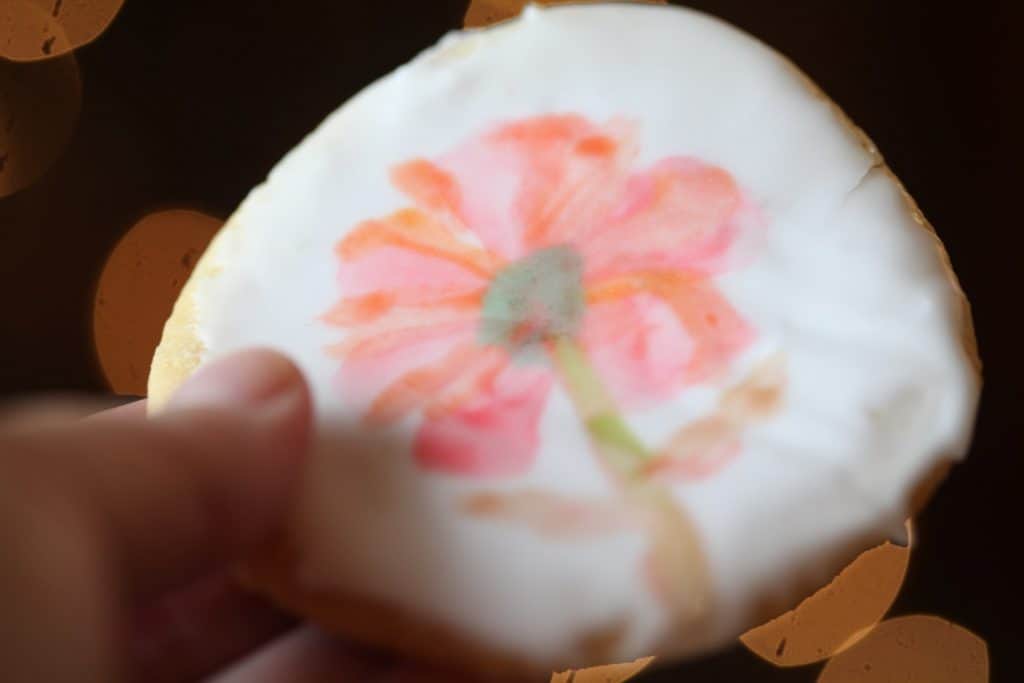
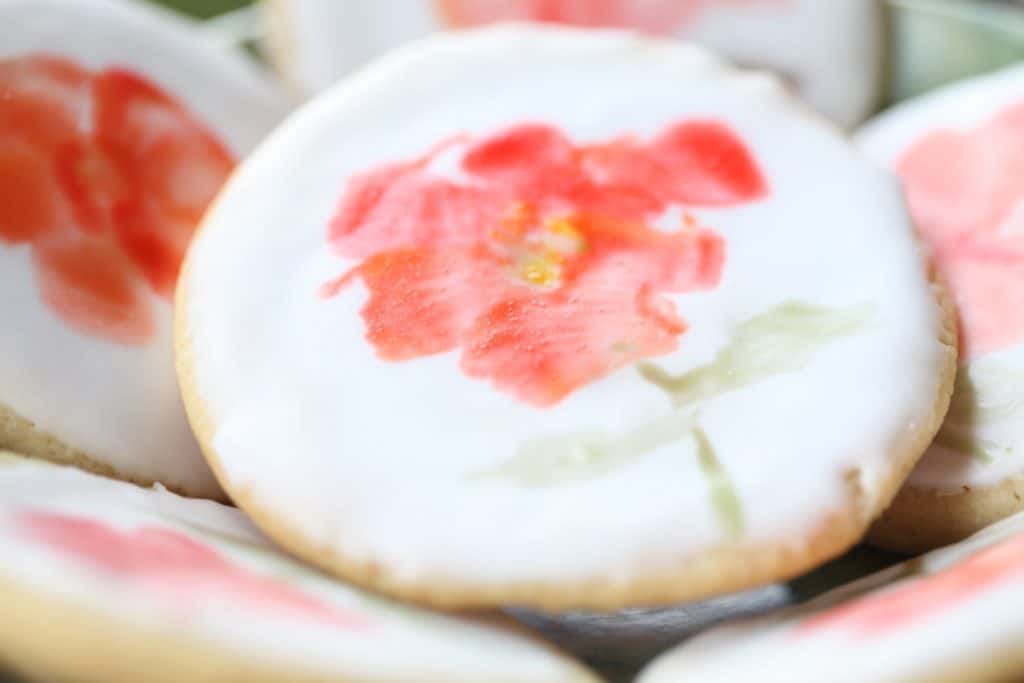
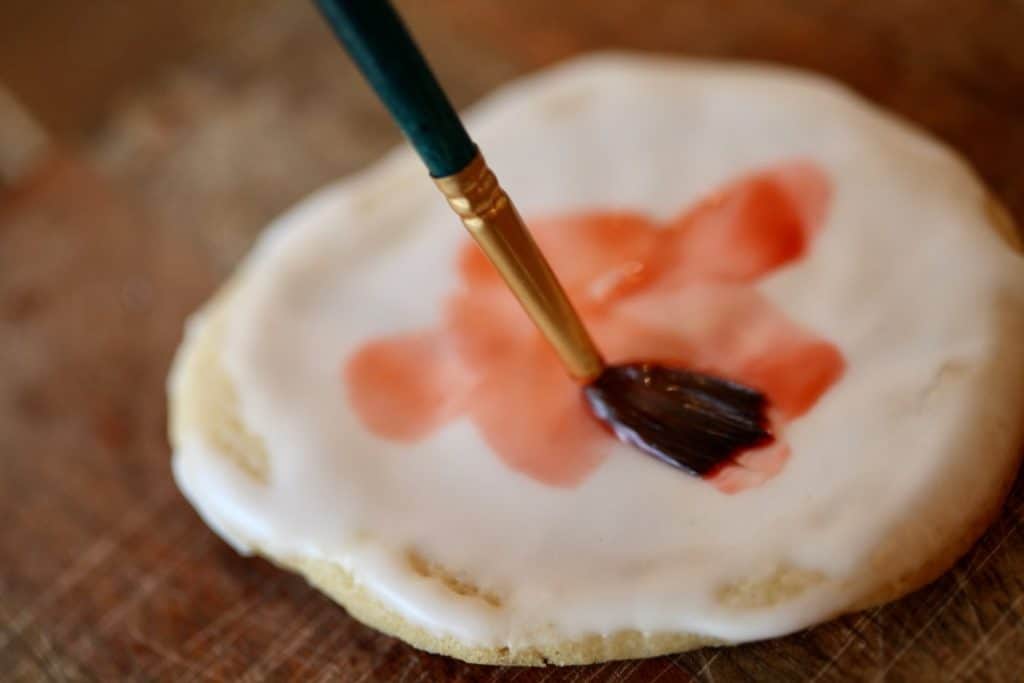
How To Paint Watercolor Sugar Cookies
- Try practicing on a few spare cookies to get the feel for the paint on the icing using the watercolor method. This really helps your confidence as you learn to work with this edible paint.
- You can try different colors, or stick to one simple color. It all works well.
- You can also blend colors together as needed, making different tones.
- Load up a small amount of paint onto a fine tip paint brush and paint some designs.
- Allow the paint colors to bleed onto the surface of the icing for a watercolor effect.
- Don't worry, there's no right or wrong way to do this. Just place the color on the cookie.
- Use the paper towel to dab your brush as needed.
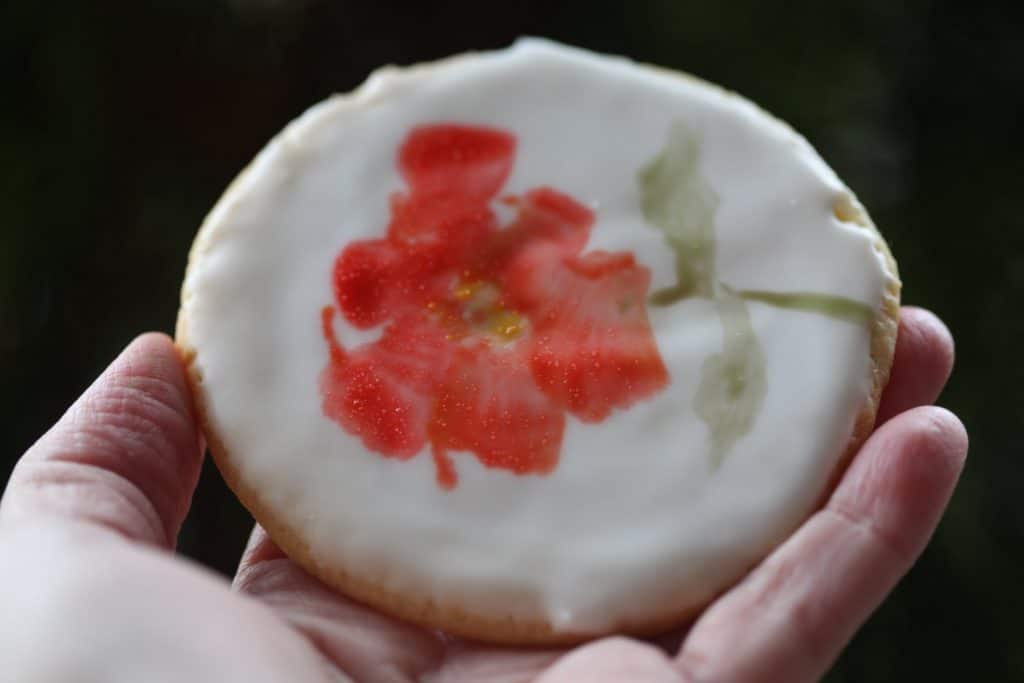
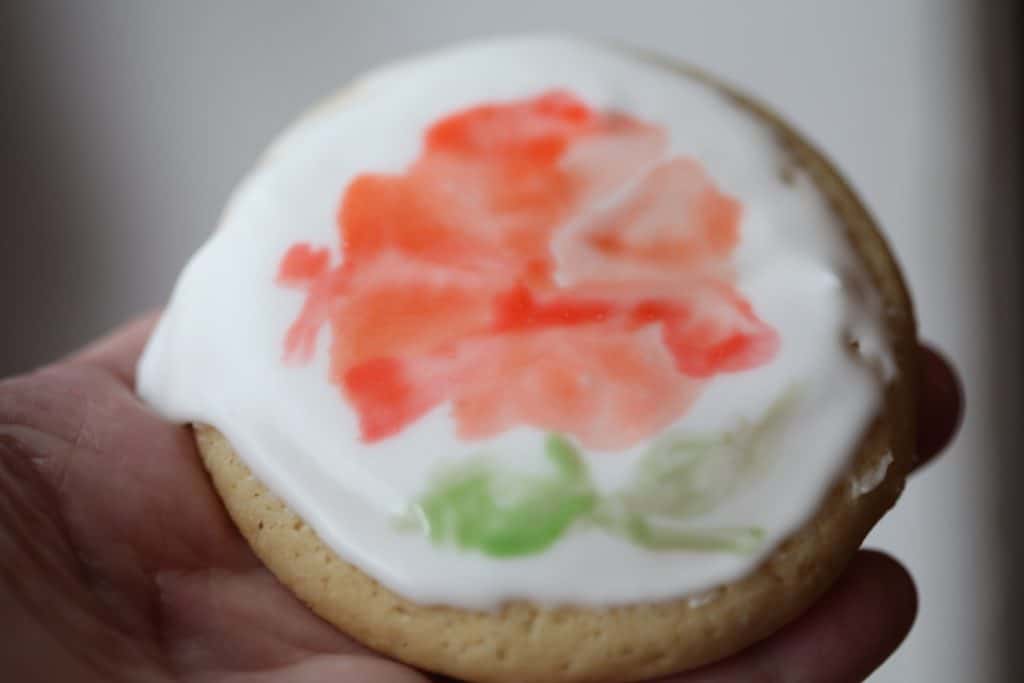
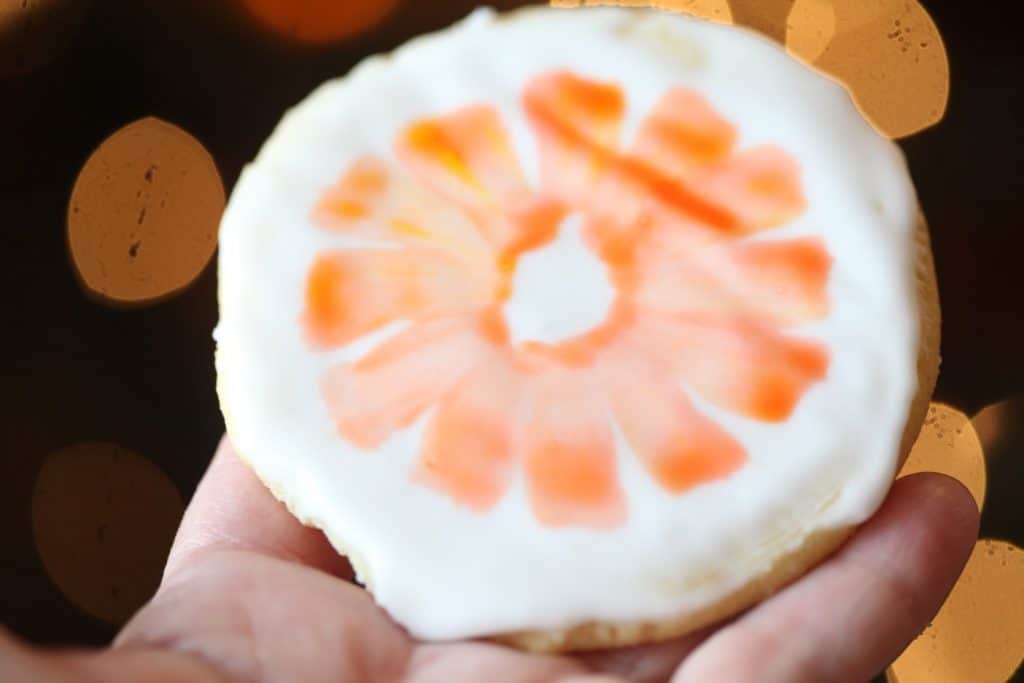
- Then try a fatter paint brush and try some flower petals. Just plop the paintbrush down sideways, and make a few petals from a sideways perspective.
- Let the colors lay as you place them.
- You can keep it very simple, or with some practice make a more intricate design.
- I feel that each and every cookie, no matter how simple the design, is a work of art, as each is unique and made by you.
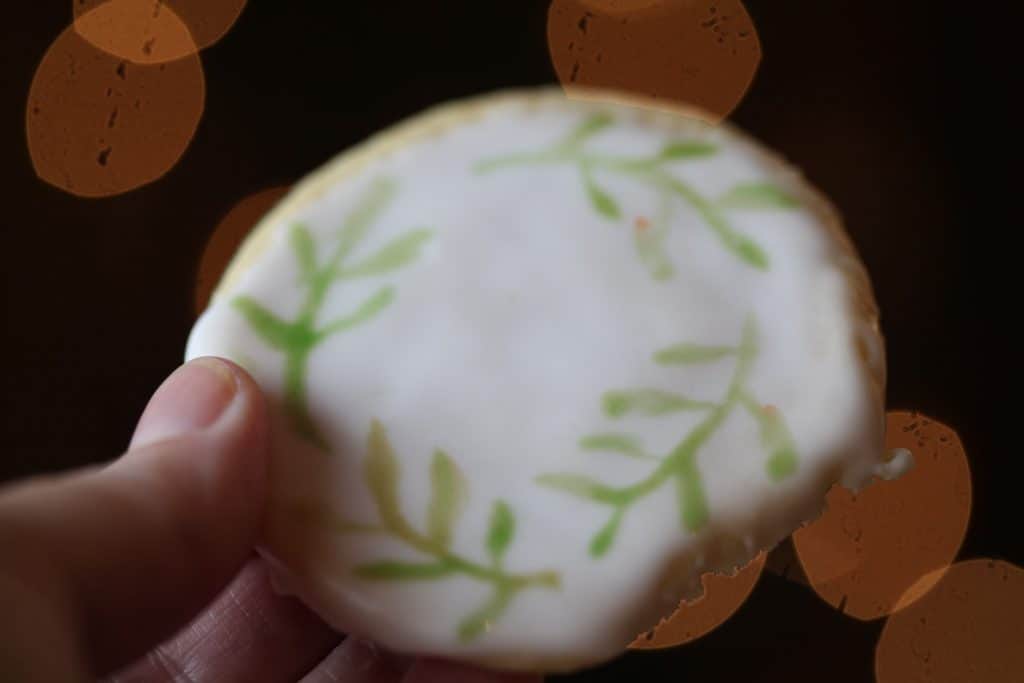
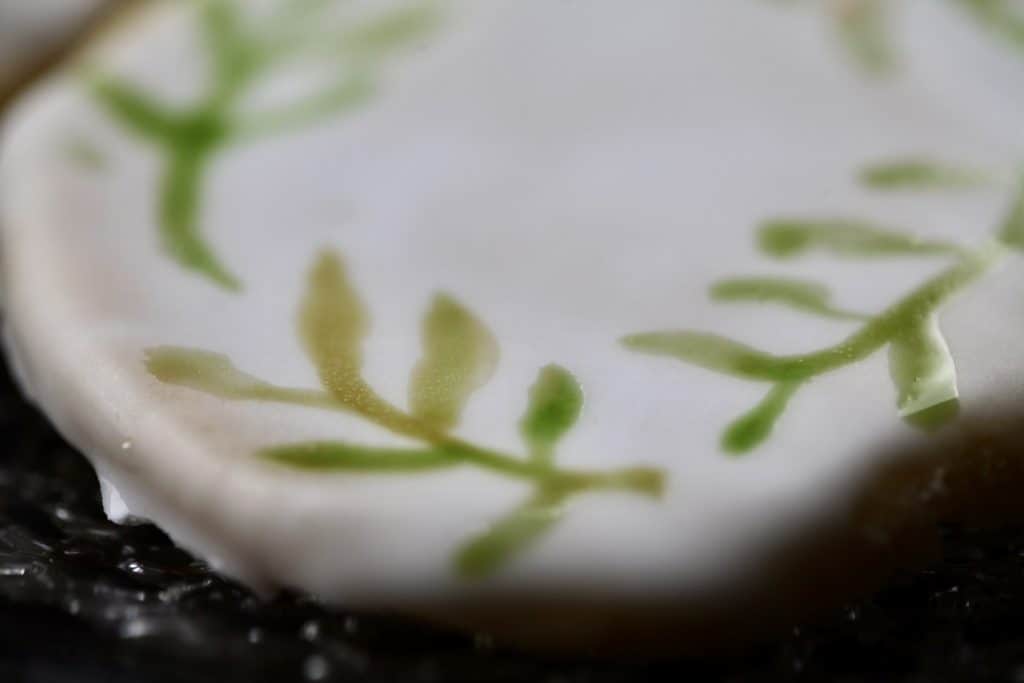
- Try painting some small stems and attach some leaves.
- I tried painting flowers, and loved the effects.
- Have a look at some simple watercolor painting ideas for inspiration.
- You can also paint simple shapes, watercolor flowers or berries.
- Paint what you are comfortable with.
- There is no right or wrong way, just have fun and enjoy the process.
- They are your very own cookies and unique edible art.
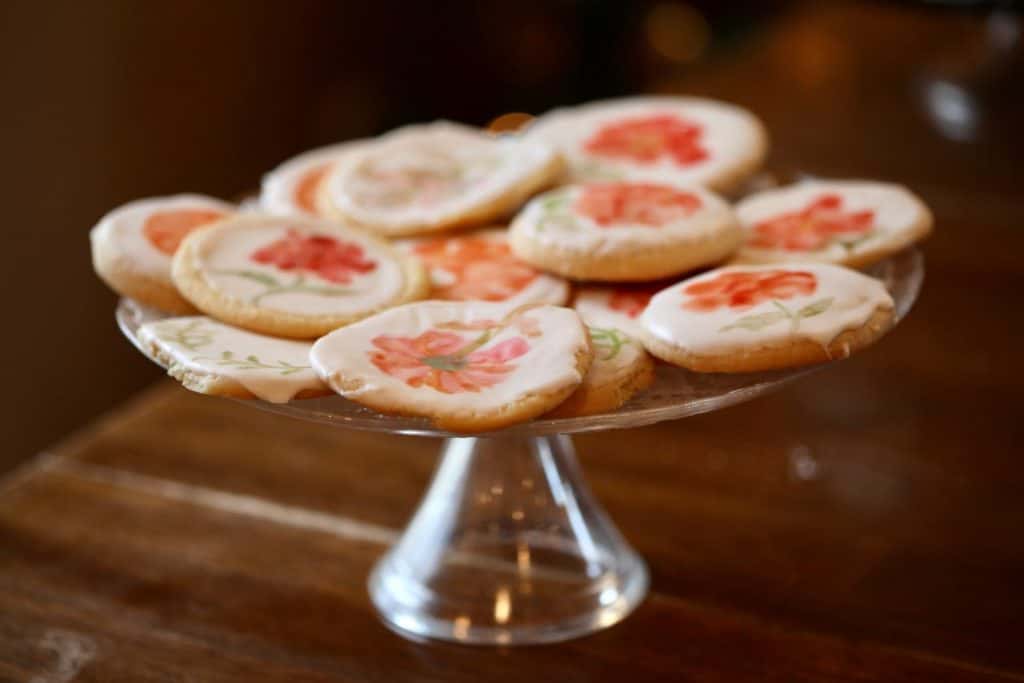
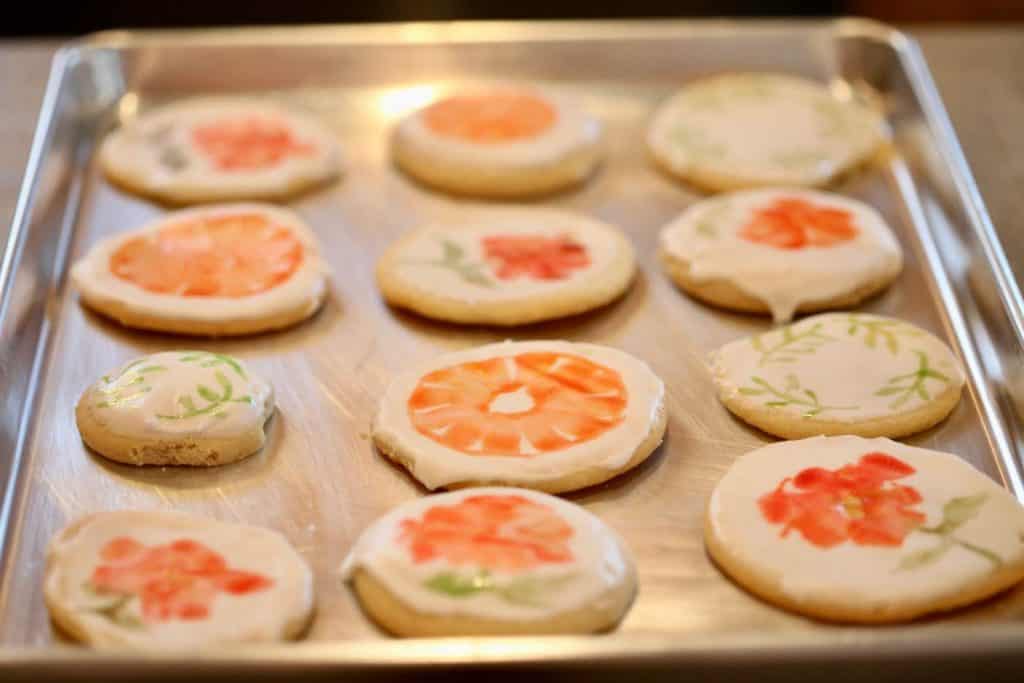
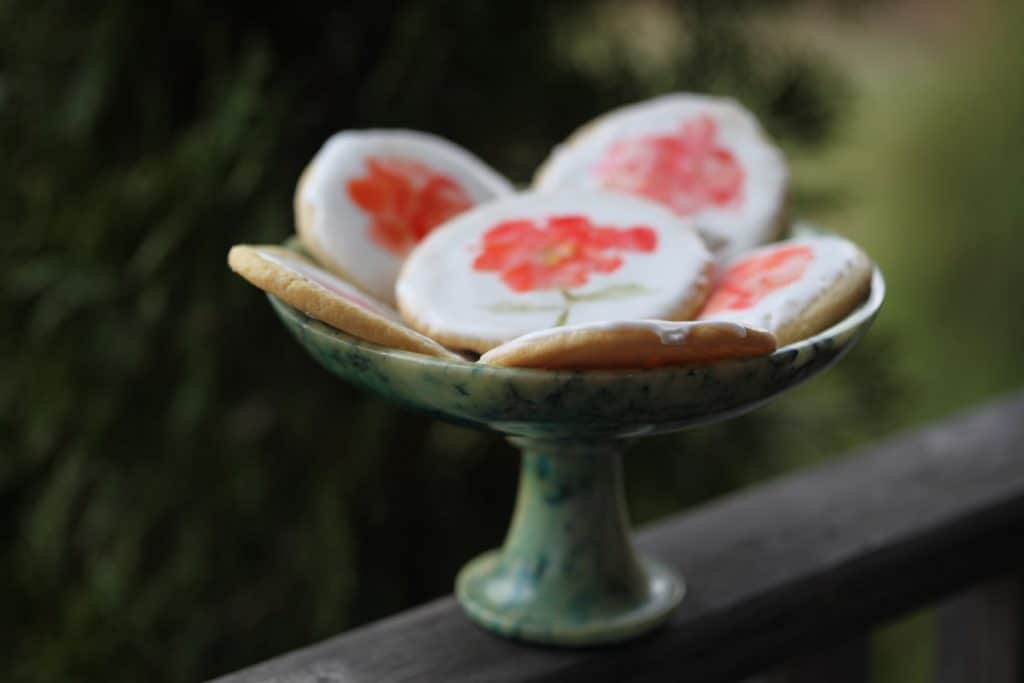
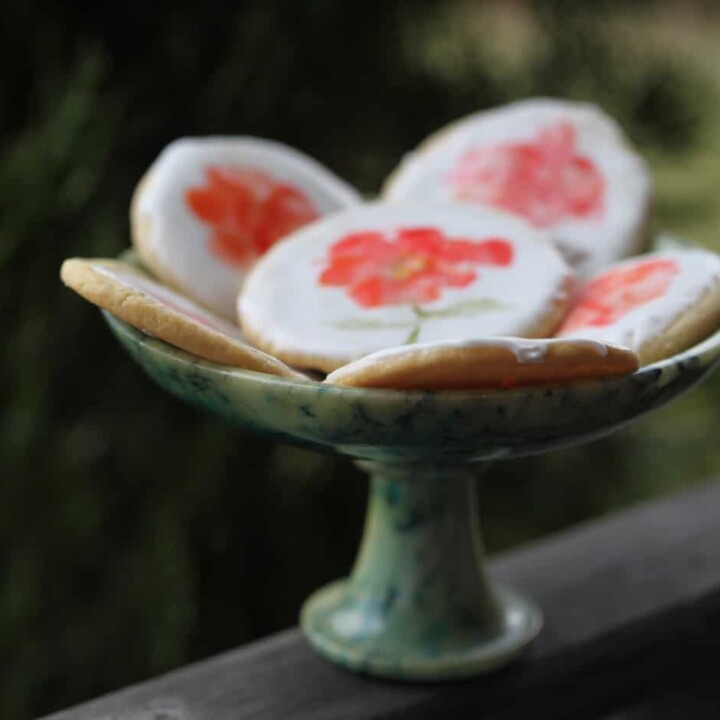
Here are some of my finished cookies:
Notice how simple and unique each one is.
How Long Do Watercolor Cookies Take To Dry?
The drying process for the watercolor paint is quite fast.
The paint will dry usually within an hour or two, depending on how wet the painting is.
When the cookies are dry you can pack them away in airtight containers.
Conclusion
Making these cookies was so much fun. I can't wait to make them again.
These colourful cookies are perfect for any special occasion.
They are great for a birthday party or shower.
Decorate them in season for Valentines, Easter, Mother's Day, Halloween and Christmas. They are perfect holiday cookies.
Have fun and enjoy!
Have you ever made watercolor sugar cookies? Be sure to leave a comment down below to share your experience!
HOW TO CARD: Making Watercolor Sugar Cookies
Watercolor sugar cookies are delectable bites of edible art that anyone can make. Try your skill at making these creations, and you will probably be making them for every occasion. Learn how to make watercolor sugar cookies, and awaken the artist in you.
Materials
- Gel Food Coloring or Icing Gel
- Cookies Frosted With Royal Icing
- Tsp of Vodka or Lemon or Clear Vanilla Extract- for mixing the gel
Tools
- paint brush
- paper towels
- small bowls or glasses
Instructions
- Put a small amount of gel approximately pea sized, into a small bowl or glass, such as a shot glass.
- Add the equivalent amount of vodka or extract and blend together with your paint brush.
- If it's too watery add more gel. If it's too thick, add more vodka.
- Use the cap of the bottle to deliver the alcohol into the container. It gives you a little more control over the amount that you pour in.
- Adding just a few drops of the alcohol thins the coloured gel or food colouring mixture and makes it more usable and watery to paint with.
- During this process, if the paint starts to dry, just add more gel and alcohol, and adjust as needed.
- Apply the paint to the cookies with a paintbrush.
- Try practicing on a few spare cookies to get the feel for the paint on the icing using the watercolor method. This really helps your confidence as you learn to work with this edible paint.
- You can try different colors, or stick to one simple color.
- You can also blend colors together as needed, making different tones.
- Load up a small amount of paint onto a fine tip paint brush and paint some designs.
- Allow the paint colors to bleed onto the surface of the icing for a watercolor effect.
- Use the paper towel to dab your brush as needed.
- Try a fatter paint brush and paint some flower petals. Just plop the paintbrush down sideways, and make a few petals from a sideways perspective.
- Let the colors lay as you place them.
- Try painting some small stems and attach some leaves.
- There is no right or wrong way, just have fun and enjoy the process. They are your very own cookies and unique edible art.
- The paint will dry usually within an hour or two, depending on how wet the painting is.
Notes
Make sure not to substitute the alcohol for water when making this paint, as water will cause the royal icing to become wet.
The alcohol on the other hand will sit on the top of the icing and will dry very fast.
The alcohol will evaporate so no need to worry about consumption of alcohol when it's time to eat the cookies.
Other Posts You May Like:
PIN IT FOR LATER!

Leave a Reply