
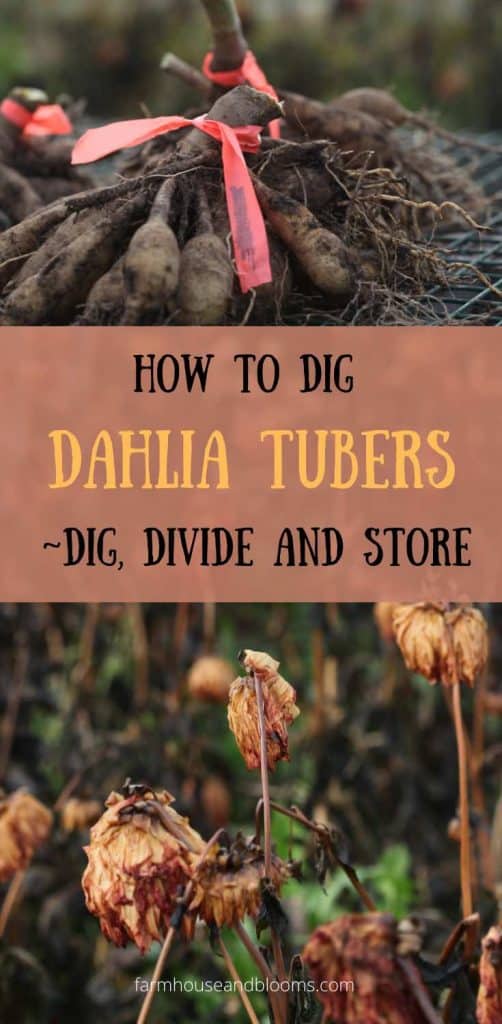
Digging up dahlia tubers in fall at the end of the growing season can be an arduous task, especially if you have more than just a few plants. However with some organization and a digging plan, getting the job done is easily accomplished. Learn how to dig dahlia tubers, with tips on digging, dividing and storing the tubers away for winter.
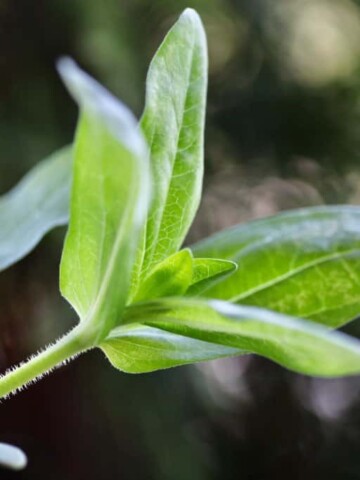
During our first year of growing dahlias, we grew them in pots.
Our dahlias bloomed beautifully, and the tubers multiplied exceptionally well. At the end of the season we had more than quadrupled our tuber numbers.
There was no need to dig, we just dumped out the soil, cleaned off the clumps, and were ready to divide.
The following year however we needed to plant into the garden, as we only had so many pots. And the dahlias do so much better in the ground. We planted in prepared beds with a high organic content.
So the following fall our tubers again multiplied, and more than quadrupled, and the tubers were massive.
Fast forward several more seasons, and you can probably get the picture... several small fields full of dahlias.
I try to dig out as many tubers as I have room for, and the others will remain in the ground.
I chose my favourites, and the best performers for our area. Then set about planning a dig date to harvest all the tubers, to get them out of the ground before the frost sets in.
When Should I Dig Up My Dahlia Tubers?
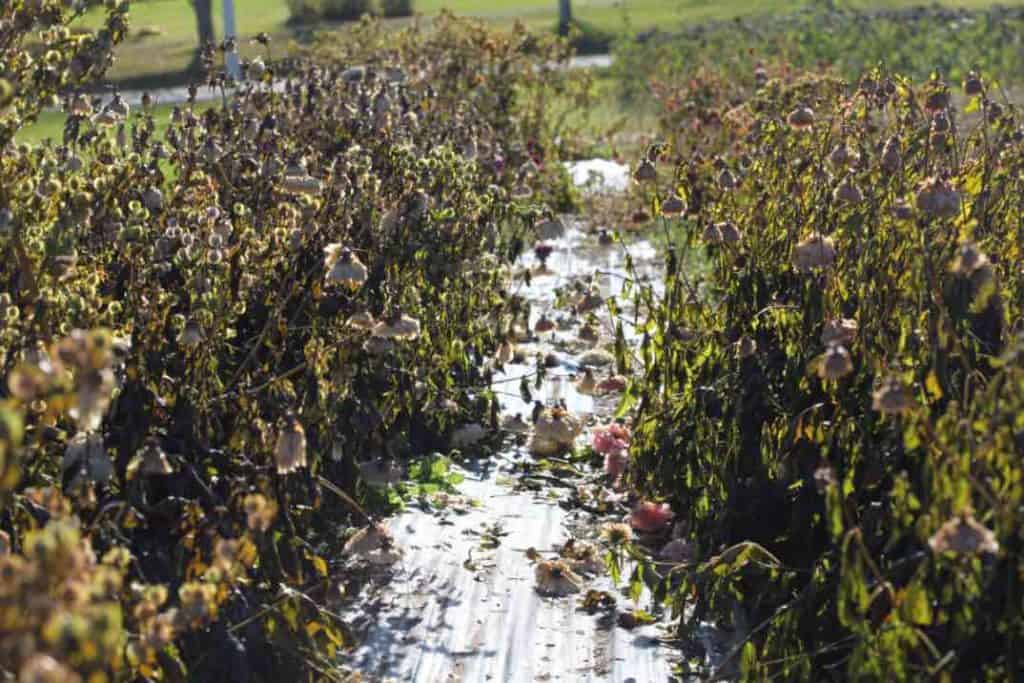
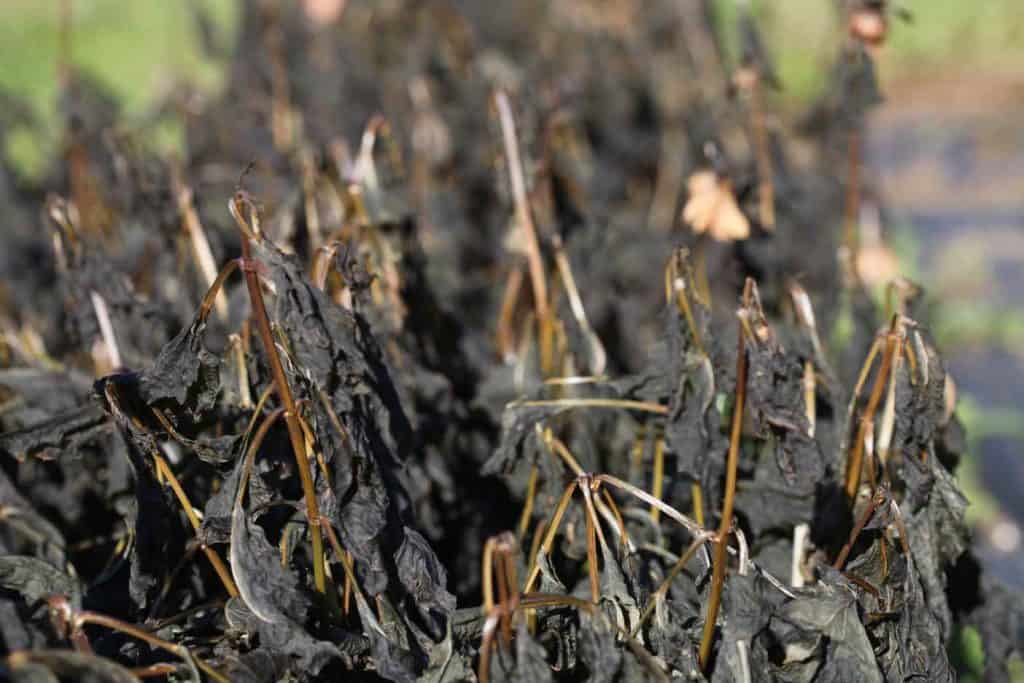
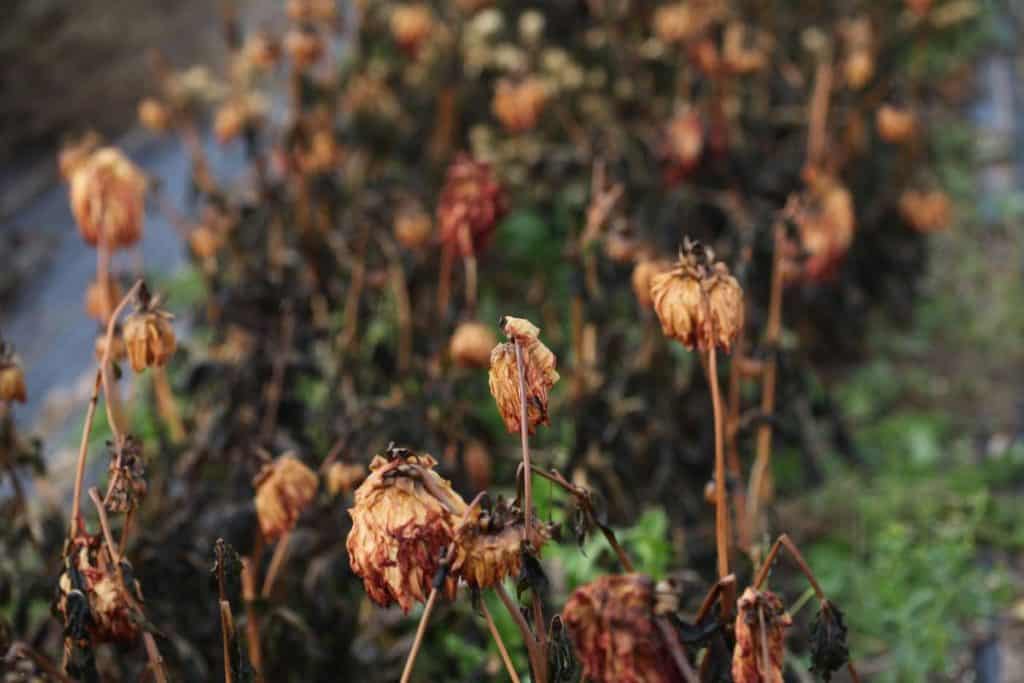
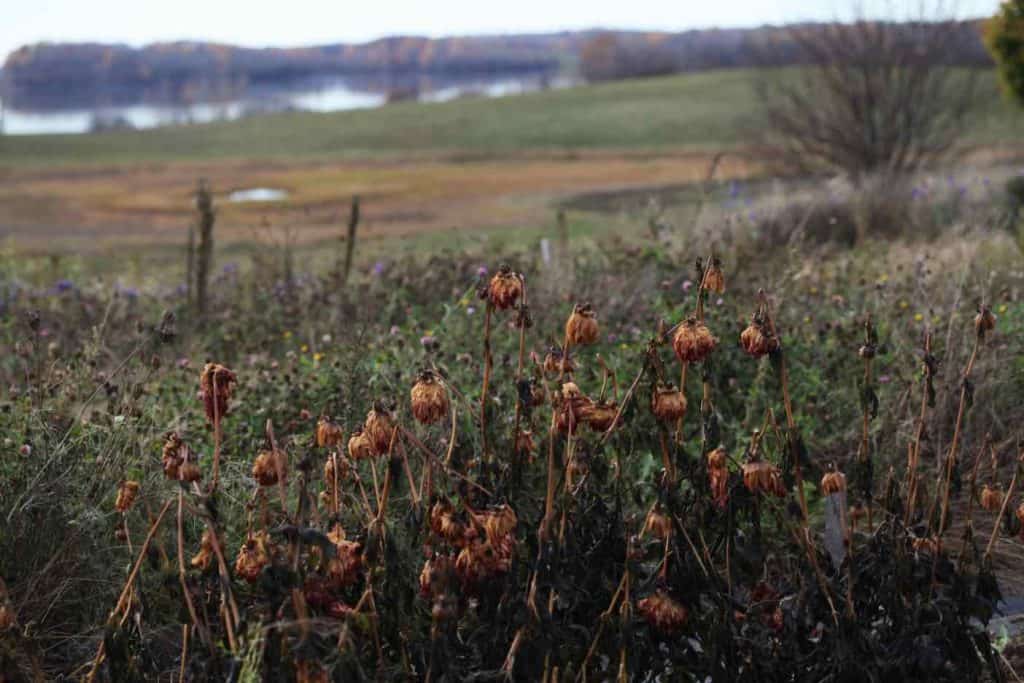
Ideally dahlia tubers should be dug after the first or second hard frost in late fall, when the upper portion of the plant has blackened from the frost.
Sometimes the first frost is a light frost and does not damage the foliage much, so wait until the dahlia foliage has blackened from a hard freeze before digging the dahlia bulbs or tubers.
The time frame is varied from one location to another, and can also be different in the same location from one season to another.
In 2020 we had a damaging frost in mid September, and were digging our dahlias in early October.
This year however we had blooms until November, and our killing frost did not arrive until November 5th. This resulted in a much later time frame for our dahlia dig.
In warmer growing zones, you will probably not get a killing frost. So it is important to find a different way to determine the best time to dig, if you plan to dig at all.
In warmer growing zones, such as usda zones 8 to 10, dahlia tubers can be overwintered in the garden, as they are considered to be tender perennials. However if you plan to divide the tubers, then digging will need to occur.
In this case it is best to allow the tubers to grow for at least four to five months, especially the larger dinner plate Dahlias like Cafe Au Lait, thus allowing them to mature and grow to full size before digging.
Allow The Tubers To Cure
After the foliage has blackened, wait for a week or two to dig if you can. This allows for the tubers to cure, and the outer skin to toughen. This curing process is helpful for the tuber, as it becomes less vulnerable to damage by trauma or disease.
However, I always say to dig your dahlia tubers when you can, and when you can fit this task into your schedule. Just know that if the tubers are able to stay in the ground a little longer, that it can be a good thing.
Can You Leave Dahlias In The Ground Over Winter?
Dahlia tubers are damaged by frost. They will be completely destroyed if left in ground that becomes frozen through the winter.
In our zone 5b garden the dahlia tubers would not survive our cold winter. Our ground freezes deeply, and the frost can travel down four feet deep in some locations.
In warmer growing zones (7 and above), gardeners have successfully overwintered dahlias in the ground with extra protection. They use a combination of leaves, straw and tarps to heavily mulch the dahlia beds. These efforts help to protect the tubers throughout the winter.
In areas where the ground freezes however, the dahlia tubers should be dug in fall. The tubers can then be divided and stored over winter, until they are once again able to be planted out in spring.
Some people choose not to dig their tubers in the fall. They have the option to purchase new tubers in the spring if they want to plant dahlias again next year.
How Do You Dig Dahlia Tubers?
Digging dahlia tubers is pretty straight forward, although involves a lot of physical effort and some heavy lifting.
There are various methods, so pick one that works best for you.
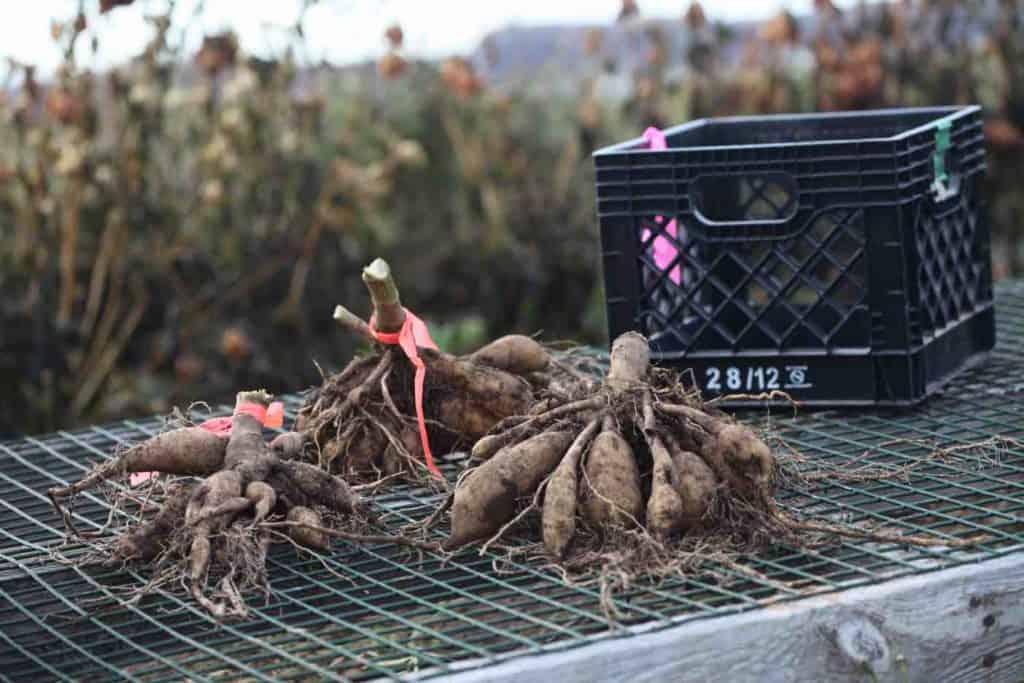
For the dig itself, all you need are severals tools to make the process go smoothly, plus some containers and labeling supplies to label the tubers as they are dug.

Tools For The Dig
- Garden Fork -one that will stand up to the weight of some of the heavy tuberous roots.
- Pair Of Snippers to cut the thick dahlia stems from the tubers.
- Rolls Of Plastic Ribbon to label the tubers.
- Permanent Marker to label the tubers.
- Storage Crates in which to place the tubers- we like to use milk crates or stackable crates for easy storage, but you can also use cardboard boxes, storage bins, or paper bags if it's not wet outside.
The Best Day To Harvest
Dig the dahlia tubers on a dry day if possible, as the soil will be drier during the harvest. It will therefore be easier to lift the dahlia clumps.
If the soil is wet and heavy, the task will be more difficult.
With dry soil it is also easier to remove the majority of the soil from the tubers before placing them in the crate. This makes for a lighter container to move and store when the crate is full of tubers.
Dig the dahlia tubers when the air temperature is above freezing, because if you harvest when the temperature is below freezing you can damage the tubers.
The tubers will be safe and insulated under the soil for awhile, even when it's freezing out. But once you harvest them and expose them to the freezing air, they will most likely become damaged. So try to harvest on a milder day.
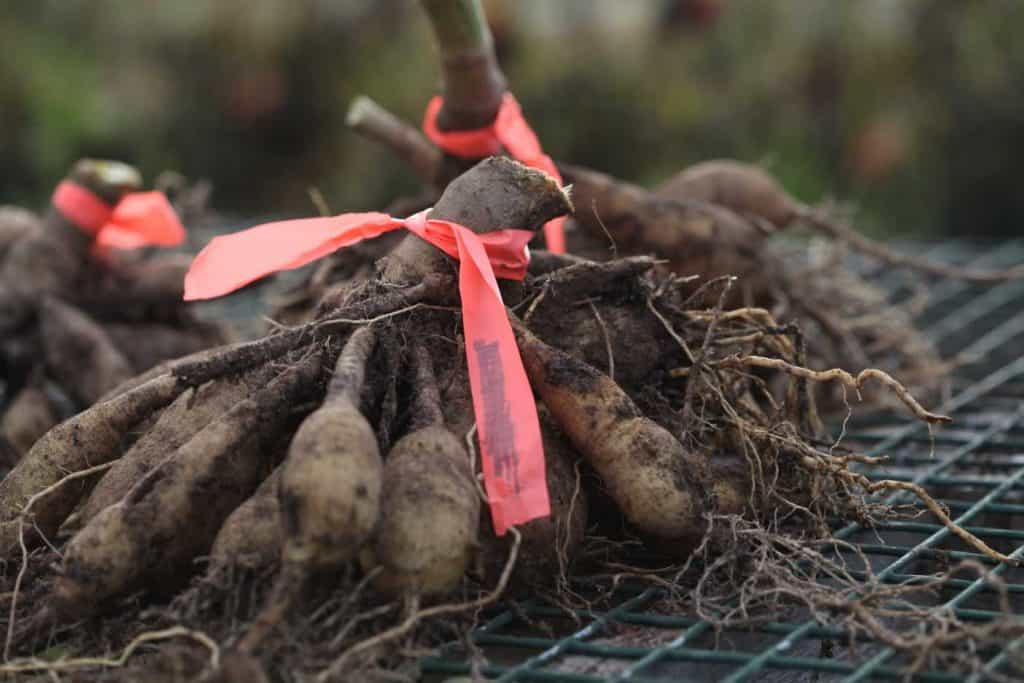
Label The Dahlia Tubers
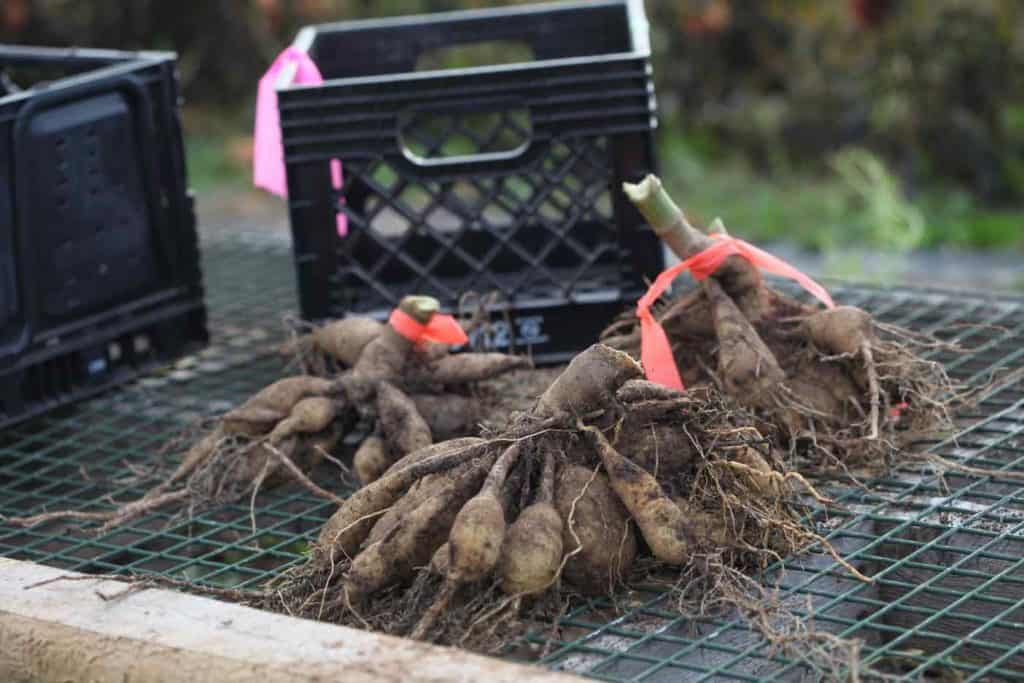
For the sake of identification, make sure to prepare a label for your dahlia variety before you start to dig, and affix it to the crate where you plan to place those specific tubers.
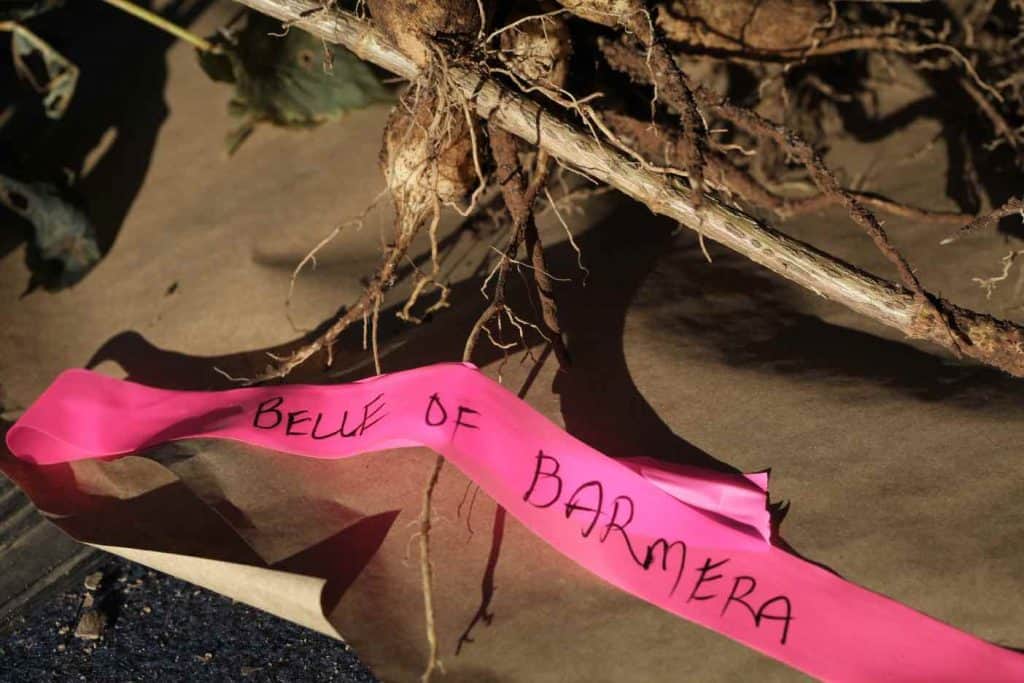
This is a good habit to get into, and can save a mixup. Even the most organized person can forget which dahlias they have been digging, especially if there are multiple varieties being dug.
It is hard to identify dahlia tubers once they are in their crates without a label. Although many tubers can look slightly different, they all look similar in an unlabelled crate.
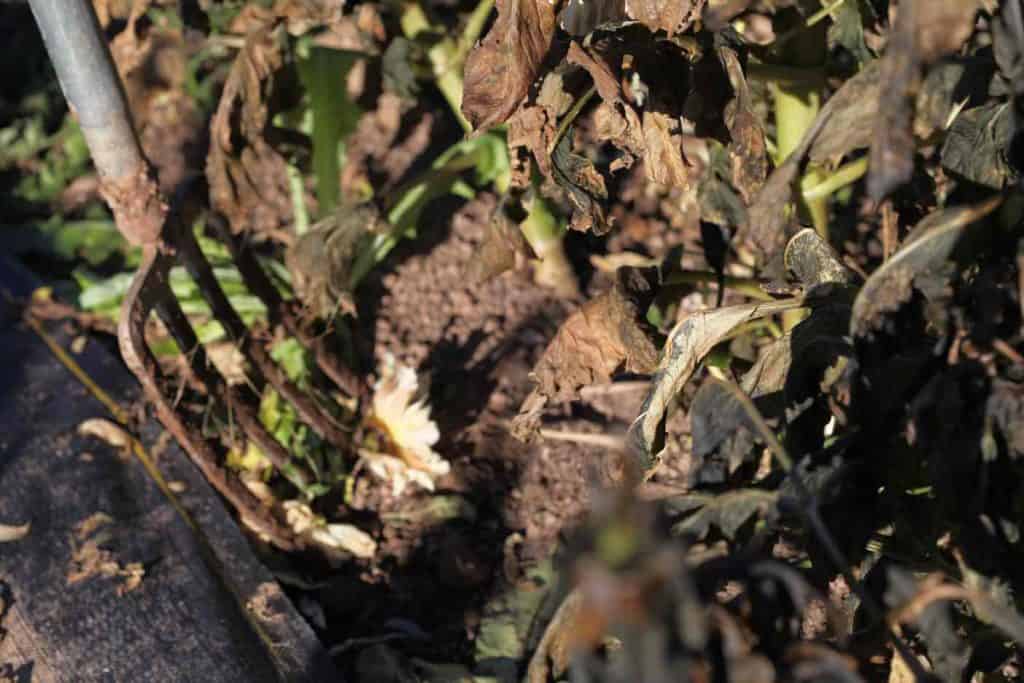
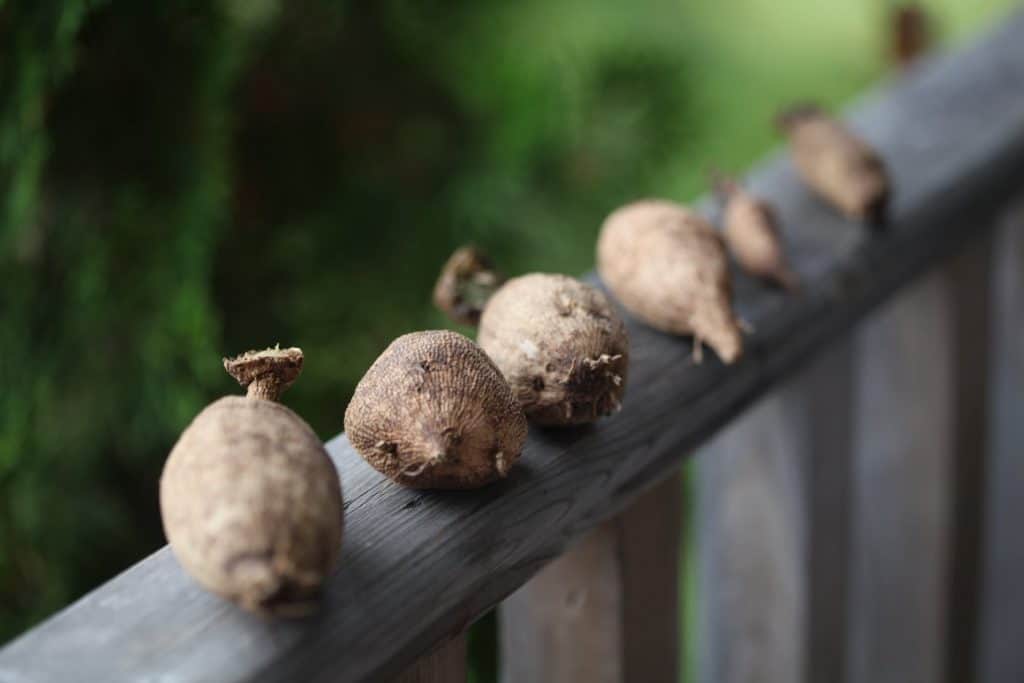
The Digging Process
I always use a good garden fork to dig the dahlia tubers.
Some of the larger dinner plate dahlias can have massive sized clumps, especially if growing in fertile organic soil. The fork makes it easier to lift these clumps allowing for the soil around the tubers to fall away as you lift the clump out of the soil.
Start by piercing the soil with the fork about a foot away from the dahlia stem at the base of the plant. Push the fork into the soil while also pressing down on the handle, loosening up the dahlia clump.
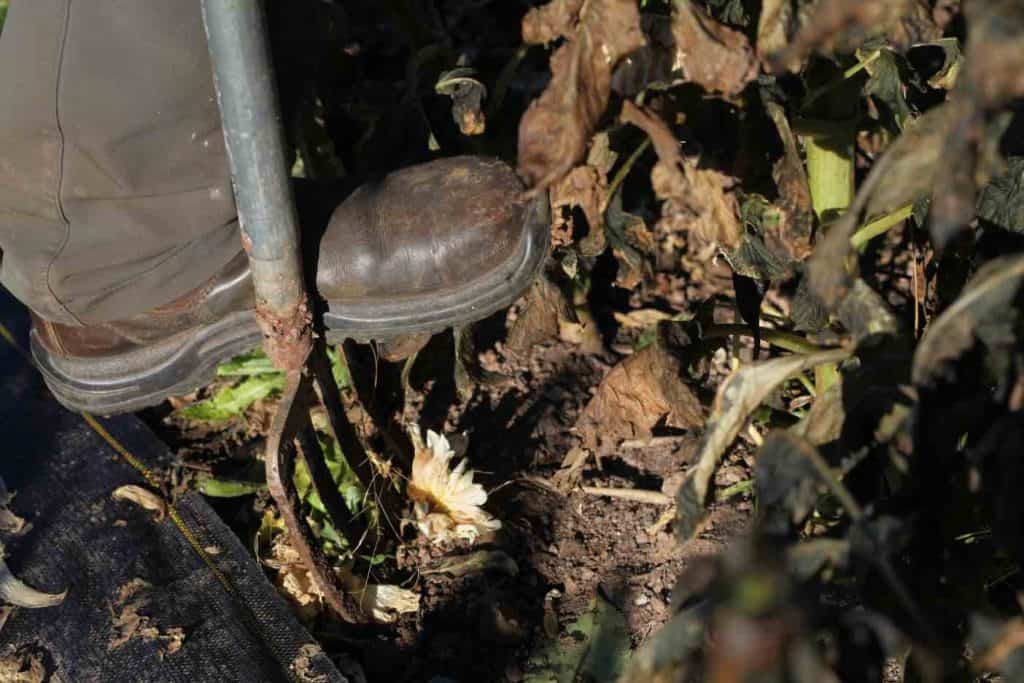
You will see the stem of the dahlia move and wiggle as you loosen the hold of the soil.
Work your way around the dahlia plant in this manner, pushing down on the fork as you work around the plant.
Lifting The Dahlias
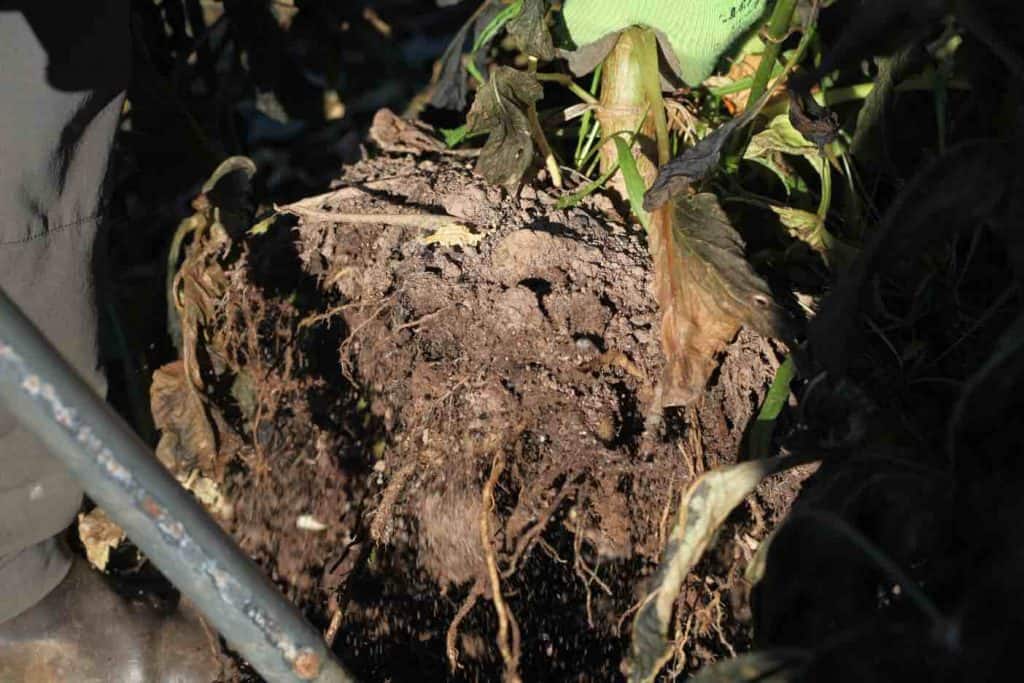
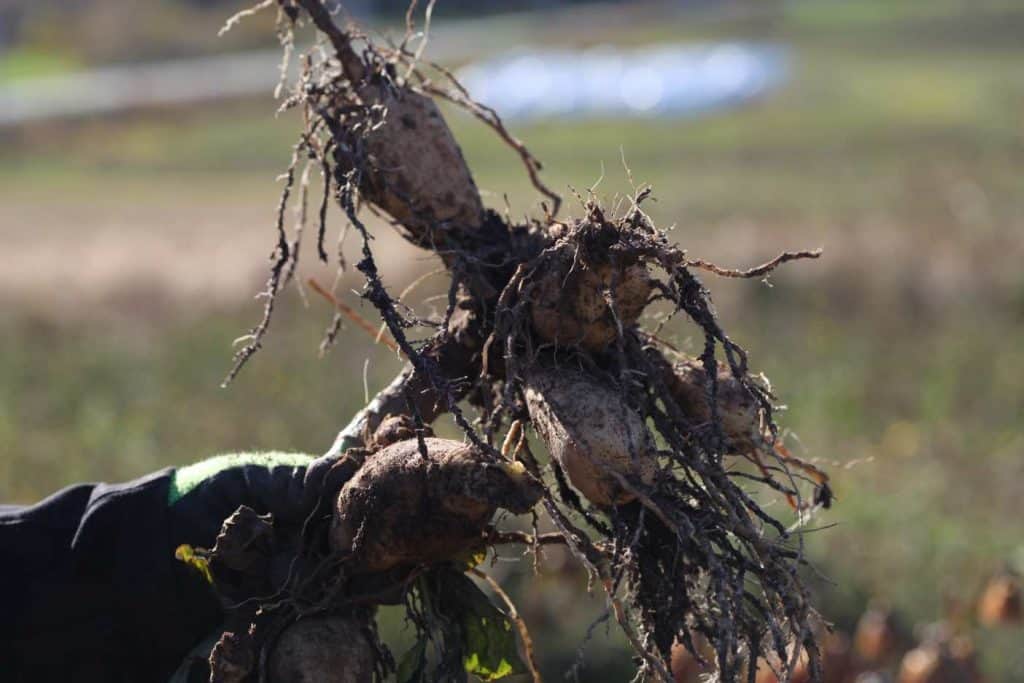
When the dahlia is dislodged, gently pull the root clump up out of the soil.
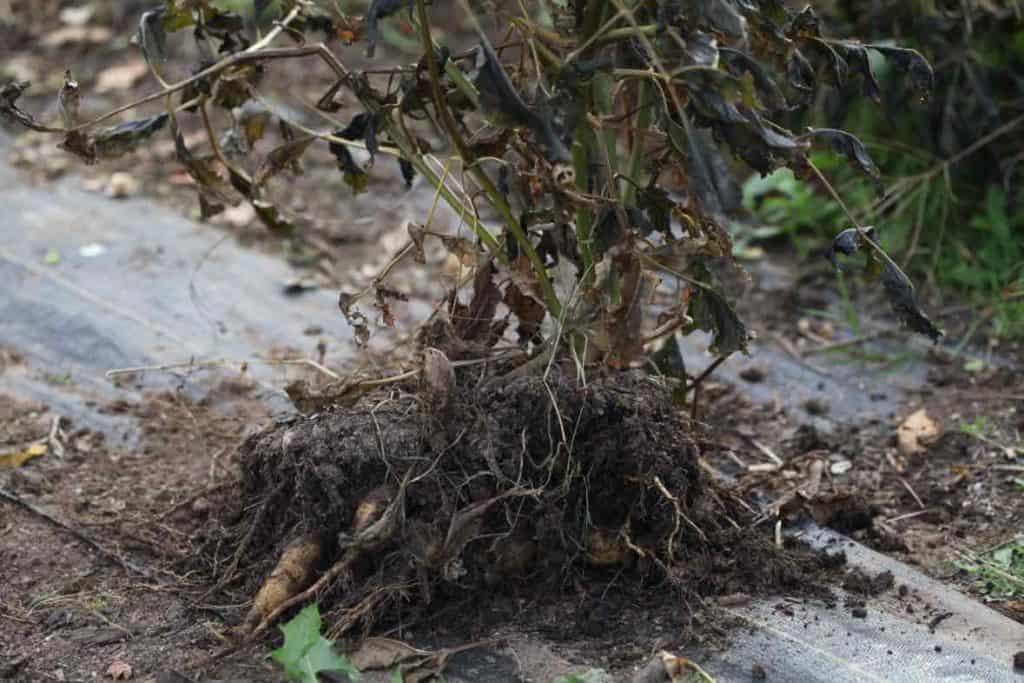
Often it will be completely intact, although sometimes there will be missing tubers. You can easily see this by looking at the clump of tubers to see if any pieces look like they have been broken off.
If you notice some broken pieces, fish around in the soil to see if you can locate them. Many of these broken individual tubers will still be viable and are good to add to the pile.
Sometimes you may pierce a tuber with the fork, but don't worry, it's all part of the process. Some of these tubers will recover and heal. Others will not.
I find this happens more often if I get too close to the clump with the fork as I start the dig. Just move back a distance from the dahlia stem if you have gotten too close.
Cut The Dahlia Stems
I generally cut the main stem after I lift the whole clump out of the ground. Other growers will cut the stem of the plant before they start to dig.
Do whatever works best for you. You will figure out your own process.
Cut the stem within two to three inches from the clump, and discard the top of the dahlia plant in the compost pile. Some stems can be quite thick, so you will need a good pair of garden snippers for this task.
Removal Of Dirt
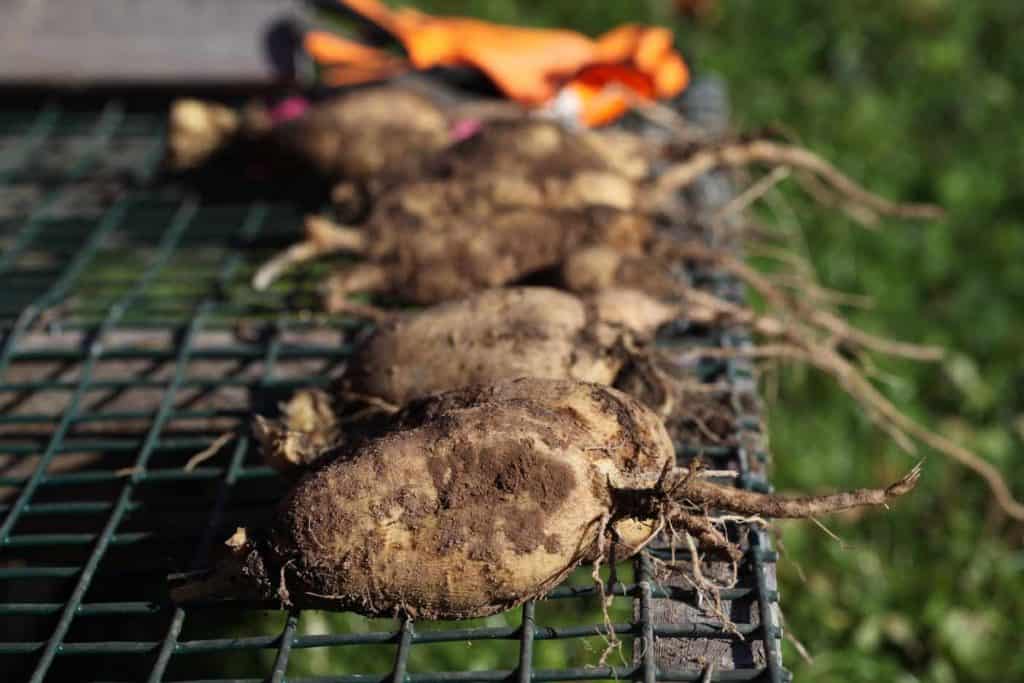
Sometimes the dahlias extracted from the ground are in large clumps of dirt.
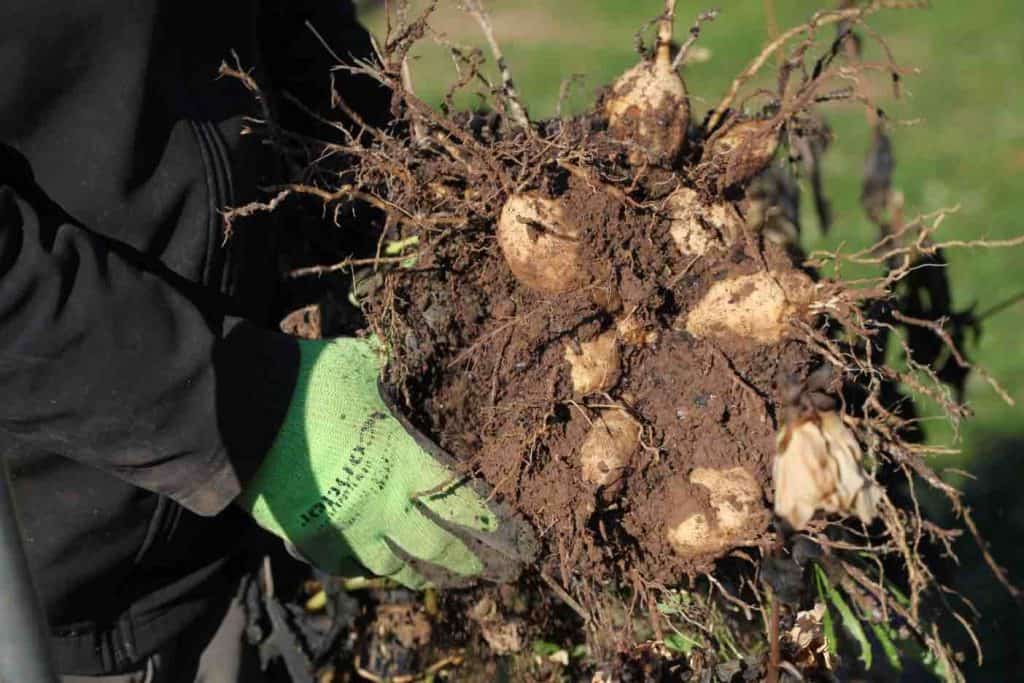
It is very tempting to hold the dahlia clump by the stem and to give it a good shake to remove the excess soil. I still do it.
However, it is important to do this very gently, because shaking the clump will result in lots of tuber breakage. The necks of the tubers are often very delicate, and will break easily if you shake too hard.
I'll often just place the tuber clump down on it's side and gently brush the excess dirt away, before placing it into the crate.
I leave a little bit of dirt on the freshly dug tubers. This tends to insulate them some, and helps to keep them from drying out too much until they can be processed and stored away.
Toss The Damaged Tubers
It is almost inevitable that some tubers from the clump will get damaged by the digging process. Most often the damage occurs to the fragile tuber necks, which easily bend with the weight of the soil and crack.
If the neck is bent slightly it may be okay, however if cracked it will likely be no good, so I toss these tubers into the compost.
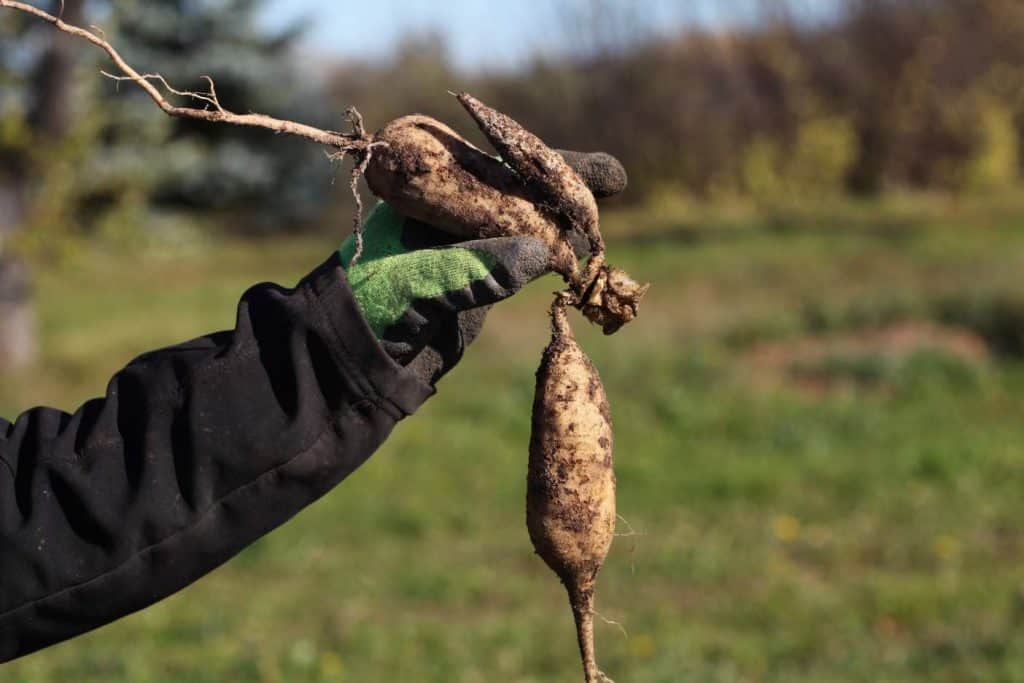
Any tubers that have come off of the clump that do not have part of the crown attached will also be tossed into the compost pile. These tubers will never grow or develop eyes and they do not need to be stored, as they will only be taking up valuable storage space.
Place Tubers In Storage Containers
After harvesting, place the tubers in the crates, boxes, or whatever storage container you have chosen.
Store in a cool location until they can be processed for winter storage.
Cleaning And Dividing The Dahlia Tubers
Depending on the numbers of dahlias that you have dug, there may be some time between the digging process, and the cleaning, dividing, and storing.
And that is okay.
In fact, it can take me a month to get all the dahlia tuber processing done.
I can't say exactly how many clumps of dahlias we dug this year, however we dug what we could manage. There are at least several hundred clumps, if not more, so the cleaning and dividing will take some time.
The very most important thing to be aware of during this period is not to place the tubers in an area where they will be exposed to freezing temperatures.
If the temperature dips below freezing, the tubers will most likely meet their demise.
This happened to us last year, and it was a very big lesson. We tucked many crates of freshly dug tubers out of the elements but into an unheated building. When we eventually got to them, all of the tubers were lost.
They are very vulnerable to freezing.
Lesson learned.
This year, after each tuber harvest, the tubers were safely stored in a heated but cool storage area until they could be processed.
Cleaning Dahlia Tubers
After dahlia tubers have been dug, we leave a little bit of soil on them, a dusting really, until they can be cleaned, divided and stored.
We grow in clay soil, so the small amount of clay remaining on the tubers is easy to remove after it has dried.
To clean, I start by taking each clump and gently remove any soil, usually by holding the clump over a large collection container.
Next, I cut off any fine feeder roots, which generally cover the clump.
Then I take the clump to a utility sink, and rinse off all the dirt.
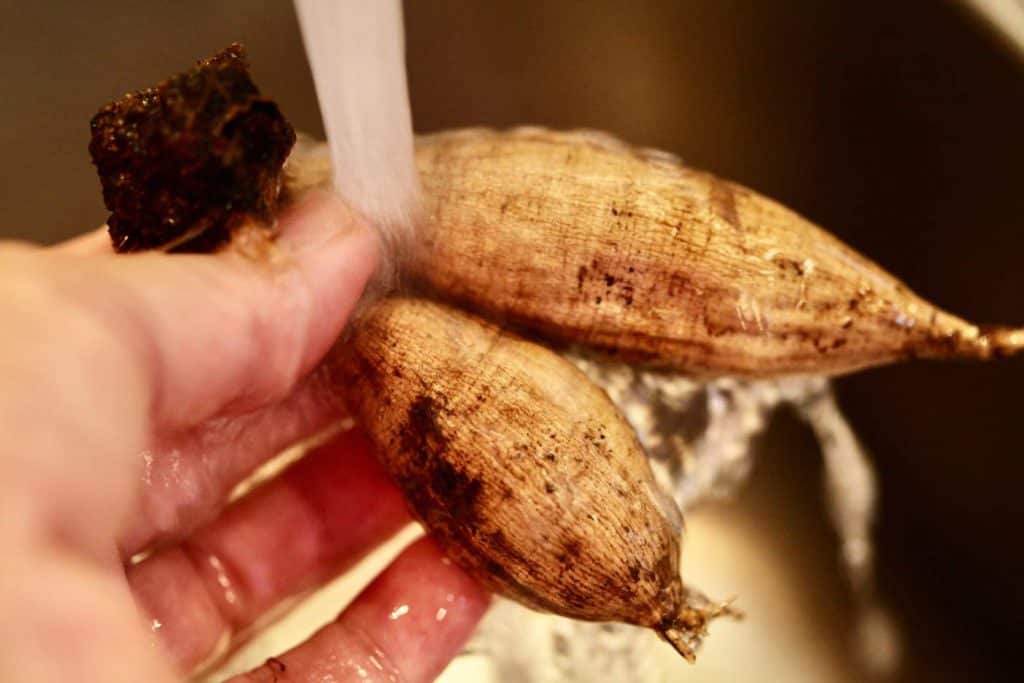
At this point it's easy to inspect the dahlia clump.
Some people store their dahlia clumps intact. In that case, they will not need to be divided.
I like to divide the dahlia clumps and remove all the tubers, as I find that this is the easiest way to store, especially using the method that I use, which is wrapping them in plastic wrap.
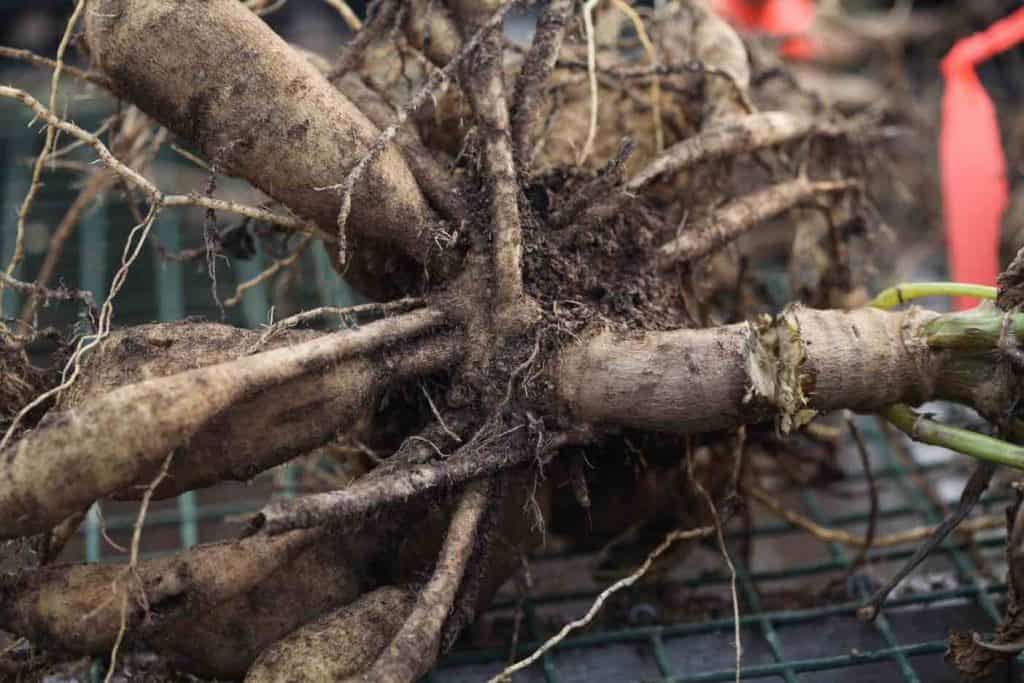
Dividing Dahlia Tubers
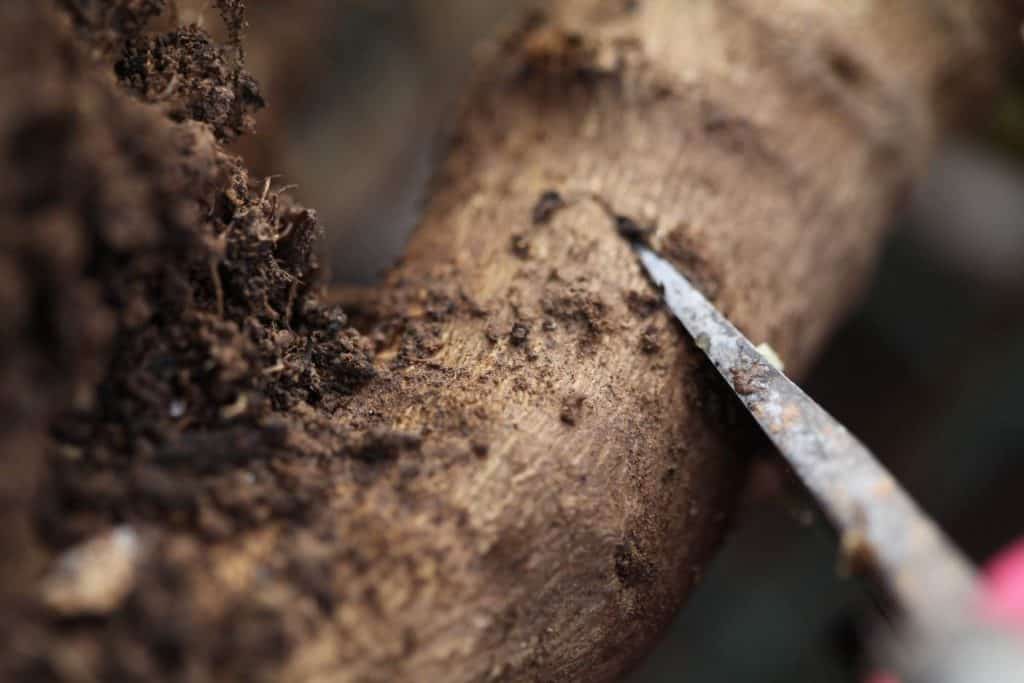
Inspect The Clump
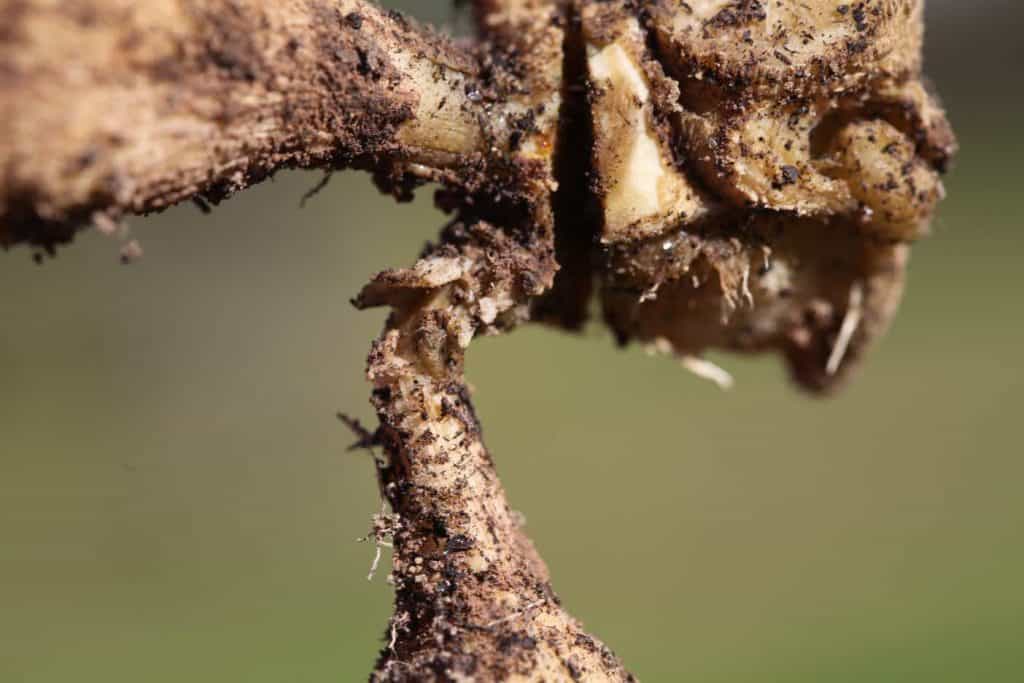
To divide dahlia tubers, start by inspecting the clump.
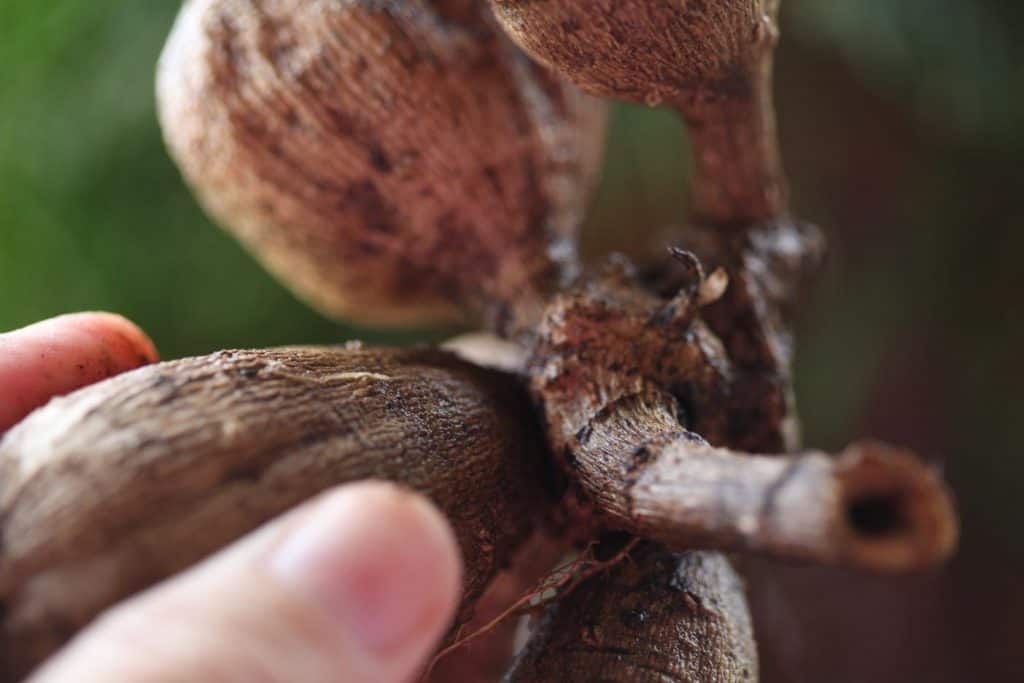
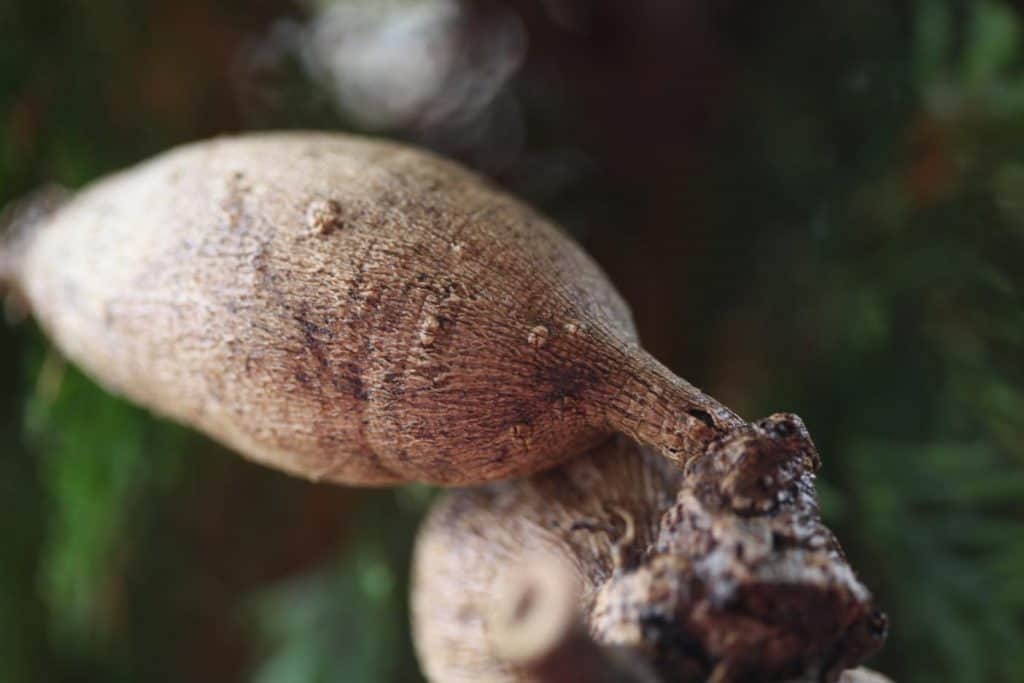
Note where the tuber is attached to the crown of the plant. Often you will see a little cap-like structure where the tuber comes off the clump.
This is part of the crown, and it's important to keep this part attached to the tuber when you cut it from the clump with your snippers.
The reason that it's important to preserve this part is that this will be where an eye may form.
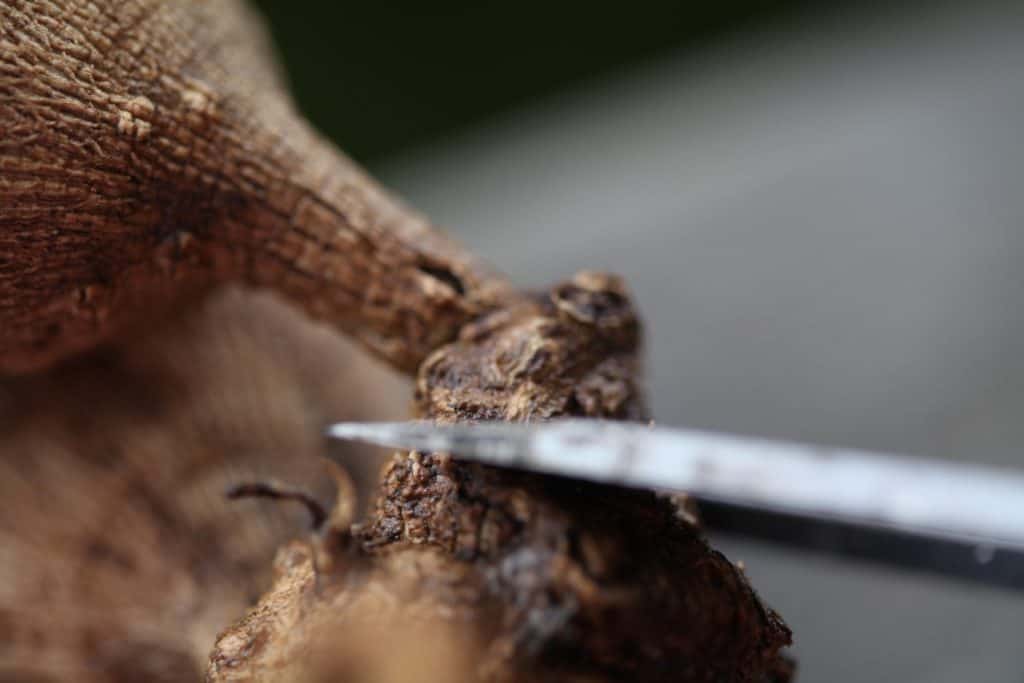
Take Part Of The Crown
You should always have a piece of the crown on your tubers for successful propagation. Without it you will not get any sprouting eyes.
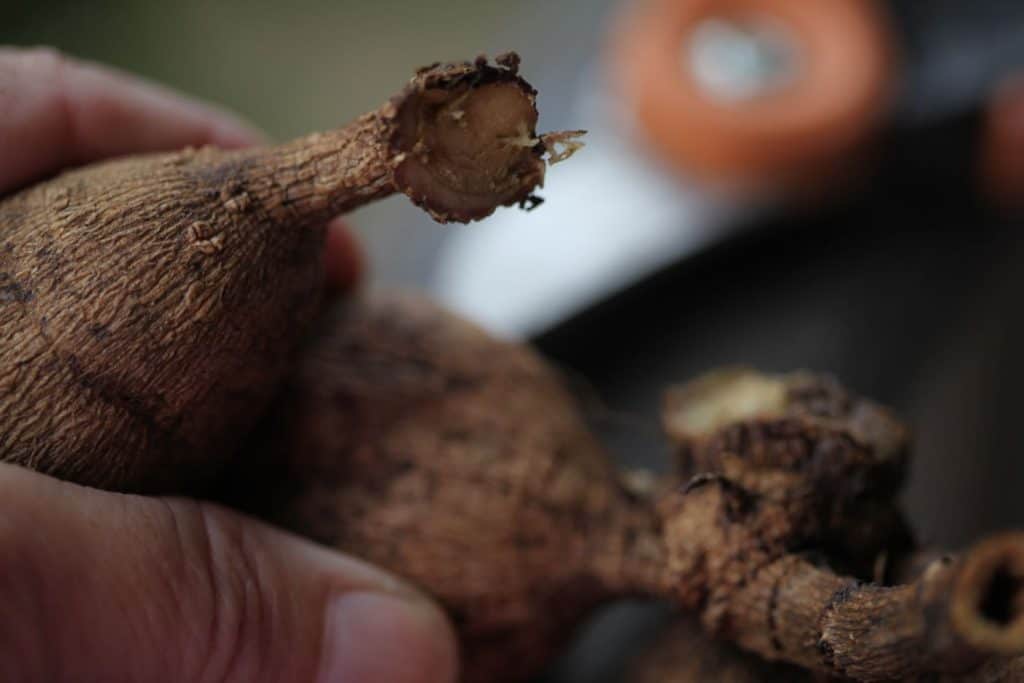
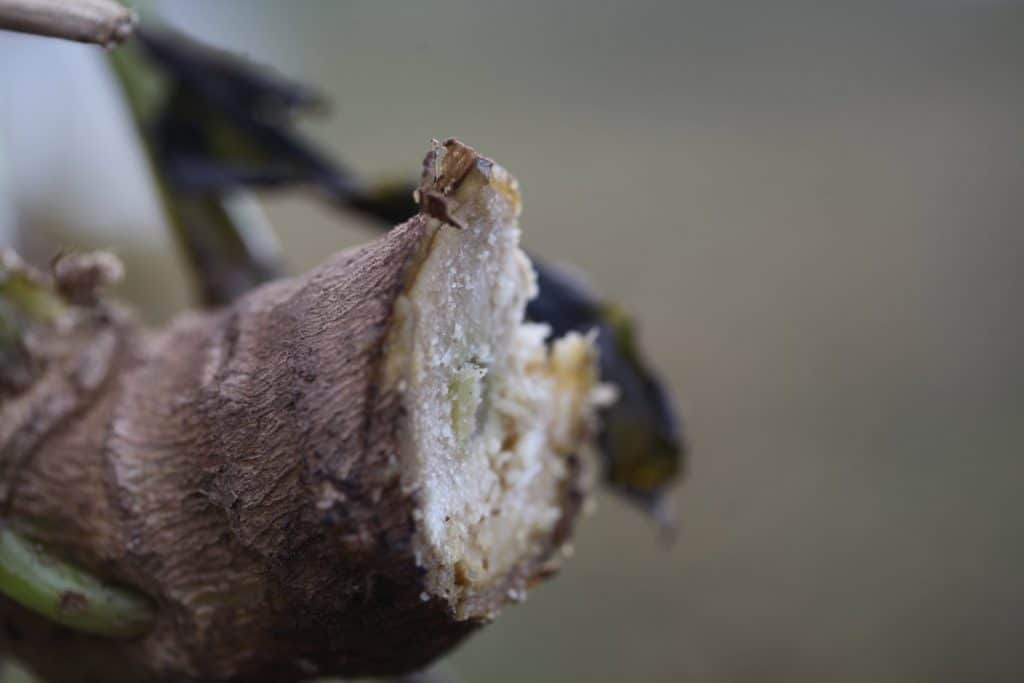
Healthy tubers have a crown, neck and body.
If all you can see on the tuber is a neck and a body, just know that a dahlia will not grow from these parts.
Here is a wonderful dahlia tuber and splitting guide from Summer Dreams Farm which demonstrates different dahlia tubers in various stages of dryness. There are also colour codes for parts of a tuber to show you how to differentiate the neck from the crown.
Cut Off The Tubers
So with your sharp snips, cut the tubers from the clump, taking a piece of the crown as you cut.
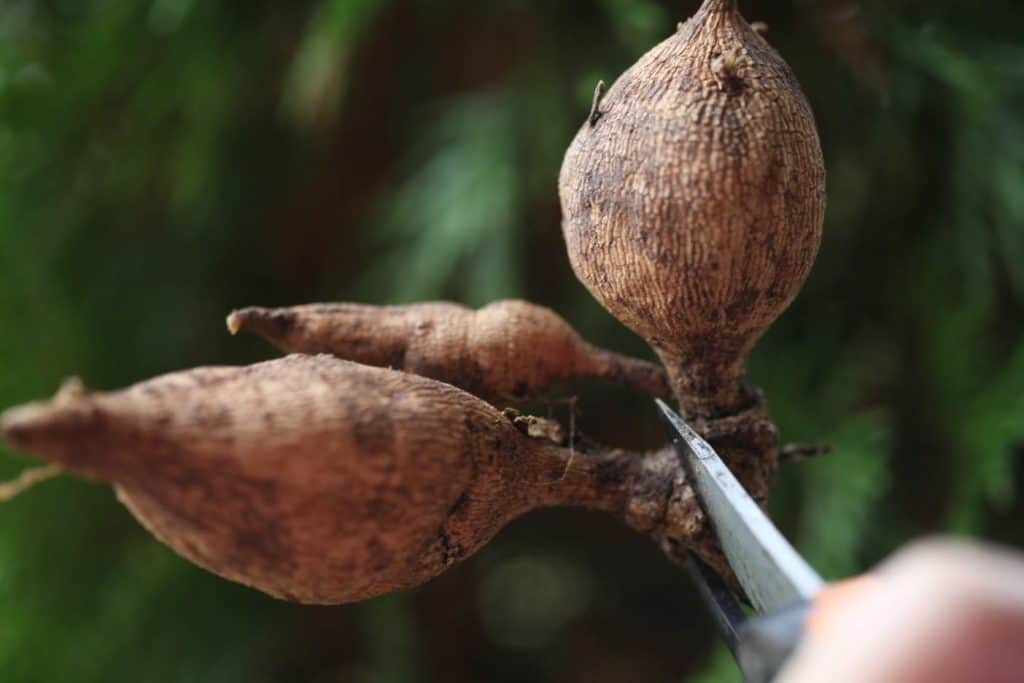
Carefully inspect the clump as you go along, searching for the best and most accessible tuber to cut at the start.
Sometimes breaking a large clump in half makes the process easier.
In time and with practice it does get easier.
After I cut the tubers, I place them in a container to dry for about twelve to twenty four hours. I use clean seedling cell tray bases, which have little grooves to help to collect water.

I find that these containers allow for good air circulation around the tubers, which helps with the drying process.
After the tubers are finished drying, it's time to process them for storage.
Many people search for an eye on the crown, and only keep tubers with visible eyes.
I find that the eyes are much more visible in spring, so I store all of the tubers away, and sort them as the eyes begin to sprout in spring.
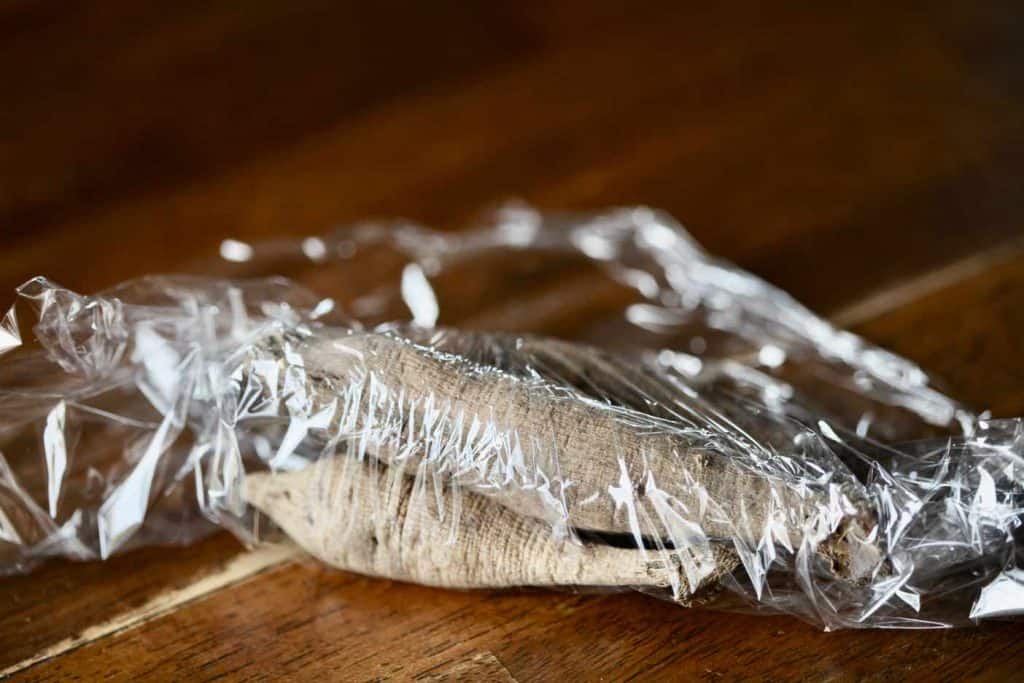
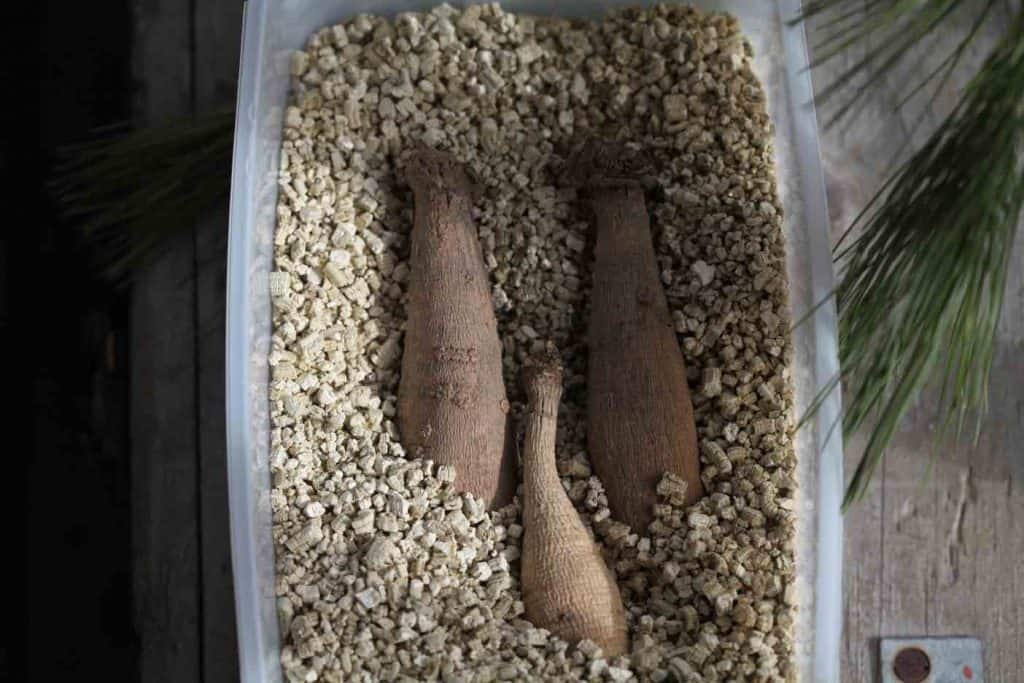
How To Store Dahlia Tubers
I store my dahlia tubers in plastic wrap, such as Saran Wrap. I first heard about this method through the American Dahlia Society website, and decided to give it a try.
This has been a successful storage method for our dahlia tubers, and works well for us.
There are other ways to store dahlia tubers as well. You can store tubers in wood chips or wood shavings, peat moss, or coarse vermiculite.
It's important to know that there will always be some crown rot, and that this is hard to prevent. Check on your tubers throughout the winter, and remove any rotten ones.
The thing that I like about the plastic wrap method is that if there is a tuber that goes bad, it is self contained. It therefore should not spread to the rest of the tubers.
The thing that I don't like about this method is the plastic. So I try to wrap as many tubers that I can inside each sheet of plastic wrap.
Choose a winter storage medium or method that works best for you.
Make sure to accurately identify your tubers as you are storing them. I use the plastic ribbon from the storage crates to put in with the stored tubers.
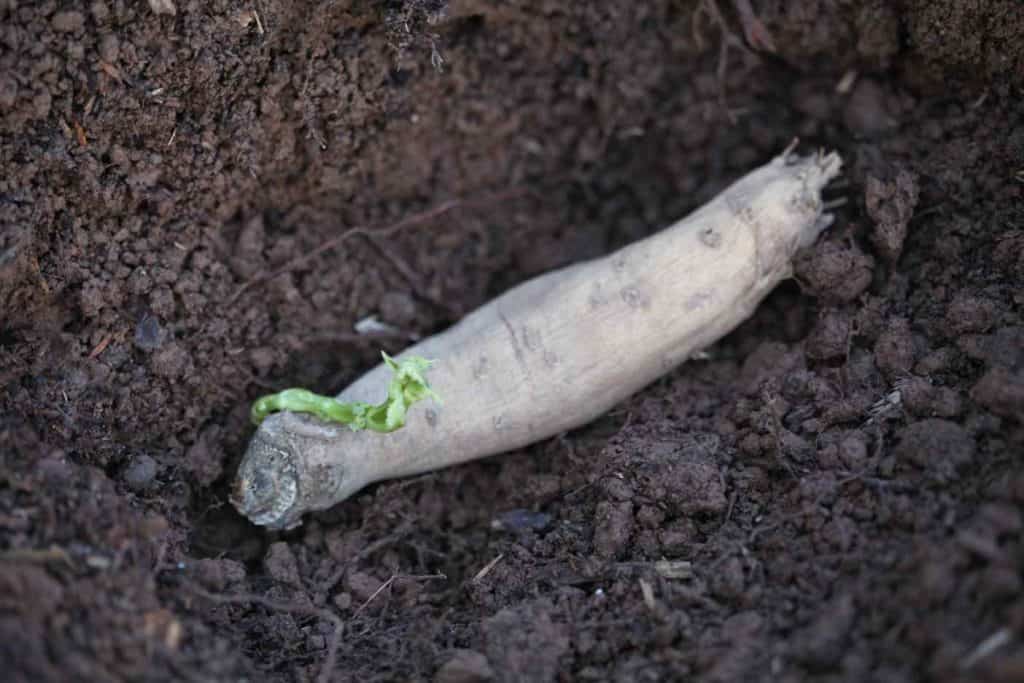
Pick a storage location in a cool place and a dark place, out of direct sunlight until spring. The eyes will start to sprout in late winter or early spring.
The dahlia tubers can then be planted into the garden in spring, when the danger of frost has passed. They will once again produce not only beautiful blooms, but a whole new collection of tubers to harvest next fall.
Have you ever tried to dig dahlia tubers? Be sure to leave a comment below to share your experience.
OTHER POSTS YOU MAY LIKE:
See the Web Story on Digging Dahlia Tubers In Fall!
PIN IT FOR LATER:


Leave a Reply