
Amaryllis is a beautiful flowering plant grown from a bulb. Although most often propagated from offsets and bulb division, Amaryllis can also be grown from seed. Learn how to grow Amaryllis from seed, to experience the joy of creating new plants.

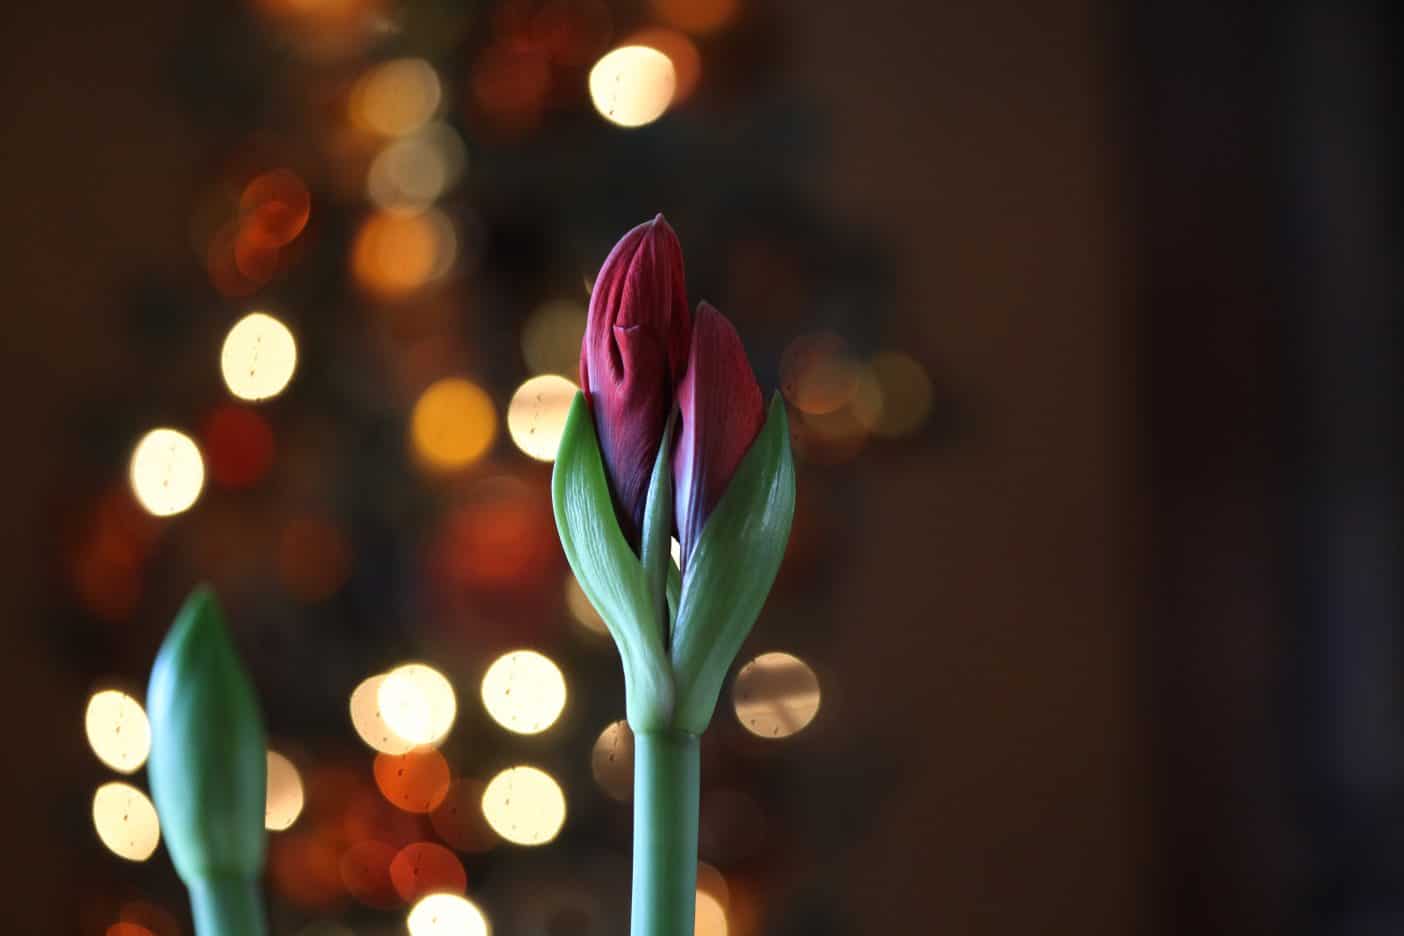
Every year we grow Amaryllis as holiday plants to enjoy over the Christmas holidays.
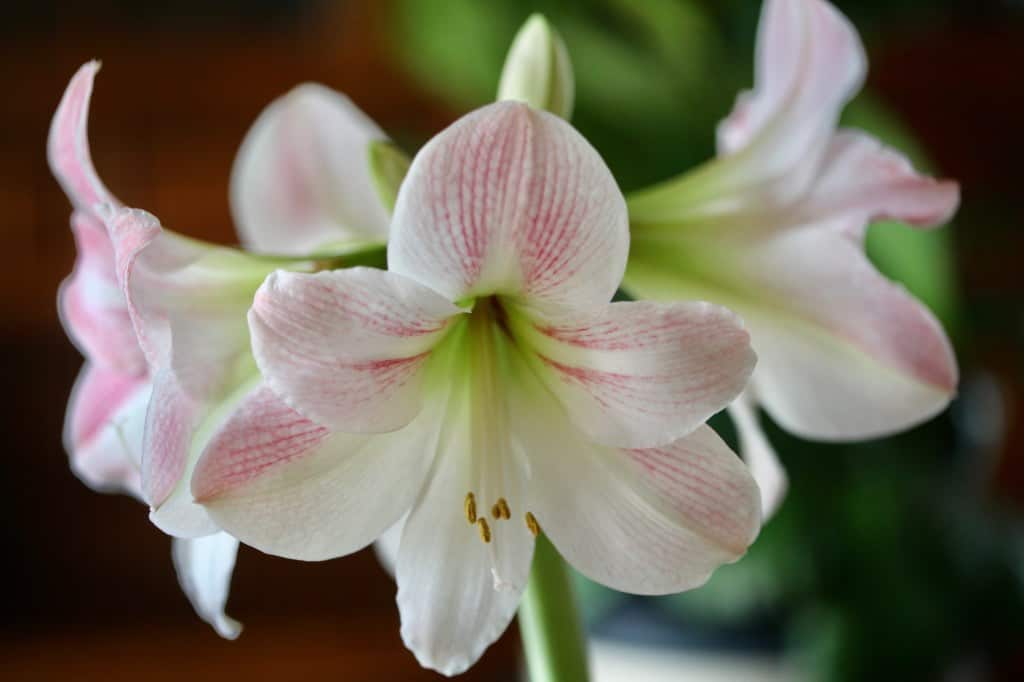
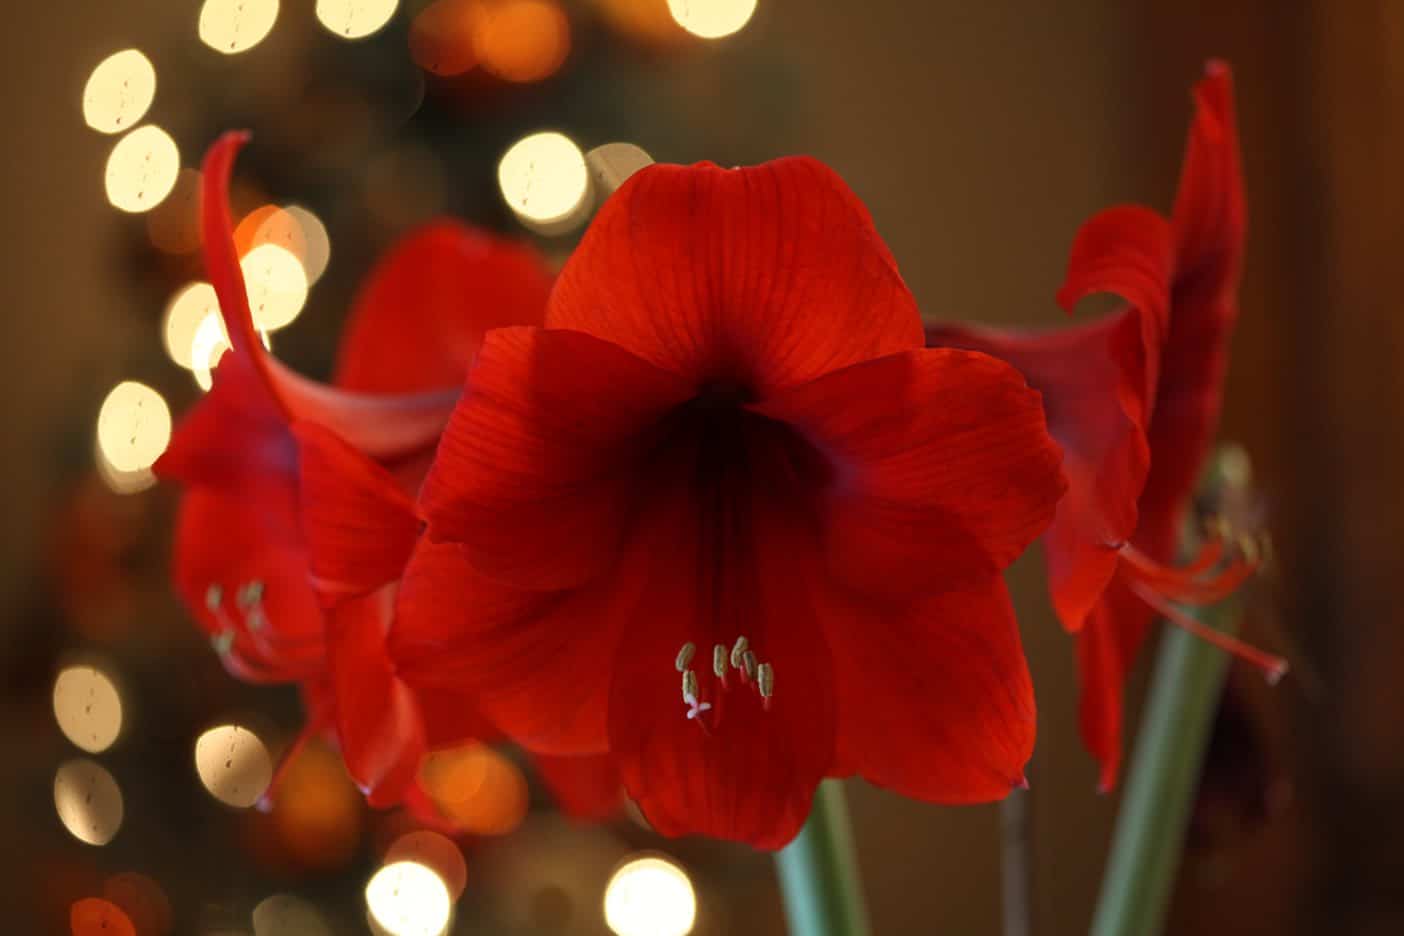
When the plants are in full bloom, I always want to dab them with pollen, to create amaryllis seeds and new plants. The structures on the amaryllis flowers are very similar to daylilies, which I hybridize every summer.
This year I got serious about this project, so follow along if you would like to see the outcome of this dabbing adventure.

What Are Amaryllis?
Amaryllis are tropical plants which belong to the Family Amaryllidaceae and the Genus Hippeastrum.
These bulbous plants should not be confused with another plant from South Africa within the same family, which belongs to the Genus Amaryllis. Those plants are known as Amaryllis belladonna, also commonly called belladonna lily and Easter lily, which bloom at Easter time.
Amaryllis grow in warmer USDA hardiness zones 8 to 10. However, indoor amaryllis plants can also be forced and grown indoors in pots, as traditional holiday plants, in any growing zone.
The flowering period of the individual flowers is generally 10 to 14 days.
Propagating amaryllis from bulb offsets and bulb division will result in new plants which are clones of the parent.
Propagating amaryllis seeds however will result in hybrid plants, which may be similar or completely different from the parent plant.
Growing amaryllis from seed is a fun and cost effective way to increase your amaryllis stock.
The fun part about this propagating endeavour, is that each new plant is a unique amaryllis hybrid.
The only cost is the extra time it will take for the amaryllis to bloom, and the extra care of the small plants along the way, while waiting for the bulb to reach mature blooming size.
However, if you have a green thumb, the extra amaryllis care that your amaryllis plants will require is really no more than caring for extra houseplants, and the end result is worth it.
Is It Easy To Grow Amaryllis From Seed?
It is easy to grow amaryllis from seed. There are a number of different methods you can use to initially germinate the seeds, and to help to separate the viable seeds from the duds.
We'll review some of these methods, as well as the amaryllis seedling care.
Amaryllis seeds are tropical, and therefore will not require stratification to assist with germination.
In fact, the seeds can be planted right after harvesting, without any special preparation at all.

Why Grow Amaryllis From Seed?
Often bought individually, the cost of amaryllis bulbs can add up over time.
Growing amaryllis from seed will allow you to grow many amaryllis, and start a unique amaryllis collection, economically.
One of the the best things about this project is the fun and creativity of discovering new plants.
If you have dabbed your amaryllis when it was in bloom, with the pollen of another amaryllis variety, the resulting seeds will be hybrids, and will be new and unique plants.
The anticipation of the waiting period, to see the end result, is so much fun. When the blooms eventually reveal themselves, you will see the results of your efforts.
If you only have one amaryllis plant, the plant can be self pollinated, by dabbing it's own pollen on itself.
Even selfed amaryllis seeds will be hybrids. Selfed seeds are those inside amaryllis seed pods which formed on the plant as a result of dabbing the plant with it's own pollen.
The pollination process will likely be more successful however, if you dab pollen from different cultivars on each other.
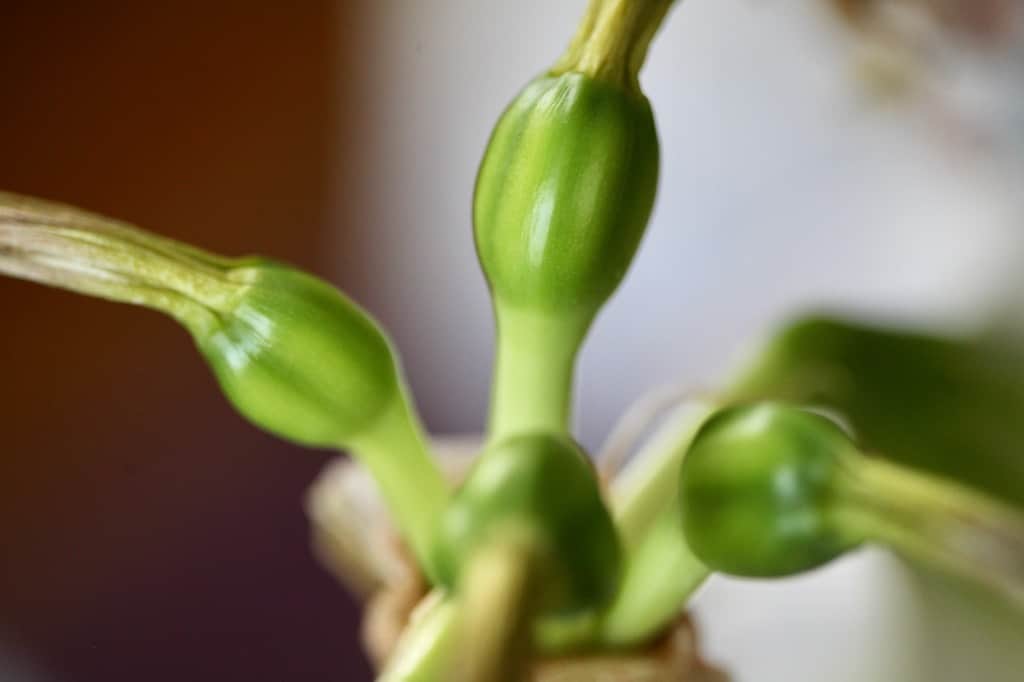
Amaryllis seed pods form after successful pollination, and are filled with amaryllis seeds. The seed pods will require a period of time to remain on the amaryllis stem to reach maturity, and to contain viable seeds.

What Do Amaryllis Seeds Look Like?
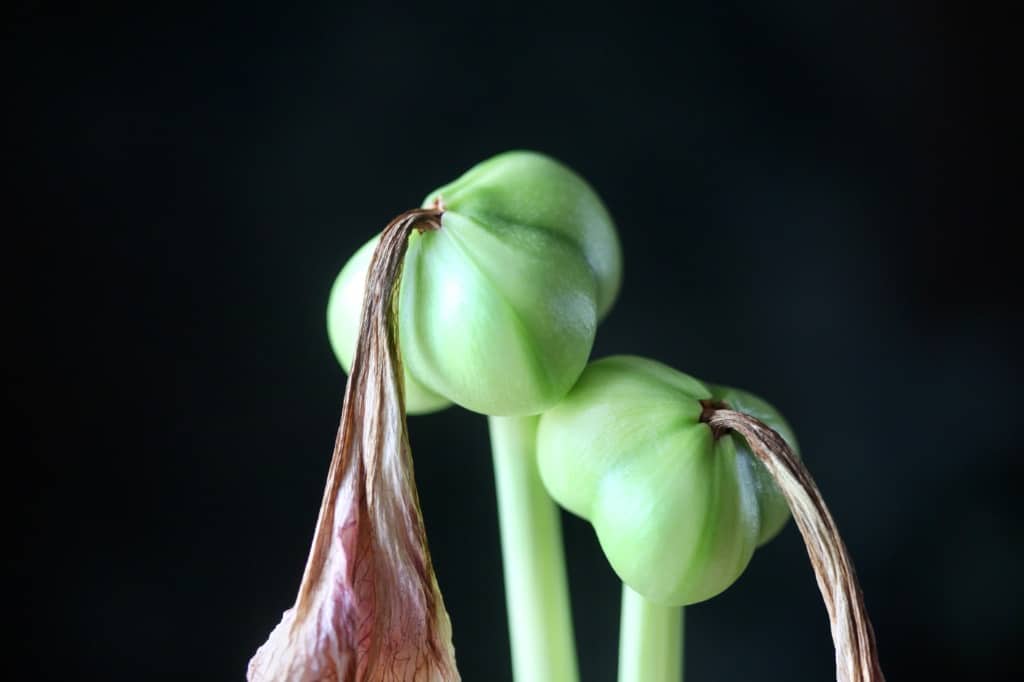
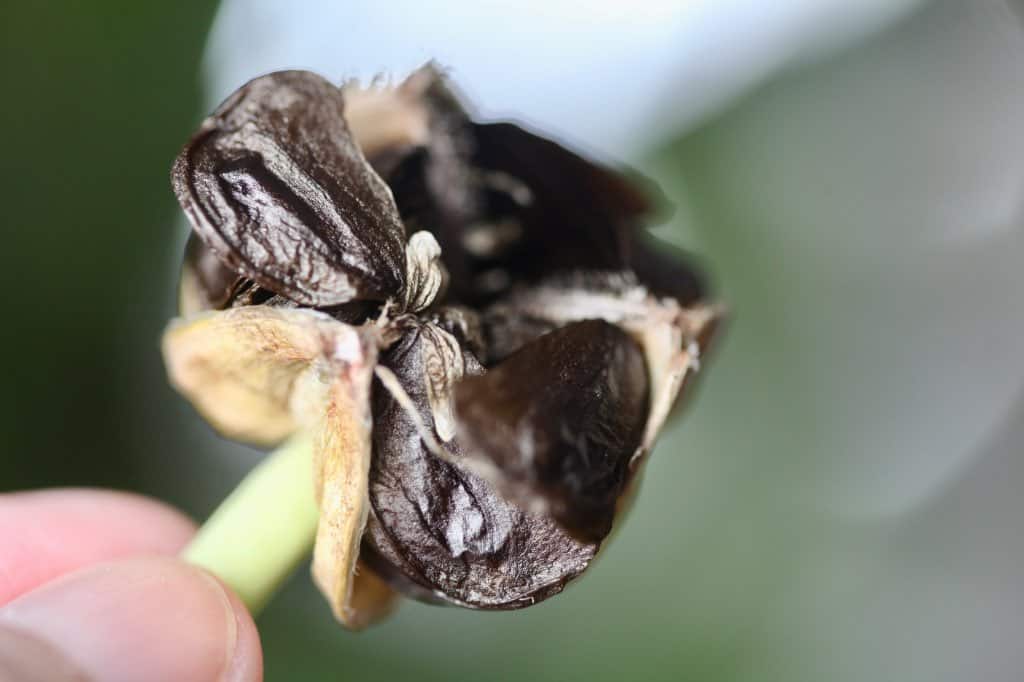
Amaryllis seeds form within the amaryllis seed pods. The pods have three chambers, and swell and grow as the seeds inside the chambers grow as well.
Depending on the amaryllis variety and bulb size, the seed pods can vary in size.
This year, some of my recent seed pods swelled to a very large size compared to the others, and one was approximately the size of a small plum.
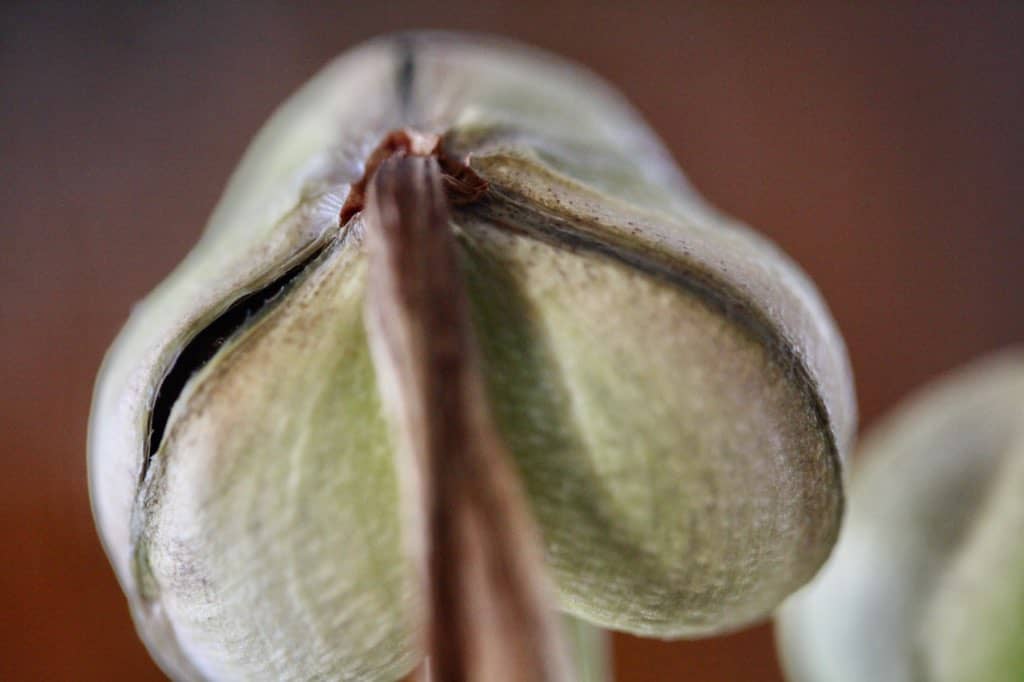
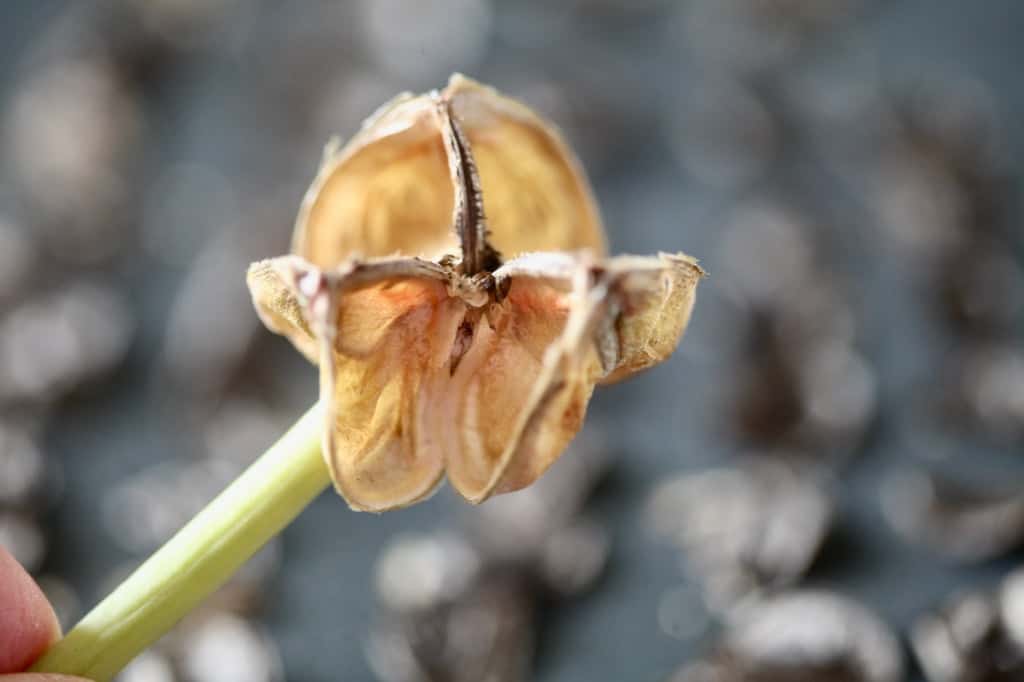
Seed pods require some time to mature, and should remain on the stem until they begin to change color and begin to dry out.
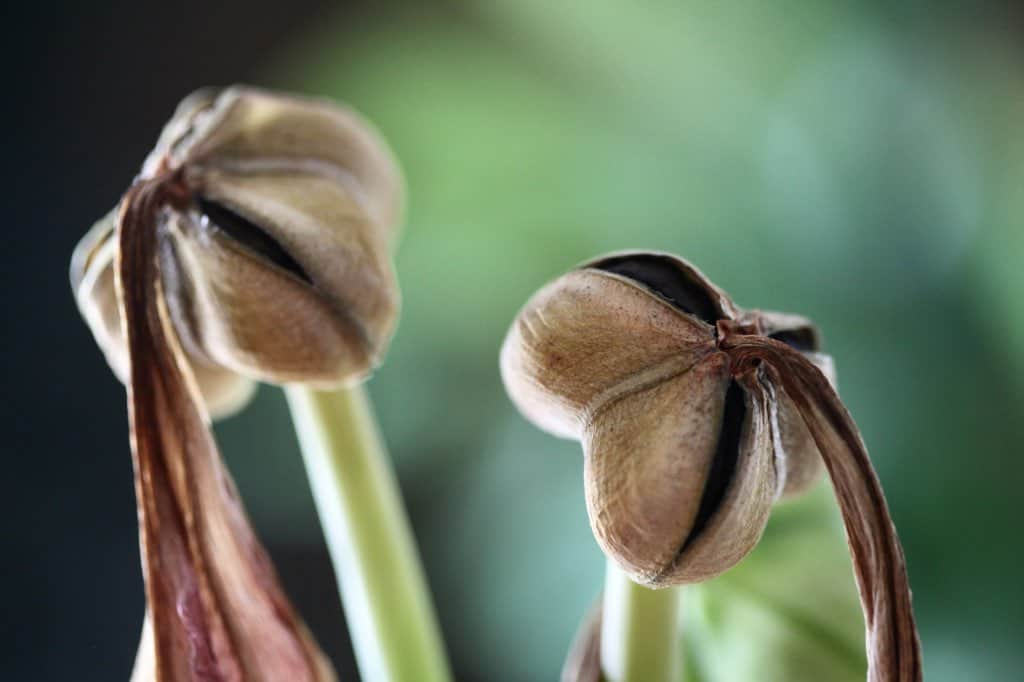
As the pods begin to dry, they turn from a medium green color to a straw yellow color, and then begin to open up at the seams, on the top of the pods.
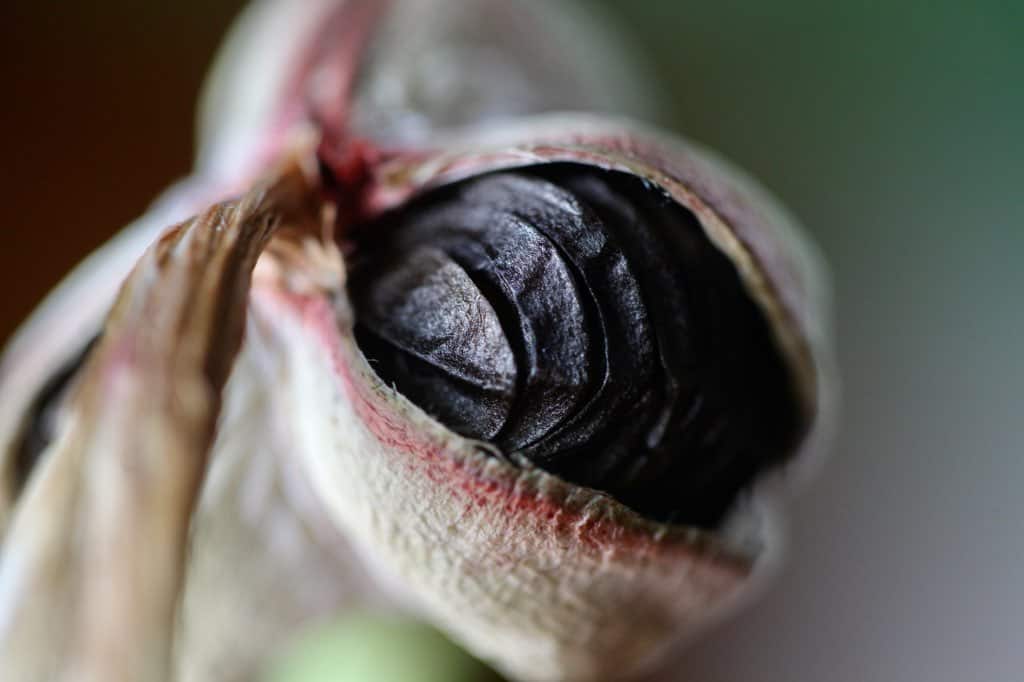
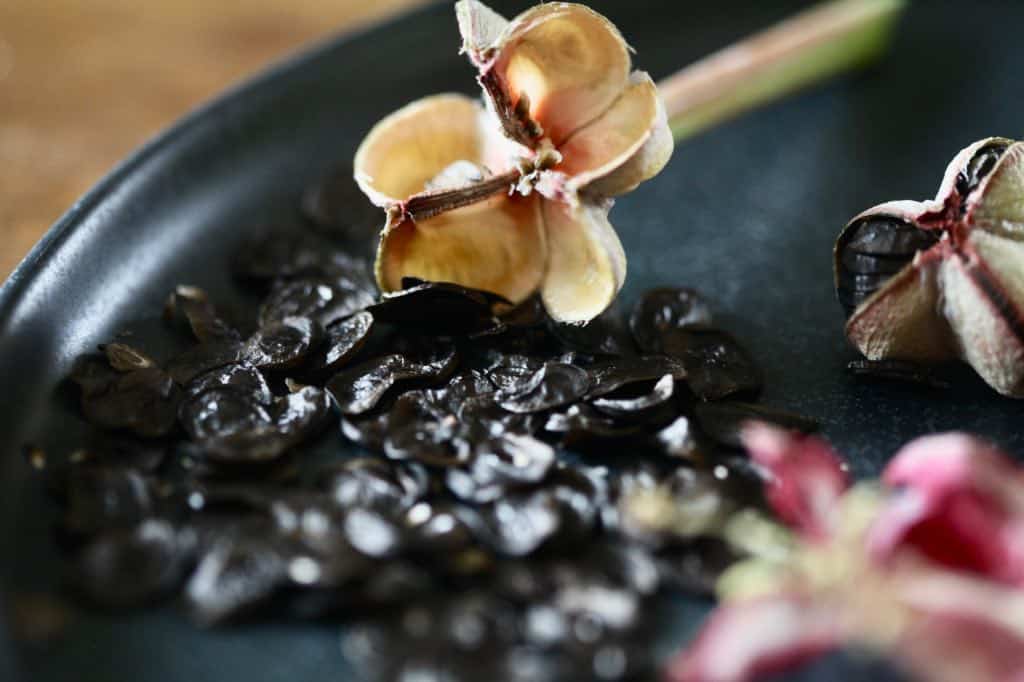
Inside the pods, the seeds are revealed, piled one atop each other, contained within the three chambers of the seed pods.
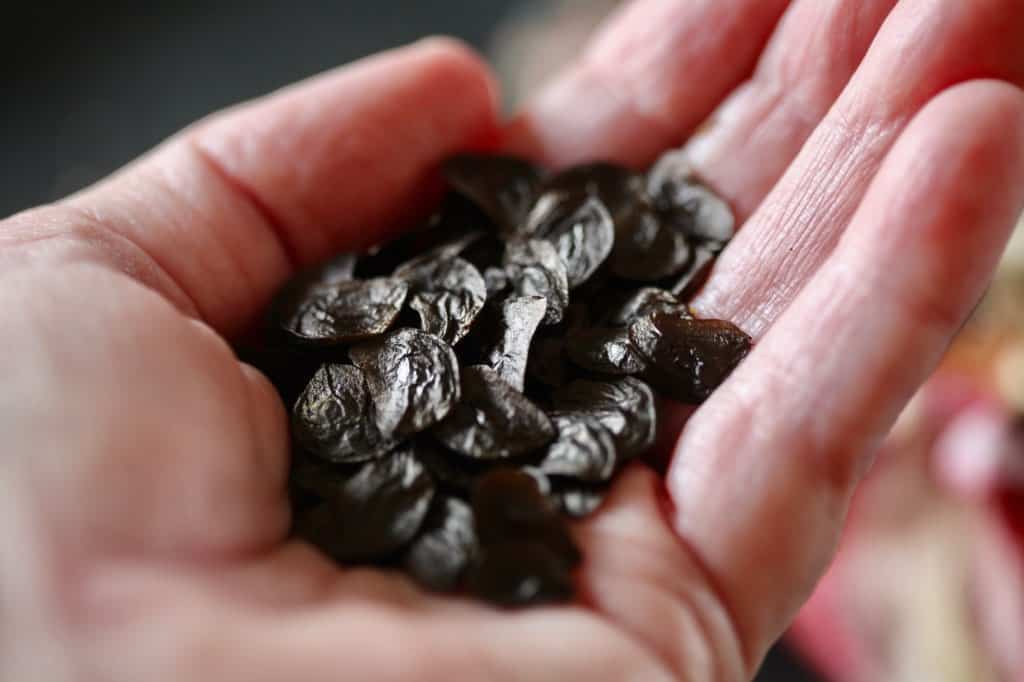
The actual Amaryllis seeds are contained within black or dark grey tissue paper-like coverings. The coverings are fragile and easily broken, however this will not affect the seed inside.
The seeds inside the coverings are very tiny. These outer coverings help with the dispersal of seeds in nature, for self seeding and self propagation.
Keep the seeds inside their coverings, as they will be planted intact, and as is.


How To Grow Amaryllis From Seed
Amaryllis seed propagation involves hybridizing and pollinating the flowers, allowing the seed pods to develop to maturity, harvesting the seeds, and then planting them to grow new amaryllis plants.

Let's review the process:
Pollination
- Pollinating amaryllis flowers is very easy, as the plant parts are "all out there". The process is very similar to hybridizing daylilies, who's reproductive parts are similar to those of amaryllis, and are very easy to see as well.
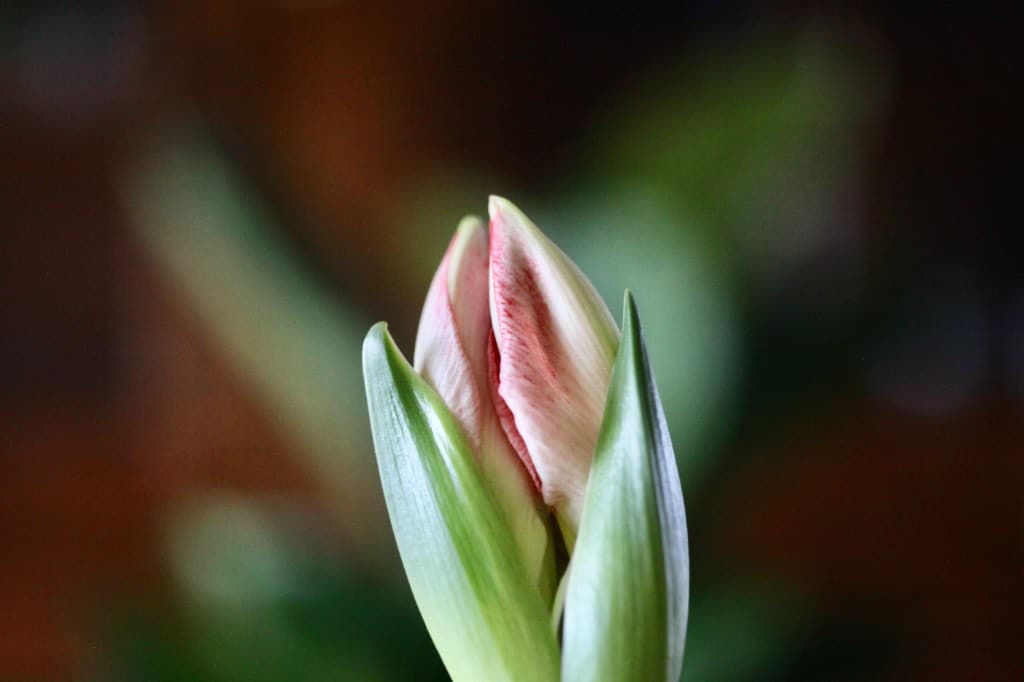
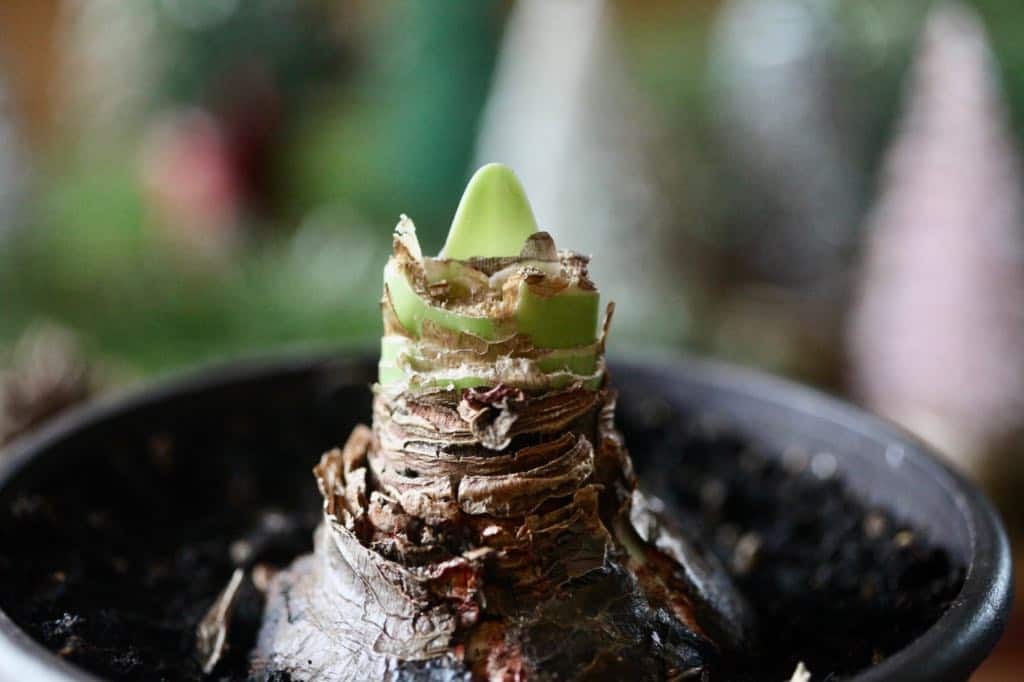
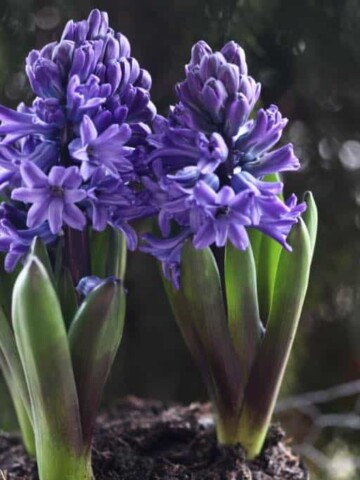
- The amaryllis flower first starts out as a flower bud at the tip of a thick flower stalk, which grows from the top of the bulb. The stem grows and the bud swells until it finally opens and begins to bloom.
- Keep the amaryllis flower out of direct sunlight, which can cause wilting of the flower.
- Wait until the amaryllis flower is in full bloom, and has started to produce pollen which will cover the surfaces of the anthers, at the tips of the stamens.
- The pistil is the long structure which extends past the stamens, in the center of the flower. At the tip of the pistil is the stigma, and this is where the pollen will be dabbed for making seeds.


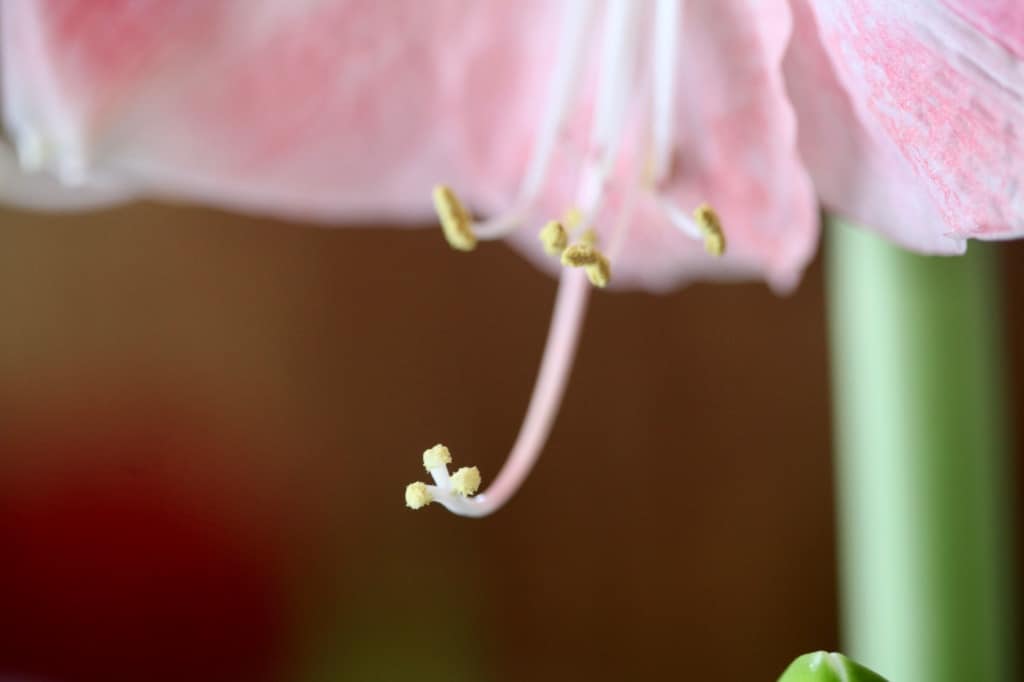
- When the amaryllis flower is pollinated, the pollen makes its way down the pistil, into the ovary at the base of the flower. This is where the seeds will form with a successful pollination procedure.
- To dab the pollen, all you need to do is transfer the pollen from an anther to the stigma.
- You can do this with the tip of your finger or even with a Q-tip. My favorite way however, is to cut a stamen off the flower with a pair of scissors, and then use a pair of tweezers to dab the pollen onto the pistil.
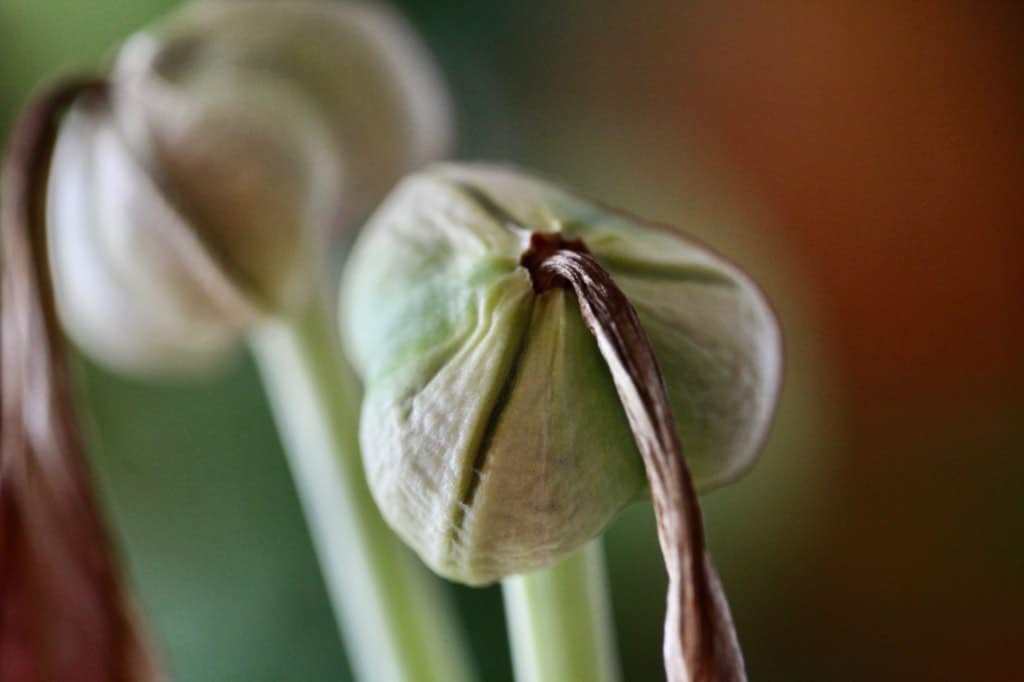
- If pollination has been successful, you will notice a swelling occurring at the base of the flower within several weeks. This is where the seed pod will form.
Allow The Seed Pods To Mature
- The flowers will dry up once they have finished their blooming period. They tend to remain attached to the seed pod as it continues to swell and grow.
- Keep the amaryllis in a warm area while the seed pods are forming and developing. Continue to water and care for the plant as the seed pods develop.
- Leave the dried flowers in place, rather than attempting to remove them to be on the safe side.

- The seed pods will continue to grow until they reach their maximum size, and will stay green until several weeks before harvest.
- The pods generally remain on the amaryllis stem for 6 to 8 weeks before the seeds are mature, and then the seed pods can be removed from the plant.
- Signs of maturity of the seed pod are quite evident.
- The pods will begin to change color as they are nearing maturity, and go from a bright green color to a straw yellow tone. The seams on the tops of the pods will begin to open, revealing the seeds inside.
- Wait until the pods are quite open and dry, before removing the whole pod from the stem.
Harvesting The Seeds
- When the amaryllis seed pods have opened wide, and feel dry to the touch, cut the seed pods from the stem with a sharp pair of scissors. Place them into a bowl or onto a plate.
- Remove the seeds from the pod itself. They will often just fall away from the seed pod, and will drop easily into the bowl.
- Discard the empty seed pod into the compost.
- Spread the seeds out into a layer, and place in a dry place to allow them to dry further for a day or two.
Pre Sprouting
- Some gardeners choose to test the seeds for germinating success before planting. Pre sprouting can help to determine the percentage of seeds which will be viable in a batch.
- Pre sprouting can also give the seeds a head start, by providing constant moisture to help stimulate germination.
- This can be done by placing the seeds in a bowl of water for several weeks, and place in a sunny location at room temperature.
- You can also place the seeds in a moist paper towel, and then place this in a plastic bag, and set in a warm location.
- Any resulting seedlings can be planted up.


Planting The Seeds
- The seeds can also be planted up right away using the fresh seed, right after harvesting and drying, as there's no need to wait unless you want to.
- Choose a container for planting, which has enough space to accommodate the growing plants. Make sure that the container has drainage holes.
- Fill the container with a good sterile seed starting medium or potting mix.
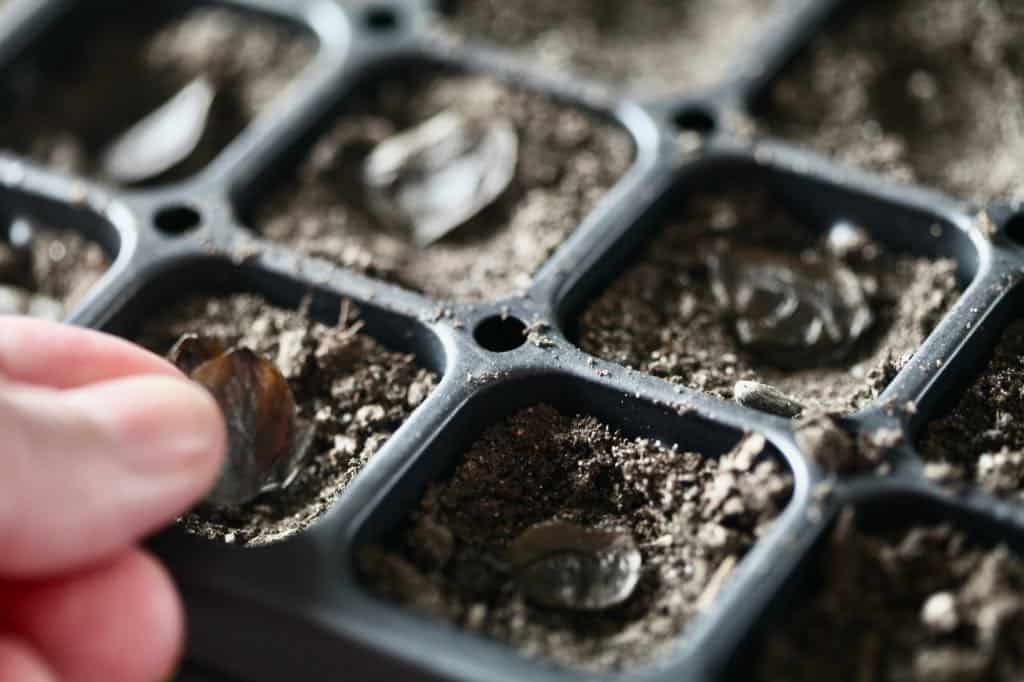
- I used a 72 cell seed starting tray, to keep the seedlings separate in the individual cells.
- You can also plant the seeds into an open tray, filled with the mix. These seedlings will need to be gently removed from the open tray, once they grow, and get a little larger, so they can be potted up separately on their own.
- Once the tray is ready for planting, make a little indent where you will be placing the seeds.

- Place a single seed per cell in the tray, placing them into the indents in the soil that you just made.
- Cover the seeds with either more seed starting medium, or with some vermiculite. I like to use vermiculite, because it helps to hold the moisture in the soil.
- Bottom water the tray, so as not to dislodge the seeds. Remember to keep the soil moist while the seeds are germinating.
- For better results, place the tray on a heat mat, or in a location where the seeds will receive some warmth.
- You can also place the container immediately under a grow light, while awaiting germination.
- Remember to keep the soil moist while awaiting germination.

How Long Do Amaryllis Take To Germinate?
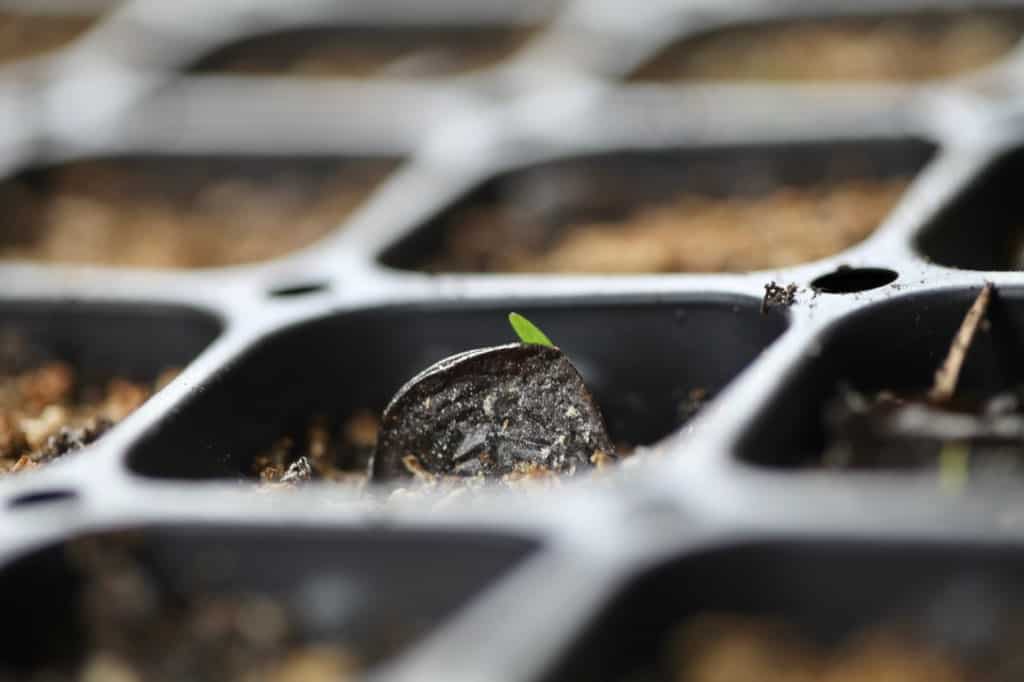
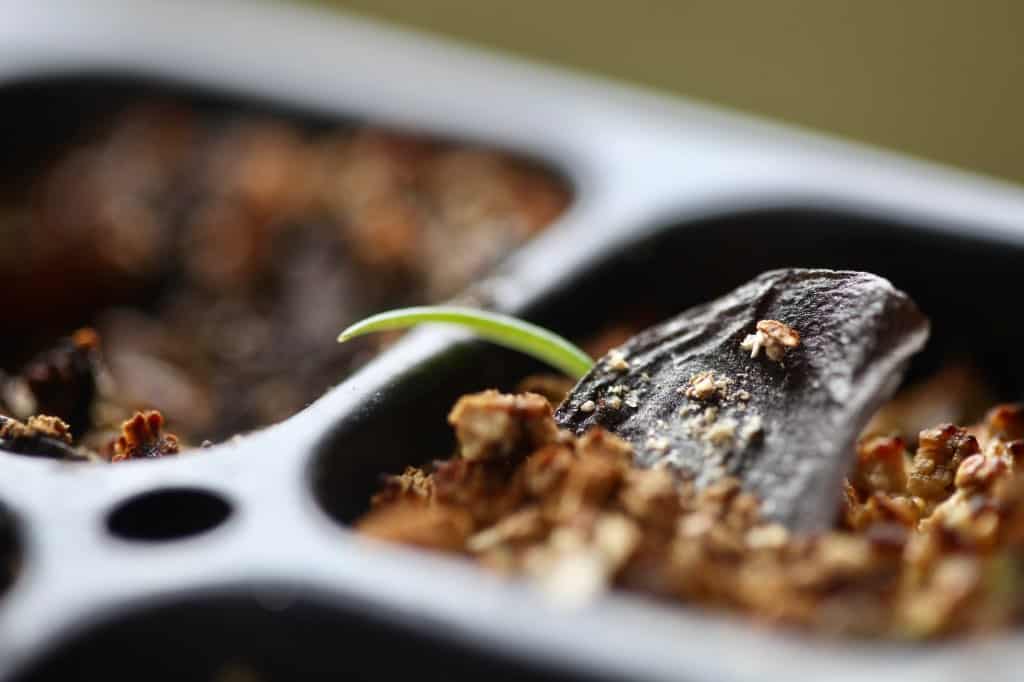
- Amaryllis seeds will usually germinate within 2 to 3 weeks, depending on temperature and moisture levels.
- Providing warmth and moisture during germination will allow for faster germination results. Provide warmth and moisture for optimal results.
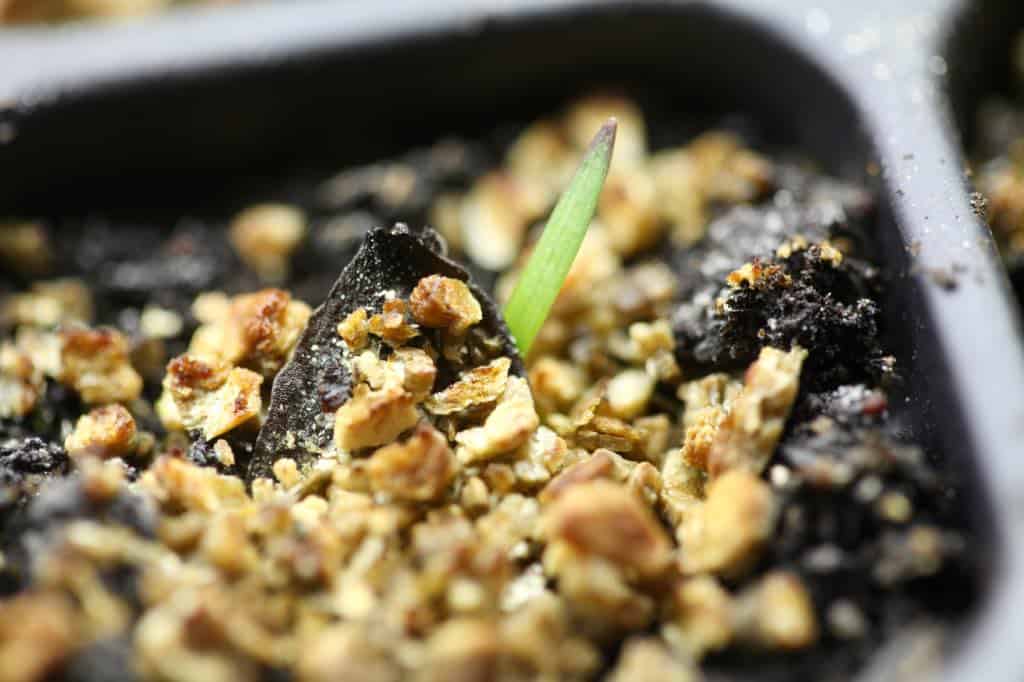
- Once the seeds have germinated, it will be time to provide amaryllis seedling care. It will take a number of years before these tiny seedlings will become large enough to bloom.
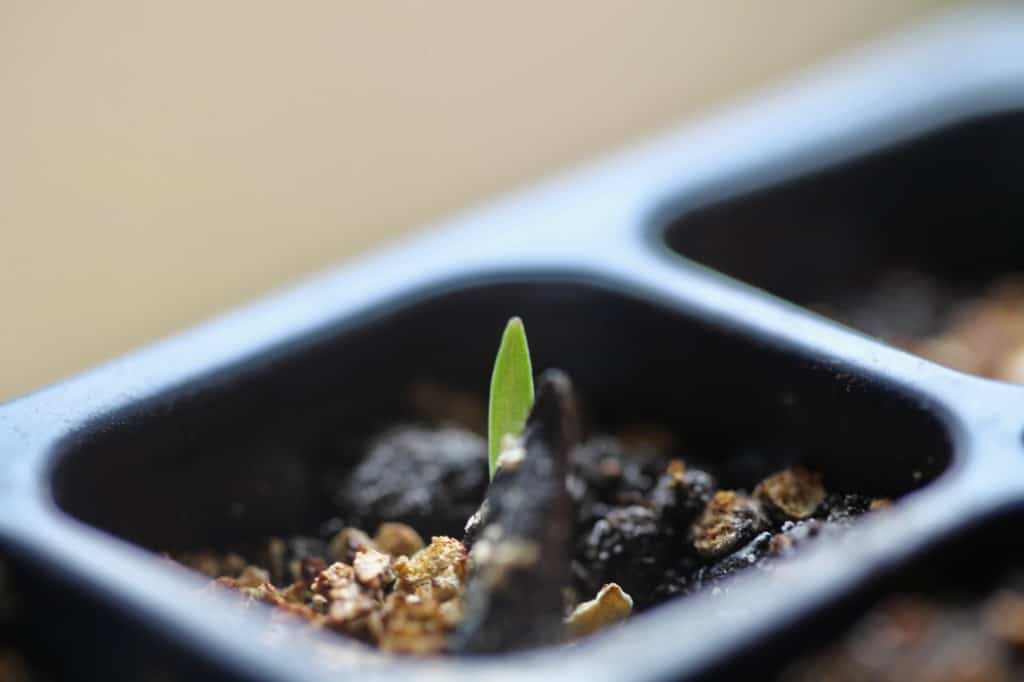
- The tiny seedlings are attractive, and are miniature versions of the adult plant. They are enjoyable to care for as tiny house plants.
- The seedlings will require care, until they become beautiful flowering plants at maturity.
Amaryllis Seedling Care
Growing amaryllis from seeds is a fun and rewarding experience, however it will require a bit of patience due to the time frame required to get them to blooming size.
Amaryllis seedlings will require bright indirect light, for at least 12 hours a day. Grow them in individual pots in a sunny windowsill, or under grow lights.
Fortunately the plants are attractive in appearance, and can be treated as indoor plants. They can also be planted outside in the summer, and then can be bought back inside in the late summer or early fall.
The seedlings are tropical, and prefer a warm temperature of between 60°F to 70°F.
Water regularly, allowing the plants to dry out slightly in between waterings. When the soil surface becomes just dry to the touch, it's time to water again.
Try to avoid over watering, which can cause bulb rot.
When seedlings are a little larger, with two or three sets of leaves, the seedlings can be transplanted into individual pots.
Fertilize with a balanced fertilizer, as you would other house plants. Do not fertilize amaryllis plants however, after they have gone dormant, as this can lead to bulb rot.
Enjoy the seedlings as they grow, continuing to care for them as they mature. With the proper care, they will grow in size, and reward you with beautiful amaryllis blooms in the future.

How Long Does It Take Amaryllis To Grow from Seed?
Although seed germination only takes a few weeks, It will take up to 4 to 5 years for the amaryllis plants to grow and become mature enough to produce a blooming sized stem.
In the meantime, take care of the small plants, providing for their light, water, and fertilizer needs. The small seedlings will require ongoing care, as you would provide for any other green leaved houseplants.
Bump them up to a larger container as needed, with fresh potting soil. Ensure that there is good drainage, and avoid excess water.
Amaryllis seedlings will grow on for several years, and then will eventually go through a dormant period, as do more mature amaryllis plants.
Frequently Asked Questions
What Do I Do With Amaryllis Seed Pods?
Allow your amaryllis seed pods to remain on the amaryllis stem for several months, until the pods dry out, and then open, revealing the seeds inside.
When the seed pods are mature, you can harvest the seeds, and then plant them, making new amaryllis plants to grow and enjoy.
The seeds can be planted out right away, or stored in an envelope in the fridge for up to a year for later use.

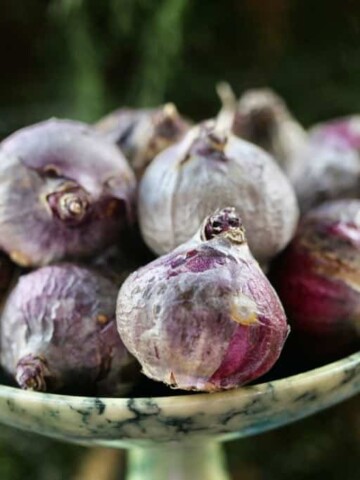
Do Amaryllis Seeds Grow Into Bulbs?
Yes amaryllis seeds will grow into bulbs.
Amaryllis seedlings will eventually develop bulbs at the base of the leaves. It will take some time before the bulbs reach a mature size, and produce blooming stems.
The small bulbs which are formed at the base of the plant grow larger every year as they mature.
The plants will take 4 to 5 years before they become blooming size.
How Many Seeds Do Amaryllis Pods Contain?
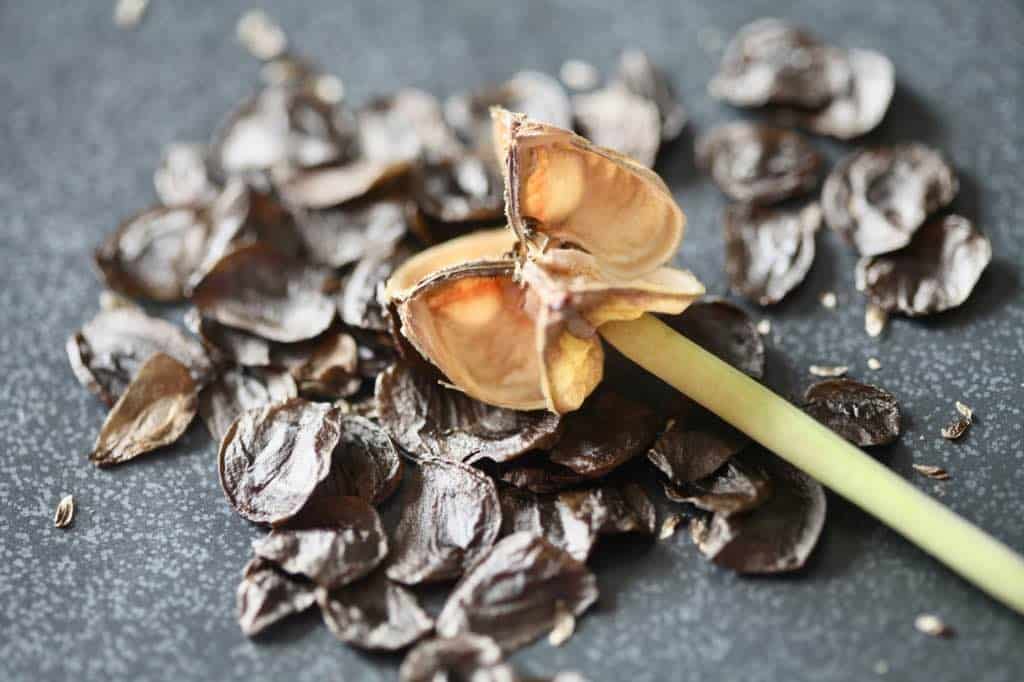
Amaryllis seed pods contain approximately 50 seeds. Some seeds will be viable, and some will be duds.
The seed pod will also contain some chaff, however is mostly filled with many dark, round, and papery encased amaryllis seeds.
Conclusion
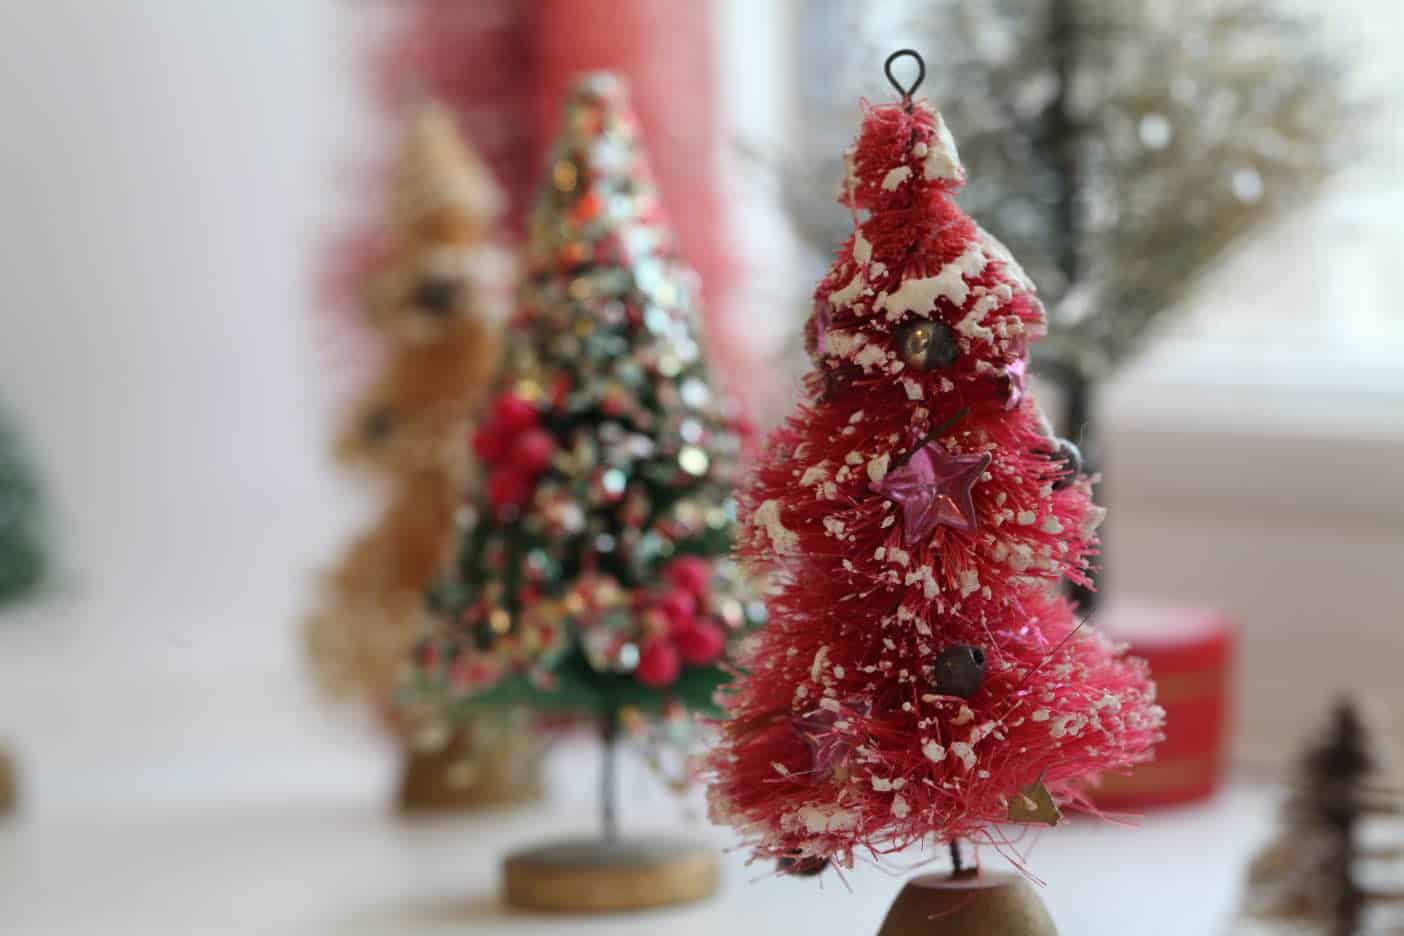
Amaryllis is a popular plant, often forced and grown indoors during the Christmas season.
Growing amaryllis from seed is easy, although it will take some time to see the tiny new seedlings bloom.
The germination process is fun to watch, and with a little care you will have lots of baby amaryllis plants. Each new plant is a miniature version of mature amaryllis plants.
The resulting seedlings are different plants than the original plant, and the flowers may look different once they bloom.
Take care of the young plants as they grow and develop, and with a little patience they will eventually reach blooming size.

Other Posts You May Like:
PIN IT FOR LATER!

Leave a Reply